
Grandma’s Secret Wendy’s Chili Recipe: Cozy & Comforting Magic
Hey, my weekend cooking experiments always lead me somewhere delicious, and this wendy’s chili recipe promises serious comfort.
We discovered a hack that captures restaurant-style magic right in our kitchen.
Restaurant-quality dishes sometimes seem impossible to replicate at home, but not today.
Simple ingredients come together with surprising ease, creating something familiar yet extraordinary.
People constantly ask me how to nail those classic flavor profiles without complicated techniques.
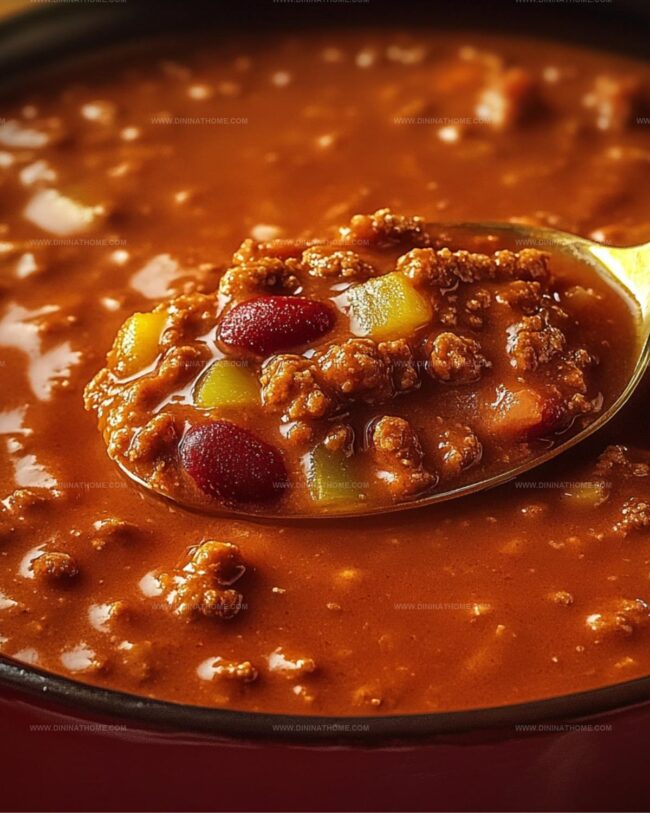
Savory, hearty chili waits just a few steps away, ready to warm your soul.
Prepare to become the neighborhood chili champion with this incredible copycat recipe.
Wendy’s Chili At Home That’s Just As Hearty And Delicious

Wendys Chili Ingredient Checklist
Meat:Vegetables:Liquid and Seasoning Base:Chili Instructions for a Wendy’s-Style Bowl
Step 1: Sizzle The Ground Beef
Heat a large skillet over medium-high temperature.
Crumble the ground beef into the pan, breaking it into small pieces while cooking.
Cook until the meat turns completely brown and loses its pink color.
Carefully drain away all excess fat using a colander or strainer.
Step 2: Combine Flavor Builders
Transfer the browned beef into a large cooking pot.
Add the following ingredients:Stir all ingredients thoroughly to ensure even distribution of seasonings and beans.
Step 3: Develop Rich Chili Depth
Cover the pot with a tight-fitting lid.
Reduce heat to low and let the chili simmer gently.
Cook for 1 to 1.5 hours, stirring every 15 minutes to prevent sticking and ensure consistent flavor development.
For slower cooking, transfer ingredients to a crockpot and cook on low setting for 3 to 4 hours.
Step 4: Prepare Delicious Serving
Once the chili reaches a thick, hearty consistency and ingredients have fully melded, remove from heat.
Ladle into warm bowls.
Optional toppings include shredded cheddar cheese, sour cream, chopped green onions, or oyster crackers.
Chili Prep Hacks for a Wendy’s-Inspired Bowl

Reheat Wendy’s Chili Leftovers
Bread and Drinks for Wendy’s Chili
Wendy’s Chili with Easy Alterations
FAQs
Use 80/20 or 85/15 ground beef for the best flavor and texture. The fat content helps create a rich, hearty chili without being too greasy.
Add more chili powder, cayenne pepper, or diced jalapeños to increase the heat level. Start with small amounts and adjust to your personal spice preference.
Yes, draining the excess fat helps prevent the chili from becoming too oily and ensures a cleaner, more concentrated flavor profile.
Absolutely! This chili tastes even better the next day as the flavors continue to develop. You can refrigerate it for 3-4 days or freeze for up to 3 months.
Print
Wendys Chili Recipe
- Total Time: 1 hour 40 minutes
- Yield: 6 1x
Description
Wendy’s chili brings hearty comfort straight from American kitchens, blending ground beef, beans, and signature spices into a satisfying one-pot wonder. Warm spoonfuls promise rich flavor and nostalgia you’ll savor with each delicious bite.
Ingredients
Meat:
- 2 pounds (907 grams) fresh ground beef
Beans and Vegetables:
- 1 (15-ounce / 425 grams) can red kidney beans, drained
- 1 (15-ounce / 425 grams) can pinto beans, drained
- 1 medium-large onion, chopped (about 1 1/2 cups / 360 milliliters)
- 1/2 cup (120 milliliters) diced celery
- 1/4 cup (60 milliliters) diced green bell pepper
Liquid and Seasonings:
- 1 quart (946 milliliters) tomato juice
- 1 (29-ounce / 822 grams) can tomato puree
- 1/4 cup (60 milliliters) chili powder
- 1 teaspoon ground cumin
- 1 1/2 teaspoons garlic powder
- 1 teaspoon salt
- 1/2 teaspoon ground black pepper
- 1/2 teaspoon dried oregano
- 1/2 teaspoon sugar
- 1/8 teaspoon cayenne pepper
Instructions
- Heat a spacious skillet over medium-high temperature and thoroughly cook the ground beef until no pink remains, carefully breaking it into small, uniform crumbles.
- Transfer the cooked beef to a large pot, allowing excess grease to drain completely during the process.
- Incorporate diced tomatoes, kidney beans, onions, green peppers, celery, tomato sauce, and signature spice blend into the pot with the beef.
- Gently stir all ingredients to ensure even distribution and complete integration of flavors.
- Pour water or beef broth into the mixture, creating a balanced liquid consistency.
- Cover the pot with a tight-fitting lid and reduce heat to low, allowing the chili to gently simmer and develop rich, deep flavors.
- Stir the chili periodically – approximately every 15-20 minutes – to prevent ingredient settling and ensure consistent heat distribution.
- Continue cooking for 90-120 minutes, watching for gradual thickening and flavor melding.
- Taste and adjust seasoning with additional salt, pepper, or spices if needed during the cooking process.
- Once chili reaches desired thickness and ingredients are tender, remove from heat and let rest for 10 minutes before serving.
- Ladle into warm bowls and garnish with optional toppings like shredded cheese, diced onions, or sour cream.
Notes
- Boost beef flavor by using a mix of ground chuck and ground sirloin for deeper, richer taste.
- Enhance texture by chopping vegetables finely to ensure even distribution and consistent mouthfeel throughout the chili.
- Control sodium levels by using low-sodium tomato sauce and reducing added salt, making the recipe more heart-healthy.
- Adapt for vegetarian diets by replacing ground beef with plant-based crumbles or extra beans, maintaining the classic chili essence.
- Prep Time: 10 minutes
- Cook Time: 1 hour 30 minutes
- Category: Lunch, Dinner, Snacks
- Method: Simmering
- Cuisine: American
Nutrition
- Serving Size: 6
- Calories: 400
- Sugar: 4 g
- Sodium: 800 mg
- Fat: 24 g
- Saturated Fat: 10 g
- Unsaturated Fat: 12 g
- Trans Fat: 1 g
- Carbohydrates: 28 g
- Fiber: 8 g
- Protein: 25 g
- Cholesterol: 90 mg
James Walker
Lead Recipe Developer & Culinary Educator
Expertise
Southern Cuisine & Farm-to-Table Cooking, Recipe Development & Testing, Culinary Education & Instruction
Education
School: Auguste Escoffier School of Culinary Arts
Program: Diploma in Culinary Arts and Operations
Focus: Comprehensive training in classical and modern culinary techniques, kitchen operations, and farm-to-table practices.
James didn’t learn cooking from a TV show, he learned it from busy kitchens, family gatherings, and long afternoons spent testing recipes the hard way.
After training at the Auguste Escoffier School of Culinary Arts, he brought his love for real, down-to-earth food to every dish he makes.
At Dining At Home, James loves building recipes that feel familiar but still have something special, like adding a twist to a classic or making a slow Sunday dinner feel brand new.
When he’s not in the kitchen, you’ll probably find him swapping garden tips at the farmers’ market or teaching his daughter how to flip pancakes without a mess (almost).