The Perfect Small Batch Raspberry Jam Recipe for Summer Joy
Sweet summer raspberries burst with incredible flavor in this small batch raspberry jam recipe that captures pure garden freshness.
Homemade preserves always taste more vibrant and genuine than store-bought versions.
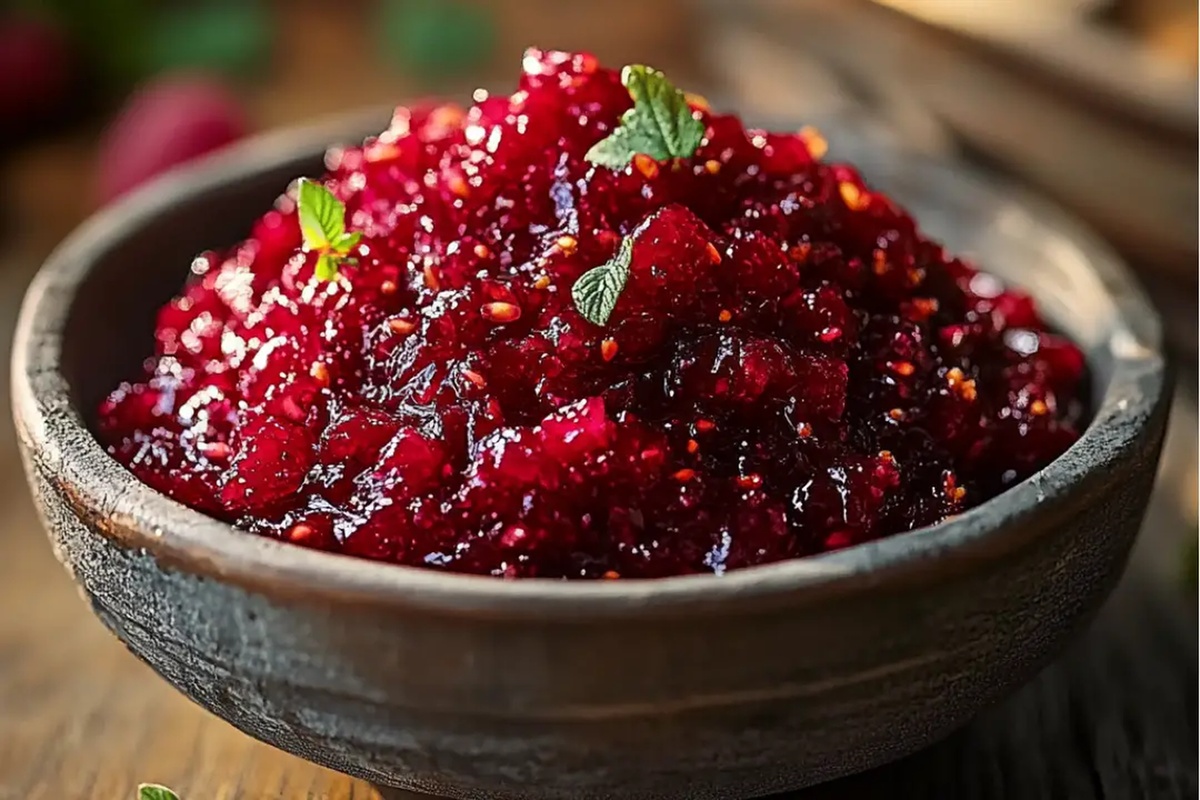
Bright ruby-red berries transform into a silky spread with minimal ingredients and simple techniques.
Local farmers markets provide the most exceptional fruit for crafting delectable jam at home.
Cooking small batches ensures maximum flavor concentration and allows careful monitoring of the perfect consistency.
Minimal sugar highlights the natural tartness of ripe raspberries, creating a pure and intense preserve.
Jump into this delightful culinary adventure and savor every spoonful of your handcrafted jam.
Raspberry Jam That’s Simple, Small Batch, And Full Of Fruit
Small Batch Raspberry Jam What’s Inside
Fresh Fruit Base:Sugar and Sweeteners:Flavor Enhancers:Raspberry Jam Cooking Instructions in Small Batch

Step 1: Prepare Berries and Sweetener
Grab fresh, ripe raspberries and gently crush them in a heavy-bottomed pot.
Sprinkle sugar over the berries and squeeze fresh lemon juice.
Let the mixture rest and mingle for about half an hour, allowing the fruits to release their natural juices and flavors.
Step 2: Bring to Bubbling Point
Heat the raspberry mixture over medium-high temperature, stirring occasionally.
Watch the pot carefully as the contents begin to bubble and transform.
Reduce heat to a gentle simmer once it reaches a rolling boil.
Continue cooking, skimming any foam that develops on the surface.
Step 3: Check Jam Consistency
Test the jam’s readiness by placing a small dollop on a chilled ceramic plate.
Gently push your finger through the jam – if it wrinkles and holds its shape without running, you’ve achieved the perfect texture.
Step 4: Enhance and Jar
Remove the pot from heat and stir in a splash of vanilla extract for depth of flavor.
Carefully pour the hot jam into clean, sterilized glass jars.
Let the jam cool completely at room temperature before sealing and storing in the refrigerator.
Step 5: Preserve for Longer Storage
For extended shelf life, consider using water bath canning techniques.
Ensure jars are properly sealed and processed to enjoy your homemade raspberry jam for months to come.
Raspberry Jam Tips for a Perfect Small Batch
Let raspberries sit with sugar for 30 minutes to intensify flavors and help break down fruit before cooking.
Use a candy thermometer to accurately reach 220°F, ensuring perfect jam consistency without overcooking.
Chill a plate beforehand and check jam’s doneness by running your finger through the mixture – a wrinkled surface signals perfect setting.
Add vanilla extract at the end to enhance the raspberry’s natural sweetness and create a more complex flavor profile.
Properly sterilize jars and follow canning guidelines for extended preservation, or refrigerate for shorter-term enjoyment.
Keep Small Batch Raspberry Jam Fresh
What Goes with Raspberry Jam
Raspberry Jam in Small Batches
FAQs
Test the jam by placing a small amount on a chilled plate. Run your finger through it – if the jam wrinkles and holds its shape without running, it’s perfectly set.
Yes, frozen raspberries work great! Just thaw them completely and drain any excess liquid before starting the recipe.
Macerating helps release the fruit’s natural juices and allows the sugar to dissolve, creating a more intense flavor and smoother texture in your jam.
Absolutely! Lemon juice helps activate the pectin, provides necessary acidity, and helps the jam set properly while balancing the sweetness of the raspberries.
Print
Small Batch Raspberry Jam Recipe
- Total Time: 55 minutes
- Yield: 8 1x
Description
Sweet summer raspberries dance with sugar in this small batch raspberry jam, creating a luscious spread bursting with fresh flavor. Homemade preserve lovers will savor the pure, concentrated essence of ripe fruit that you can enjoy on toast, scones, or straight from the spoon.
Ingredients
Main Ingredients:
- 4 cups fresh raspberries
- 2 1/4 cups granulated sugar
Flavor Enhancers:
- 2 tablespoons lemon juice
- 2 teaspoons vanilla extract
Instructions
- Prepare the fruity base by gently combining fresh raspberries with granulated sugar and a splash of lemon juice in a heavy-bottomed saucepan, allowing the mixture to rest and release natural juices for half an hour.
- Position the pan over medium-high heat, stirring occasionally to prevent scorching, and bring the mixture to a vigorous bubbling point.
- Reduce the temperature to a gentle simmer, continuing to stir and skim away any foam that develops on the surface.
- Monitor the temperature carefully using a candy thermometer, aiming for the precise setting point of 220°F, which typically takes about 15-20 minutes of careful cooking.
- Conduct the set test by placing a small dollop of the jam onto a pre-chilled ceramic plate, then gently pushing with your fingertip to check for a wrinkled surface that indicates perfect consistency.
- Remove the pan from heat and gently fold in a whisper of vanilla extract, which will enhance the raspberry’s natural fragrance.
- Carefully transfer the molten jam into sterilized glass containers, leaving a small headspace at the top to allow for potential expansion.
- Allow the jam to cool completely at room temperature, then seal and refrigerate, ensuring a tight lid to preserve freshness and prevent contamination.
- For extended preservation, consider following professional canning techniques to create a shelf-stable product that can be enjoyed for months.
Notes
- Macerating the raspberries with sugar helps release natural pectin and intensifies the fruit’s sweetness, creating a more robust jam flavor.
- Use a candy thermometer for precise temperature tracking, ensuring the perfect gel-like consistency without overcooking the fruit.
- For a lower sugar version, try using pectin or adding chia seeds to help thicken the jam naturally while reducing overall sugar content.
- Consider experimenting with additional flavor enhancers like fresh mint, lavender, or a splash of bourbon to elevate the traditional raspberry jam profile.
- Prep Time: 30 minutes
- Cook Time: 25 minutes
- Category: Snacks, Desserts
- Method: Boiling
- Cuisine: American
Nutrition
- Serving Size: 8
- Calories: 143
- Sugar: 28 g
- Sodium: 1 mg
- Fat: 0 g
- Saturated Fat: 0 g
- Unsaturated Fat: 0 g
- Trans Fat: 0 g
- Carbohydrates: 36 g
- Fiber: 2 g
- Protein: 1 g
- Cholesterol: 0 mg
James Walker
Lead Recipe Developer & Culinary Educator
Expertise
Southern Cuisine & Farm-to-Table Cooking, Recipe Development & Testing, Culinary Education & Instruction
Education
School: Auguste Escoffier School of Culinary Arts
Program: Diploma in Culinary Arts and Operations
Focus: Comprehensive training in classical and modern culinary techniques, kitchen operations, and farm-to-table practices.
James didn’t learn cooking from a TV show, he learned it from busy kitchens, family gatherings, and long afternoons spent testing recipes the hard way.
After training at the Auguste Escoffier School of Culinary Arts, he brought his love for real, down-to-earth food to every dish he makes.
At Dining At Home, James loves building recipes that feel familiar but still have something special, like adding a twist to a classic or making a slow Sunday dinner feel brand new.
When he’s not in the kitchen, you’ll probably find him swapping garden tips at the farmers’ market or teaching his daughter how to flip pancakes without a mess (almost).