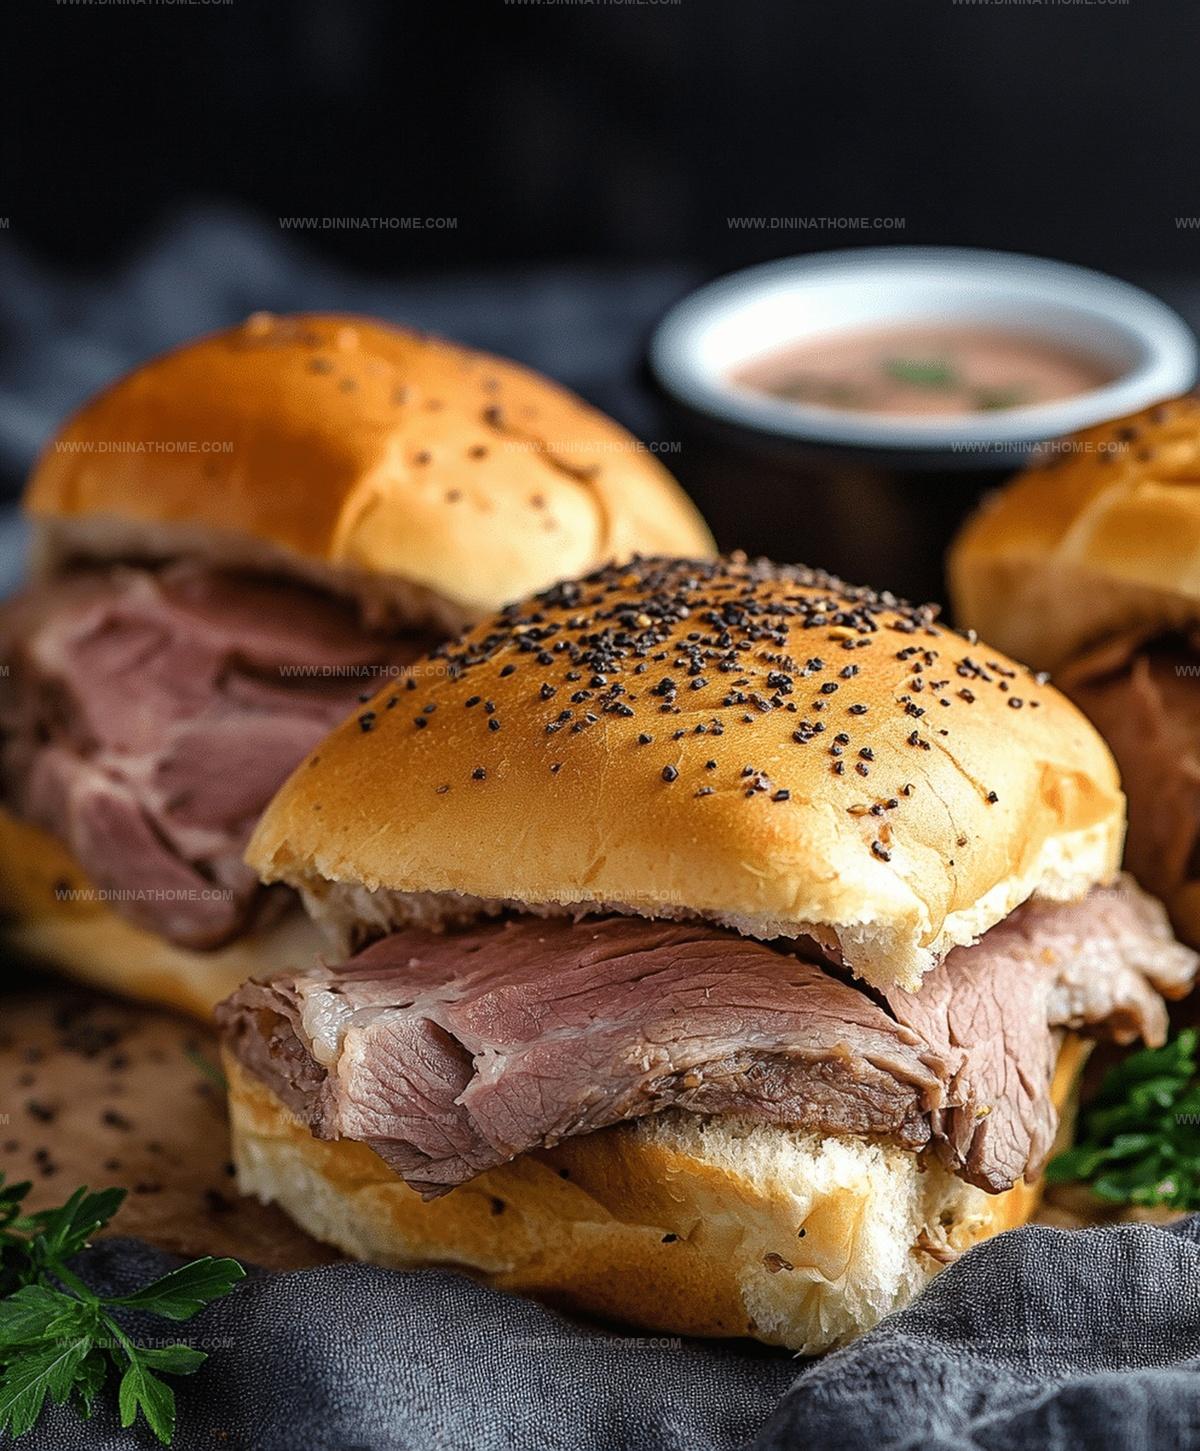
Juicy Weekend Roast Beef Sliders Recipe for Hungry Crowds
Crafting mouthwatering roast beef sliders can turn an ordinary meal into a delightful experience.
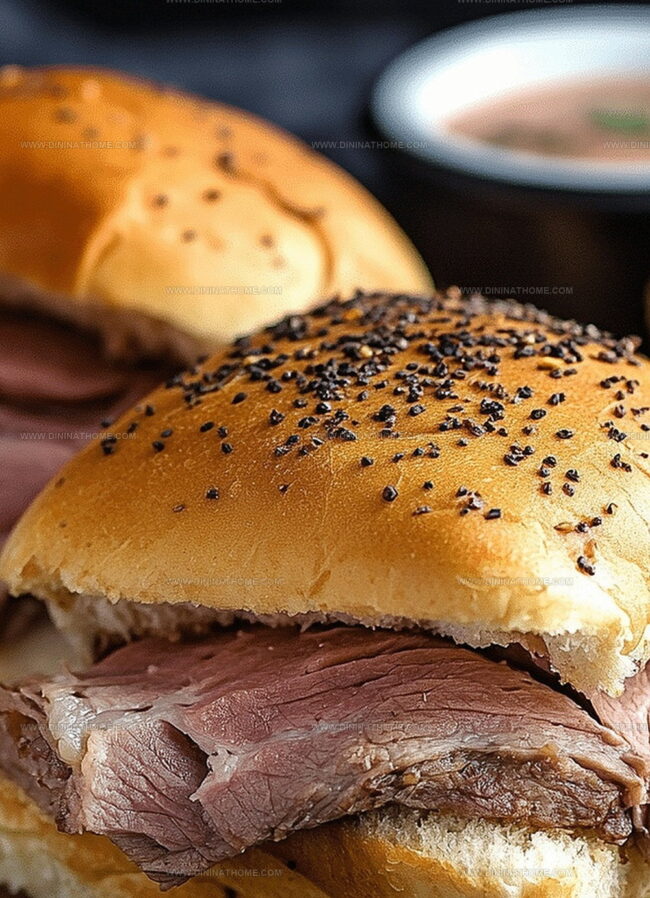
Tender meat nestled between soft rolls creates pure comfort.
Small yet packed with flavor, these mini sandwiches pack a serious punch.
Succulent slices of beef complemented by zesty condiments make everyone’s taste buds dance.
Home cooks appreciate recipes that wow without complicated techniques.
Each bite promises a perfect balance of savory goodness.
Roast Beef Sliders That Satisfy Every Time
Roast Beef Sliders Prep Base
Bread:Meat and Cheese:Seasoning and Enhancers:Roast Beef Sliders Step-by-Step Method
Step 1: Fire Up the Oven
Set your oven to a toasty 350°F and get ready for some slider magic.
Step 2: Prepare the Slider Base
Gently slice your slider buns in half and nestle the bottom halves into a greased 9×13-inch baking dish.
Step 3: Layer the Delicious Goodness
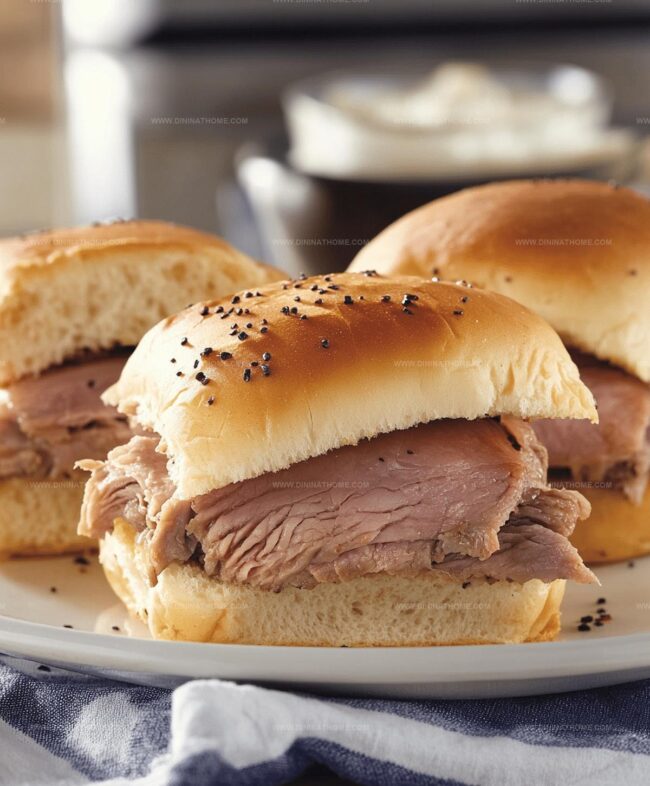
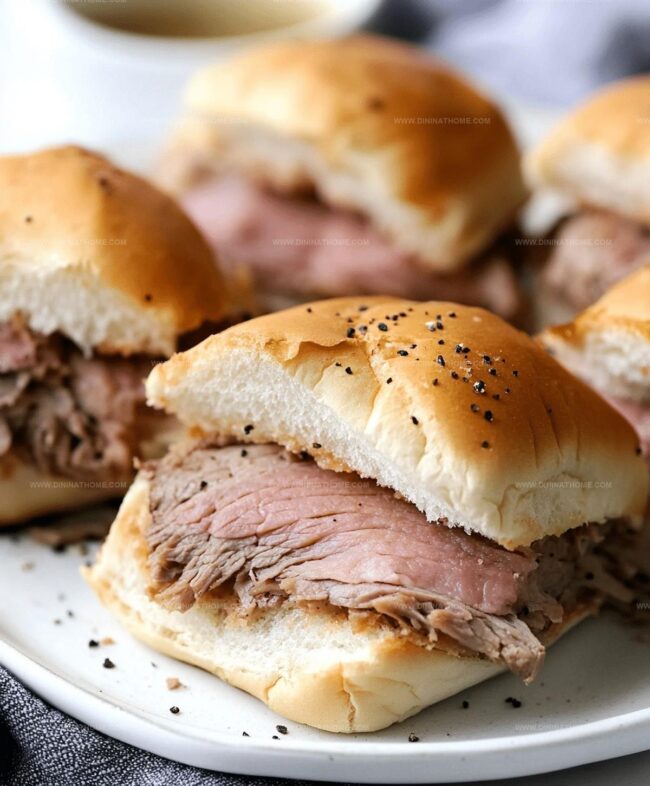
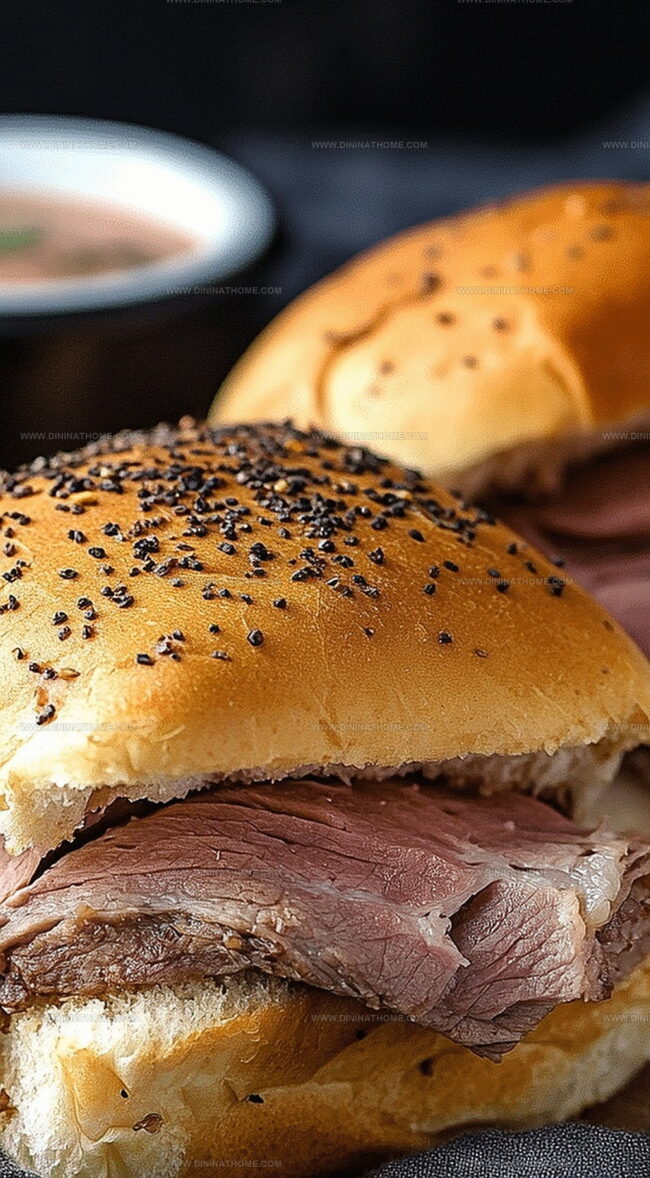
Create a mouthwatering foundation by spreading roast beef across the bun bottoms, then crown with a blanket of provolone or Swiss cheese.
Step 4: Top It Off
Place the bun tops over the meat and cheese, creating little flavor sandwiches.
Step 5: Craft the Flavor Boost
In a small bowl, whip up a tantalizing sauce by combining:Generously brush this mixture over the bun tops.
Sprinkle poppy seeds for an extra touch of excitement if you’re feeling fancy.
Step 6: Bake to Perfection
Cover the baking dish with foil and slide into the oven for 15 minutes.
Then remove the foil and bake for an additional 5 minutes until the tops turn golden and the cheese becomes irresistibly melted.
Step 7: Serve and Savor
Pull out these heavenly sliders and serve them warm.
Get ready for everyone to ask for seconds!
Roast Beef Sliders That Bake Without Drying Out
Warm Roast Beef Sliders The Easy Way
Simple Plates to Serve with Roast Beef Sliders
Roast Beef Sliders in Savory Serving Styles
FAQs
Yes, you can substitute roast beef with ham, turkey, or pulled chicken for a different flavor profile.
Add a few dashes of hot sauce to the butter mixture or sprinkle red pepper flakes on top before baking to increase the heat.
These sliders can be assembled ahead of time and refrigerated, then baked just before serving, making them perfect for advance preparation.
Coleslaw, potato chips, green salad, or pickle spears complement these roast beef sliders perfectly.
Print
Roast Beef Sliders Recipe
- Total Time: 30 minutes
- Yield: 12 1x
Description
Succulent roast beef sliders bring classic comfort to party appetizers with irresistible flavors. Layers of tender meat, zesty sauce, and buttery rolls create a crowd-pleasing bite you won’t want to miss.
Ingredients
Main Ingredients:
- 1 pound (1 lb) deli-style roast beef (thinly sliced)
- 1 cup provolone or Swiss cheese (sliced or shredded)
- 12 slider buns
Sauce and Seasonings:
- 4 tablespoons (4 tbsp) butter (melted)
- 1 tablespoon (1 tbsp) Dijon mustard
- 1 tablespoon (1 tbsp) Worcestershire sauce
- 1 teaspoon (1 tsp) garlic powder
- 1 teaspoon (1 tsp) onion powder
Optional Topping:
- 1 tablespoon (1 tbsp) poppy seeds (optional)
Instructions
- Warm the oven to 350°F, preparing a greased 9×13-inch baking dish for assembling the sliders.
- Split the slider buns horizontally, positioning the bottom halves across the prepared baking dish.
- Arrange thin slices of roast beef evenly over the bottom bun layer, creating a uniform meat coverage.
- Carefully place provolone or Swiss cheese slices directly on top of the roast beef, ensuring complete coverage.
- Crown the cheese layer with the top halves of the slider buns, creating compact sandwich stacks.
- Craft a flavor-packed glaze by whisking together melted butter, Dijon mustard, Worcestershire sauce, garlic powder, and onion powder in a small mixing bowl.
- Generously brush the prepared glaze across the slider bun tops, ensuring even distribution and maximum flavor absorption.
- Optional: Sprinkle poppy seeds over the glazed buns for added texture and visual appeal.
- Shield the baking dish with aluminum foil and slide into the preheated oven for 15 minutes of initial baking.
- Remove the foil and continue baking for an additional 5 minutes until the bun tops transform into a golden-brown crust and the cheese becomes perfectly melted.
- Extract from the oven and allow to rest momentarily before serving these delectable warm sliders.
Notes
- Customize cheese selection by swapping provolone or Swiss with sharp cheddar, pepper jack, or blue cheese for different flavor profiles.
- Make sliders gluten-free by using gluten-free slider buns or lettuce wraps, ensuring everyone can enjoy this delicious meal.
- Prepare ahead by assembling sliders up to 24 hours in advance, storing covered in the refrigerator and baking just before serving to save time.
- Enhance flavor by using high-quality, thinly sliced deli roast beef or leftover pot roast for a more tender and rich taste experience.
- Prep Time: 10 minutes
- Cook Time: 20 minutes
- Category: Lunch, Dinner, Appetizer, Snacks
- Method: Baking
- Cuisine: American
Nutrition
- Serving Size: 12
- Calories: 300
- Sugar: 1 g
- Sodium: 800 mg
- Fat: 16 g
- Saturated Fat: 7 g
- Unsaturated Fat: 6 g
- Trans Fat: 0 g
- Carbohydrates: 30 g
- Fiber: 1 g
- Protein: 16 g
- Cholesterol: 50 mg
James Walker
Lead Recipe Developer & Culinary Educator
Expertise
Southern Cuisine & Farm-to-Table Cooking, Recipe Development & Testing, Culinary Education & Instruction
Education
School: Auguste Escoffier School of Culinary Arts
Program: Diploma in Culinary Arts and Operations
Focus: Comprehensive training in classical and modern culinary techniques, kitchen operations, and farm-to-table practices.
James didn’t learn cooking from a TV show, he learned it from busy kitchens, family gatherings, and long afternoons spent testing recipes the hard way.
After training at the Auguste Escoffier School of Culinary Arts, he brought his love for real, down-to-earth food to every dish he makes.
At Dining At Home, James loves building recipes that feel familiar but still have something special, like adding a twist to a classic or making a slow Sunday dinner feel brand new.
When he’s not in the kitchen, you’ll probably find him swapping garden tips at the farmers’ market or teaching his daughter how to flip pancakes without a mess (almost).