
Irresistible Raspberry Cheesecake Thumbprint Cookies Recipe
Whipping up a batch of delectable raspberry cheesecake thumbprint cookies always brings smiles to hungry faces.
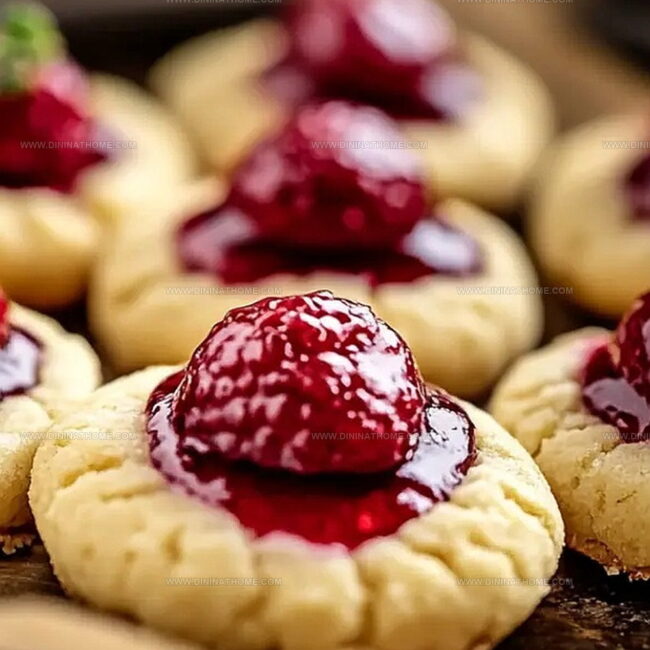
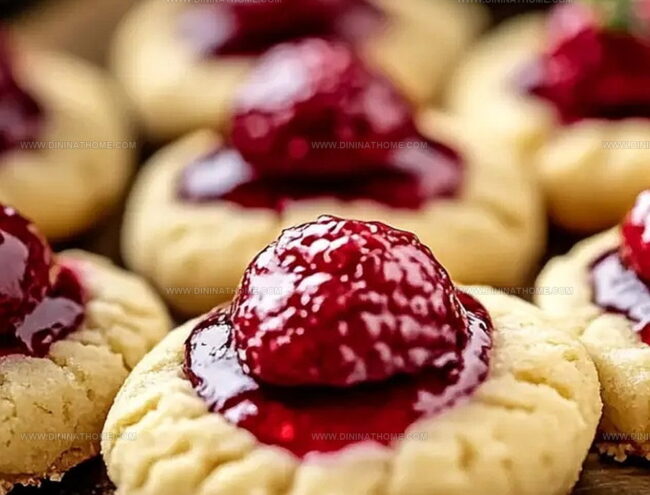
Sweet raspberry jam nestles perfectly in a creamy cheesecake-inspired cookie landscape.
Soft, buttery dough creates a tender canvas for each delightful bite.
Rich cream cheese blends seamlessly with classic shortbread elements, promising an irresistible treat.
Delicate indentations filled with vibrant raspberry preserve add a pop of color and fruity excitement.
Baking these cookies fills your kitchen with an incredible aroma that beckons everyone closer.
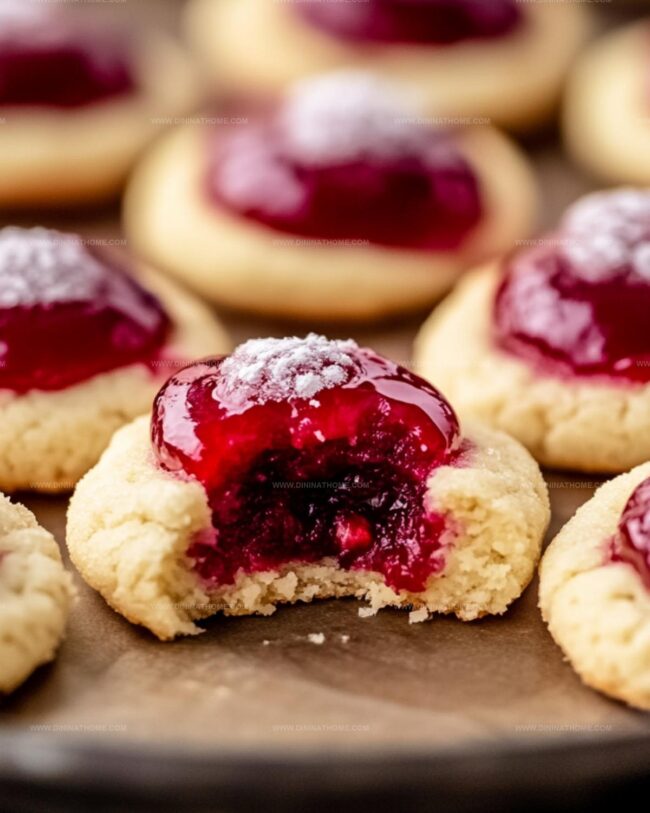
Slice into these miniature desserts and watch how quickly they disappear from the plate.
Raspberry Cheesecake Thumbprints Worth Baking Again
Raspberry Cheesecake Thumbprint Cookies Ingredient Guide
Base Ingredients:Filling Ingredients:Baking Ingredients:Thumbprint Cookie Method for Raspberry Cheesecake Bites
Step 1: Create Buttery Cookie Base
In a large mixing bowl, whip butter and sugar together until they become light and airy.
Gradually fold in flour, mixing until a soft, cohesive dough forms.
Wrap the dough in plastic and chill in the refrigerator for half an hour to help it firm up nicely.
Step 2: Shape Cookie Treats
Warm up the oven to 350°F.
Cover a baking sheet with parchment paper.
Roll the chilled dough into small, bite-sized balls.
Place them on the prepared sheet, leaving space between each cookie.
Press your thumb or the back of a spoon into the center of each ball, creating a cozy little nest for the filling.
Step 3: Craft Creamy Filling
In a separate bowl, blend softened cream cheese with sugar until silky smooth.
Carefully spoon the dreamy cream cheese mixture into the center of each cookie indentation.
Step 4: Add Fruity Splash
Drop a dollop of vibrant raspberry preserves on top of the cream cheese filling, creating a beautiful burst of color and flavor in each cookie.
Step 5: Bake and Cool
Slide the cookie sheet into the preheated oven.
Bake for 12-15 minutes until the edges turn a delicate golden brown.
Let the cookies rest on the baking sheet for five minutes, then transfer them to a wire rack to cool completely.
The result?
Irresistible raspberry cream thumbprint cookies that will make everyone’s taste buds dance with joy.
Cookie Centering Tips for Raspberry Thumbprints
Chill Raspberry Cheesecake Thumbprint Cookies
Great Matches for Raspberry Thumbprint Cookies
Cheesecake Thumbprint Cookies Filling Variations
FAQs
Chilling helps the dough firm up, preventing cookies from spreading too much during baking and maintaining their shape with the thumb indentation.
Absolutely! While raspberry is classic, you can swap it with strawberry, apricot, or any other fruit preserve you enjoy.
Gently press the center with your thumb or the back of a spoon before adding the cream cheese and preserves, making sure the indentation is deep enough to hold the filling.
Yes, the cream cheese adds a rich, tangy flavor that complements the sweet preserves and buttery cookie base, creating a more complex and delicious treat.
Print
Raspberry Cheesecake Thumbprint Cookies Recipe
- Total Time: 45 minutes
- Yield: 24 1x
Description
Sweet raspberry cheesecake thumbprint cookies bring a delightful twist to classic desserts. Creamy cheesecake filling nestled in buttery cookie bases creates an irresistible treat you’ll crave with every delicate bite.
Ingredients
Main Ingredients:
- 1 3/16 cups all-purpose flour
- 1 3/16 cups sugar
- 8 tablespoons (1/2 cup) salted butter, softened
- 4 ounces cream cheese, softened
Filling:
- 1/4 cup raspberry preserves
There are no additional or other ingredients in this recipe.
Instructions
- Cream softened butter and sugar in a spacious mixing vessel until the mixture achieves a pale, airy texture with visible volume expansion.
- Gradually incorporate flour into the butter mixture, gently folding until a cohesive, tender dough emerges without overmixing.
- Wrap the prepared dough securely in plastic film and allow it to rest in the refrigerator for half an hour, enabling the ingredients to meld and solidify.
- Heat the oven to 350°F and line a baking sheet with parchment paper to prevent sticking.
- Extract the chilled dough and shape into uniform one-inch spherical portions, positioning them evenly across the prepared baking surface with sufficient spacing.
- Delicately press a small indentation into the center of each cookie using either your thumb or a rounded utensil, creating a welcoming cavity for the filling.
- Whip the cream cheese with sugar until achieving a smooth, creamy consistency without lumps.
- Carefully spoon the cream cheese mixture into each cookie’s central depression, ensuring precise and elegant distribution.
- Gently crown each filled cookie with a modest dollop of vibrant raspberry preserves, creating a colorful and appetizing centerpiece.
- Transfer the prepared cookies into the preheated oven and bake for 12-15 minutes, watching for delicate golden edges as an indicator of doneness.
- Remove from the oven and permit the cookies to rest on the baking sheet for five minutes to stabilize their structure.
- Carefully transfer the cookies to a wire cooling rack, allowing them to reach room temperature and develop their full flavor profile.
Notes
- Chill the dough thoroughly to prevent spreading and maintain the cookie’s shape during baking.
- Gently press the thumbprint to create a shallow well without breaking the cookie’s structure.
- Use room temperature cream cheese for smooth, lump-free filling that blends easily.
- Opt for seedless raspberry preserves to achieve a silky, refined texture in the thumbprint center.
- Prep Time: 15 minutes
- Cook Time: 30 minutes
- Category: Desserts, Snacks
- Method: Baking
- Cuisine: American
Nutrition
- Serving Size: 24
- Calories: 140
- Sugar: 6 g
- Sodium: 70 mg
- Fat: 7 g
- Saturated Fat: 4 g
- Unsaturated Fat: 3 g
- Trans Fat: 0 g
- Carbohydrates: 20 g
- Fiber: 0 g
- Protein: 2 g
- Cholesterol: 15 mg
James Walker
Lead Recipe Developer & Culinary Educator
Expertise
Southern Cuisine & Farm-to-Table Cooking, Recipe Development & Testing, Culinary Education & Instruction
Education
School: Auguste Escoffier School of Culinary Arts
Program: Diploma in Culinary Arts and Operations
Focus: Comprehensive training in classical and modern culinary techniques, kitchen operations, and farm-to-table practices.
James didn’t learn cooking from a TV show, he learned it from busy kitchens, family gatherings, and long afternoons spent testing recipes the hard way.
After training at the Auguste Escoffier School of Culinary Arts, he brought his love for real, down-to-earth food to every dish he makes.
At Dining At Home, James loves building recipes that feel familiar but still have something special, like adding a twist to a classic or making a slow Sunday dinner feel brand new.
When he’s not in the kitchen, you’ll probably find him swapping garden tips at the farmers’ market or teaching his daughter how to flip pancakes without a mess (almost).