
Easy Plum Jam Recipe for Homemade Sweet Bliss
Sweet summer memories flood back when I whip up this homemade plum jam that captures pure orchard magic.
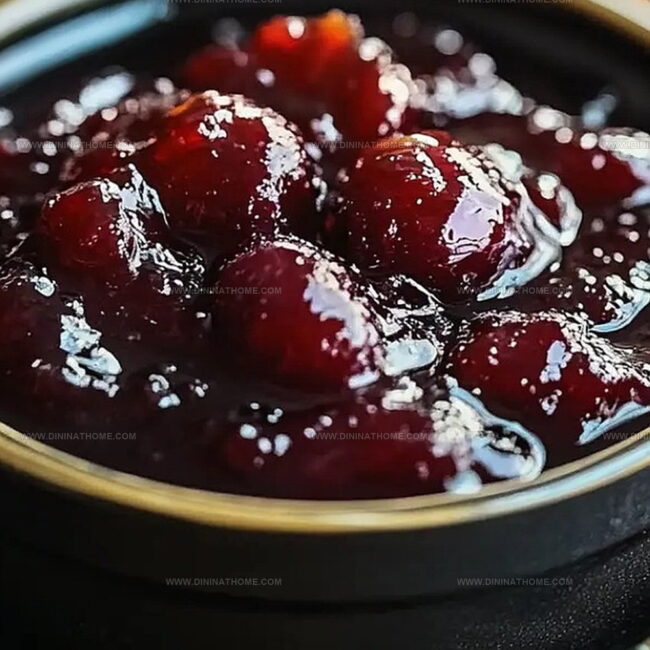
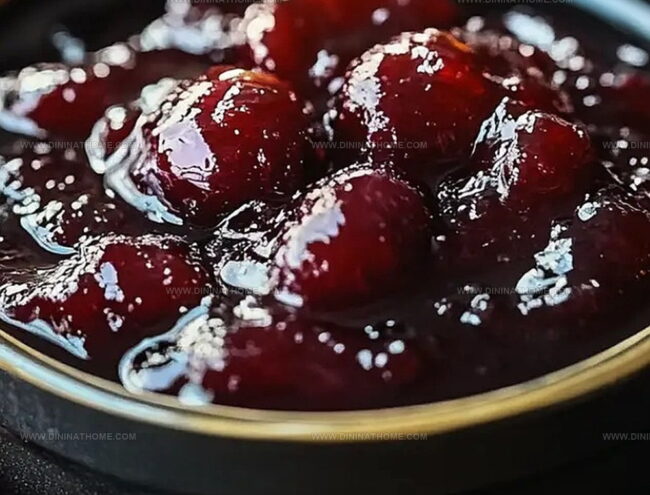
Ripe plums, bursting with natural sweetness, create a preserve unlike any store-bought version.
Clusters of deep purple fruit promise intense flavor and rich color in every spoonful.
My grandmother’s cherished technique guides me through this simple preservation process.
Weekend mornings feel magical when spreading this vibrant jam across warm toast.
Each jar tells a story of careful selection and gentle cooking techniques.
You’ll fall in love with how effortlessly fresh ingredients become a delectable spread that connects generations.
Preserve summer’s bounty and savor a taste of pure, unadulterated joy.
Homemade Plum Jam With Deep Fruity Flavor
Boost Homemade Flavor: Craft an authentic plum jam that bursts with natural, rich fruit taste straight from your kitchen.
Quick Weekend Cooking: Whip up this delightful preserve in just under an hour, making it perfect for leisurely weekend culinary adventures.
Simple Ingredient Magic: Require only three basic ingredients – plums, sugar, and lemon juice – transforming them into a luxurious spreadable delight without complicated techniques.
Family Preserve Tradition: Create a nostalgic homemade treat that connects generations, allowing you to share a classic recipe passed down through family kitchens.
Plum Jam Ingredients to Prepare
Primary Fruits:Sweetening Agent:Supporting Ingredients:Simmering and Canning Homemade Plum Jam
Step 1: Prepare Plums and Simmer
Toss freshly washed plums into a large, heavy-based saucepan.
Add:Gently heat the mixture, allowing plums to soften and release their natural juices.
Simmer for approximately 5 minutes until the fruit begins to break down and become tender.
Step 2: Incorporate Sweet Crystals
Gradually introduce sugar into the simmering fruit mixture.
Sprinkle sugar in thirds, stirring continuously until completely dissolved.
Remove the pan from heat, cover with a lid, and let the mixture rest for several hours or overnight.
During this resting period, plums will absorb the sugar and develop a deeper, richer flavor profile.
Step 3: Boil and Develop Jam Consistency
Return the cooled mixture to the stove.
Stir to ensure any remaining sugar crystals melt completely.
Bring the contents to a vigorous, rolling boil.
Increase heat and continue boiling rapidly for about 10 minutes.
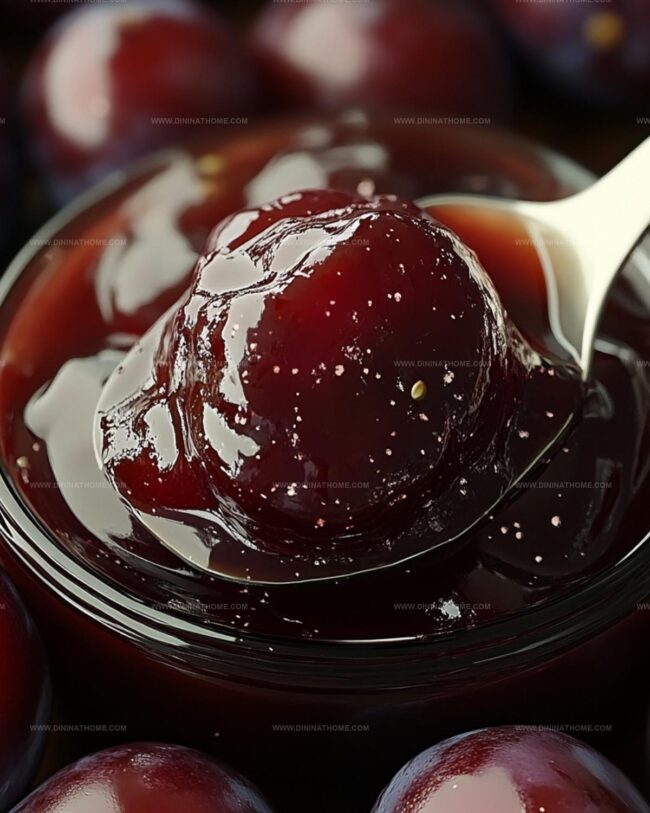
Watch for the jam to thicken and reach its ideal setting point – when a small amount placed on a chilled plate wrinkles when pushed with a finger.
Step 4: Transfer and Preserve
Allow the jam to rest for 5 minutes, enabling fruit particles to settle.
Carefully pour the hot jam into a wide-necked pitcher.
Fill sterilized glass jars to their brims, ensuring a tight seal with clean lids.
Store in a cool, dark pantry.
Homemade plum jam maintains its best quality within one year of preparation.
Small-Batch Jam Tips for Plum Flavor that Pops
Chill Plum Jam Properly
How to Enjoy Plum Jam in a Meal
Plum Jam with Flavor Additions
FAQs
Test the jam by placing a small amount on a chilled plate. After 1-2 minutes, push the jam with your finger. If it wrinkles and doesn’t flood back, it has reached setting point.
Yes, plums naturally contain high pectin levels, which helps the jam set. The lemon juice also adds extra pectin and helps with preservation.
Choose ripe, slightly soft plums like Victoria or Damson varieties. These have good flavor and natural pectin content that helps the jam set perfectly.
Ensure sugar is completely dissolved before boiling and stir occasionally during cooking. Cool the jam slowly and avoid stirring too much after it sets to prevent sugar crystals from forming.
Print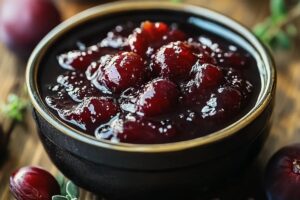
Plum Jam Recipe
- Total Time: 30 minutes
- Yield: 5 1x
Description
Sweet summer memories bloom in this homemade Plum Jam, a rustic spread capturing orchard-fresh flavors. Silky smooth and richly concentrated, you’ll savor each spoonful of this delightful preserve perfect for morning toast or afternoon pastries.
Ingredients
Main Fruits:
- 1 kg (2.2 pounds) plums, halved and stones removed
Citrus:
- Juice of 1 large lemon or orange
Sweeteners:
- 700 g (1.5 pounds) granulated sugar
Instructions
- Prepare plums by placing them in a large, heavy-based saucepan with lemon juice and water, allowing the fruits to gently simmer and soften for approximately 5 minutes.
- Introduce sugar gradually, stirring each third thoroughly until completely dissolved, then remove from heat and allow the mixture to rest and cool for several hours or overnight, enabling plums to absorb the sweetness.
- Return the pan to heat, ensuring any remaining sugar crystals melt completely by continuous stirring.
- Elevate the temperature to create a vigorous rolling boil, maintaining a rapid cooking process for roughly 10 minutes until the mixture reaches the precise setting consistency.
- Allow the jam to rest momentarily, permitting fruit particles to stabilize and settle within the liquid.
- Transfer the molten jam into a wide-necked pitcher, carefully distributing the mixture into four meticulously sterilized glass containers, filling them to their uppermost rim.
- Immediately seal jars with tight-fitting lids, then store in a cool, dark environment to preserve the jam’s rich flavor and quality, ensuring optimal consumption within one calendar year.
Notes
- Test jam’s setting point by placing a small amount on a chilled plate; if it wrinkles when pushed with a finger, it’s ready to set.
- Prevent burning by using a heavy-bottomed pan and stirring constantly during the boiling process.
- Remove any foam that forms on top of the jam for a clearer, more attractive final product.
- Consider adding a small amount of pectin if plums are slightly underripe to ensure proper setting.
- Prep Time: 15 minutes
- Cook Time: 15 minutes
- Category: Snacks, Desserts
- Method: Boiling
- Cuisine: American
Nutrition
- Serving Size: 5
- Calories: 290
- Sugar: 64g
- Sodium: 1mg
- Fat: 0g
- Saturated Fat: 0g
- Unsaturated Fat: 0g
- Trans Fat: 0g
- Carbohydrates: 75g
- Fiber: 2g
- Protein: 1g
- Cholesterol: 0mg
James Walker
Lead Recipe Developer & Culinary Educator
Expertise
Southern Cuisine & Farm-to-Table Cooking, Recipe Development & Testing, Culinary Education & Instruction
Education
School: Auguste Escoffier School of Culinary Arts
Program: Diploma in Culinary Arts and Operations
Focus: Comprehensive training in classical and modern culinary techniques, kitchen operations, and farm-to-table practices.
James didn’t learn cooking from a TV show, he learned it from busy kitchens, family gatherings, and long afternoons spent testing recipes the hard way.
After training at the Auguste Escoffier School of Culinary Arts, he brought his love for real, down-to-earth food to every dish he makes.
At Dining At Home, James loves building recipes that feel familiar but still have something special, like adding a twist to a classic or making a slow Sunday dinner feel brand new.
When he’s not in the kitchen, you’ll probably find him swapping garden tips at the farmers’ market or teaching his daughter how to flip pancakes without a mess (almost).