
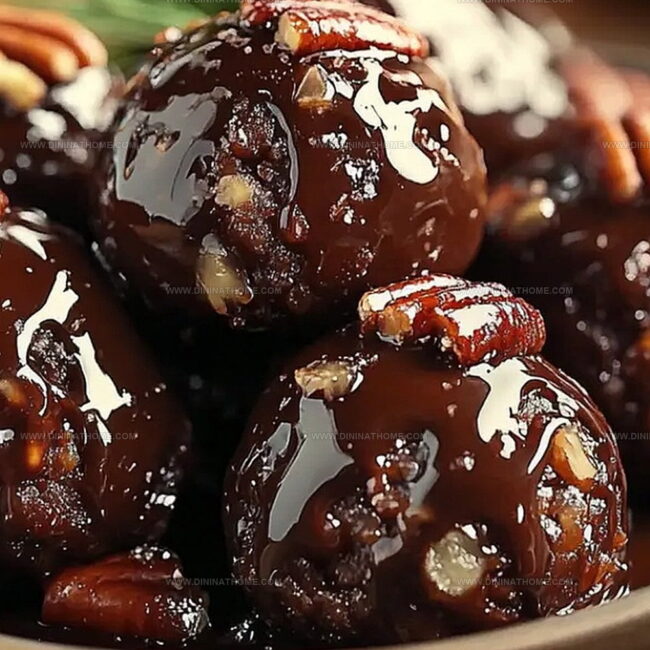
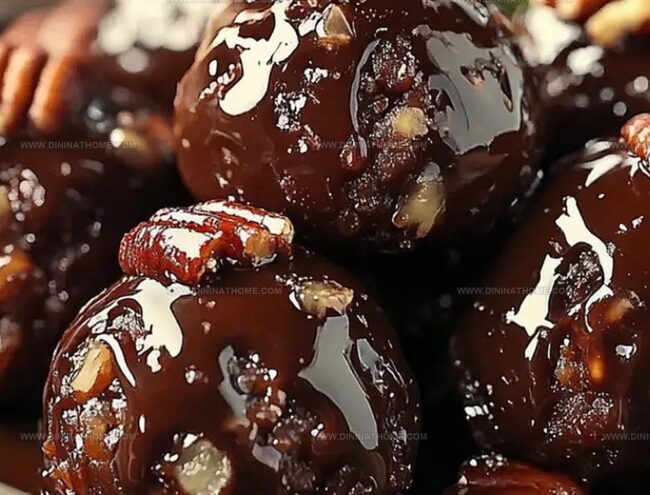
Easy Pecan Pie Balls Recipe: Bite-Sized Holiday Magic
Crafting decadent pecan pie balls brings pure joy to any dessert lover’s kitchen.
Sweet treats like these capture the essence of classic Southern comfort.
Nuts and chocolate blend seamlessly in these bite-sized delights.
Creamy textures meet crunchy pecans for an irresistible combination.
Each morsel promises a rich, indulgent experience that melts in you mouth.
Small yet powerful, these elegant confections will become your new favorite party snack.
You won’t be able to stop at just one of these delectable spheres of deliciousness.
No-Bake Pecan Pie Balls That Pack A Sweet, Crunchy Bite
Whip Up Effortless Delights: Perfect Pecan Pie Balls
Pecan Pie Balls Ingredient List
Dry Base Ingredients:Wet Binding Ingredients:Coating Ingredient:Easy Instructions for Pecan Pie Balls
Step 1: Toast and Crumble Pecans
Grab a skillet and gently toast the pecans over medium heat until they become fragrant and golden brown.
Once cooled, crush them into small, delightful pieces using a food processor or chopping board.
Step 2: Blend Dry Goodness
In a large mixing bowl, combine:Mix these ingredients until they’re perfectly blended and looking deliciously inviting.
Step 3: Introduce Liquid Magic
Pour in the wet ingredients and stir with enthusiasm:Blend until the mixture becomes sticky and holds together like a dream.
Step 4: Shape Tasty Morsels
Roll the mixture between your palms, creating bite-sized balls about an inch in diameter.
Place these little gems on a parchment-lined baking sheet.
Step 5: Chill and Firm
Pop the baking sheet into the freezer for roughly 30 minutes.
This helps the balls maintain their shape and makes the next step easier.
Step 6: Chocolate Dipping Delight
Melt chocolate chips using a double boiler or microwave.
Dunk each pecan ball partially or completely in the melted chocolate, letting excess drip off.
Step 7: Final Chocolate Set
Return the chocolate-coated balls to the parchment paper.
Allow them to rest until the chocolate hardens completely.
Step 8: Store and Enjoy
Transfer the pecan pie balls to an airtight container.
Refrigerate and enjoy within one week for maximum freshness and flavor.
No-Fail Tips for Shaping Pecan Pie Balls
Store Pecan Pie Balls
Treats to Enjoy with Pecan Pie Balls
No-Bake Pecan Pie Balls Variations
FAQs
No, they’re super easy! You just mix dry ingredients, add wet ingredients, roll into balls, chill, and dip in chocolate. Perfect for beginners and experienced bakers.
Absolutely! Replace bourbon with apple juice or orange juice. The recipe is flexible and will still taste delicious.
Not at all. You’ll only need a mixing bowl, baking sheet, parchment paper, and your hands to roll the balls. Basic kitchen tools work perfectly.
When stored in an airtight container in the refrigerator, they’ll last up to a week. This makes them great for making ahead for parties or gifts.
Print
Pecan Pie Balls Recipe
- Total Time: 15 minutes
- Yield: 20 1x
Description
Indulgent pecan pie balls bring southern comfort to bite-sized bliss, melding rich nutty flavors with creamy sweetness. Delightful no-bake treats offer quick satisfaction for dessert enthusiasts craving classic pecan pie in a convenient, pop-able form you’ll adore.
Ingredients
Main Ingredients:
- 2 cups (480 ml) pecans, toasted and finely chopped
- 1 cup (240 ml) graham cracker crumbs
- 1 cup (240 ml) brown sugar, packed
Sweet Liquid Ingredients:
- 2 tablespoons (30 ml) maple syrup
- 1/4 cup (60 ml) bourbon or apple juice
- 1 teaspoon (5 ml) vanilla extract
Finishing Ingredients:
- 1/2 teaspoon (2.5 ml) salt
- 1/2 cup (120 ml) chocolate chips, melted (for dipping)
Instructions
- In a spacious mixing bowl, thoroughly combine the fragrant toasted pecans, finely crushed graham cracker crumbs, rich brown sugar, and a delicate pinch of salt, ensuring even distribution of ingredients.
- Introduce the luscious maple syrup, smooth bourbon (or crisp apple juice), and aromatic vanilla extract, stirring meticulously until the mixture transforms into a cohesive, moldable texture that holds together effortlessly.
- Using clean hands, gently shape the pecan mixture into compact, bite-sized spheres approximately one inch in diameter, carefully positioning each ball onto a parchment-lined baking sheet.
- Transfer the formed balls to the freezer, allowing them to chill and solidify for approximately 25-35 minutes, which will enhance their structural integrity and make chocolate coating easier.
- Melt the chocolate chips using a double boiler or microwave, creating a smooth, glossy coating, then strategically dip each chilled pecan ball, ensuring partial or complete chocolate coverage according to personal preference.
- Carefully place the chocolate-enrobed balls back onto the parchment paper, allowing the chocolate to set and harden at room temperature or expedite the process by briefly returning them to the refrigerator.
- Once completely set, transfer the pecan pie balls to an airtight container and store in the refrigerator, where they will maintain their delectable quality for up to seven days.
Notes
- Toasting pecans beforehand intensifies their rich, nutty flavor and adds a delightful crunch to the balls.
- Use a small cookie scoop for consistent sizing and easier ball formation, ensuring uniform shape and cooking.
- Replace bourbon with apple juice for a kid-friendly version or non-alcoholic alternative that maintains delicious taste.
- Experiment with different chocolate coatings like dark, milk, or white chocolate to customize the flavor profile and visual appeal.
- Prep Time: 15 minutes
- Cook Time: 0 minutes
- Category: Desserts, Snacks
- Method: Chilling
- Cuisine: American
Nutrition
- Serving Size: 20
- Calories: 160
- Sugar: 12g
- Sodium: 50mg
- Fat: 10g
- Saturated Fat: 2g
- Unsaturated Fat: 8g
- Trans Fat: 0g
- Carbohydrates: 17g
- Fiber: 1g
- Protein: 2g
- Cholesterol: 0mg
James Walker
Lead Recipe Developer & Culinary Educator
Expertise
Southern Cuisine & Farm-to-Table Cooking, Recipe Development & Testing, Culinary Education & Instruction
Education
School: Auguste Escoffier School of Culinary Arts
Program: Diploma in Culinary Arts and Operations
Focus: Comprehensive training in classical and modern culinary techniques, kitchen operations, and farm-to-table practices.
James didn’t learn cooking from a TV show, he learned it from busy kitchens, family gatherings, and long afternoons spent testing recipes the hard way.
After training at the Auguste Escoffier School of Culinary Arts, he brought his love for real, down-to-earth food to every dish he makes.
At Dining At Home, James loves building recipes that feel familiar but still have something special, like adding a twist to a classic or making a slow Sunday dinner feel brand new.
When he’s not in the kitchen, you’ll probably find him swapping garden tips at the farmers’ market or teaching his daughter how to flip pancakes without a mess (almost).