
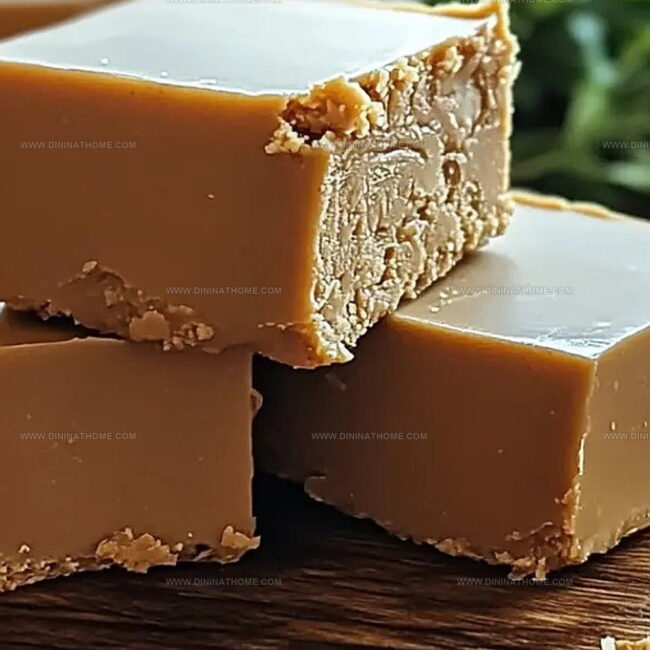
The Dreamiest Peanut Butter Fudge Recipe for Sweet Cravings
Rich and creamy peanut butter fudge transforms ordinary dessert moments into pure bliss.
Sweet indulgence waits just around the kitchen corner.
Chocolate lovers understand the magnetic pull of decadent treats that melt perfectly on your tongue.
Memories of childhood comfort surge with each silky bite.
Crafting this delightful confection requires minimal ingredients and simple techniques.
Minimal effort yields maximum satisfaction for you and anyone lucky enough to sample these heavenly squares.
Prepare to experience a mouthwatering adventure that will become your new favorite sweet escape.
Peanut Butter Fudge That Melts Just Right
Peanut Butter Fudge Recipe – What You’ll Need
Base Ingredients:Flavoring Ingredients:Preparation Ingredient:Peanut Butter Fudge Instructions Made Easy
Step 1: Prepare Cooking Equipment
Grab a medium saucepan, wooden spoon, measuring tools, and a rectangular baking pan.
Lightly grease the baking pan with butter or cooking spray to prevent sticking.
Step 2: Create Sugar Syrup
Combine sugar and milk in the saucepan.
Place over medium-high heat and stir gently until the sugar begins to dissolve.
Allow the mixture to reach a rolling boil, watching carefully and stirring occasionally.
Step 3: Boil Sugar Mixture
Keep the mixture at a rapid boil for exactly two and a half minutes.
Do not stir during this time.
Watch the bubbles carefully to ensure consistent boiling temperature.
Step 4: Add Flavor Ingredients
Remove the saucepan from heat.
Quickly add these ingredients:Stir vigorously until the peanut butter completely melts and the mixture becomes silky smooth.
Step 5: Transfer Fudge to Pan
Pour the hot fudge mixture into the prepared baking pan.
Use a spatula to spread it evenly across the surface, ensuring a smooth top.
Step 6: Cool and Set Fudge
Allow the fudge to rest at room temperature.
Do not refrigerate immediately.
Let it sit undisturbed for several hours until it becomes firm and fully set.
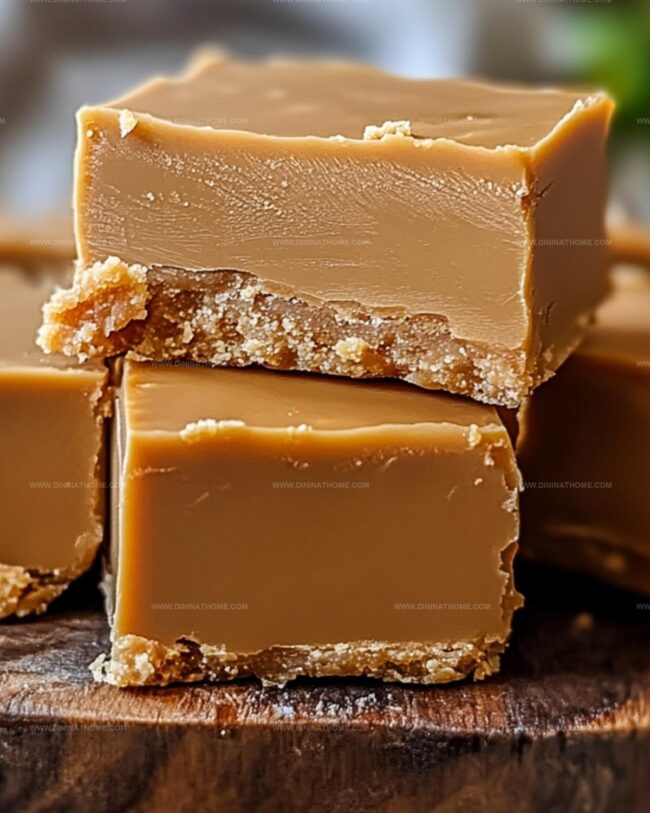
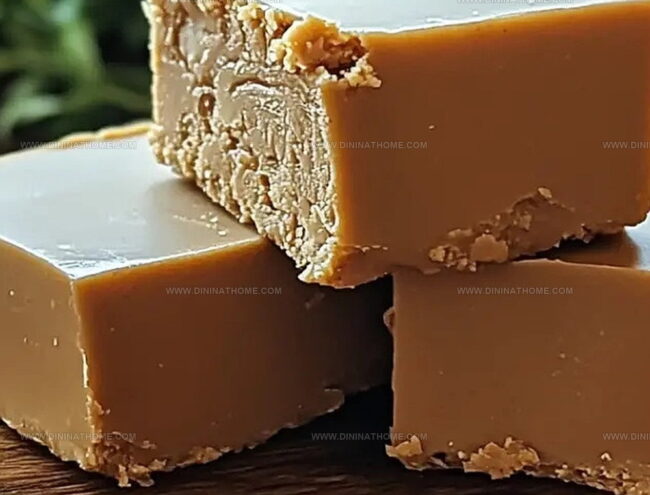
Step 7: Cut and Serve
Once the fudge has completely cooled, slice into neat squares using a sharp knife.
Serve at room temperature and store in an airtight container.
Fudge-Making Tips for the Perfect Peanut Butter Squares
Stir peanut butter thoroughly to ensure complete melting and a silky-smooth texture without any lumps.
Choose an 8×8 pan for standard recipe or 11×13 pan when doubling, allowing perfect thickness and easy cutting.
Watch boiling time carefully – exactly 2.5 minutes ensures proper sugar crystallization for ideal fudge consistency.
Allow fudge to set completely at room temperature before cutting to maintain structural integrity and clean square edges.
Store fudge in an airtight container at room temperature for up to a week, or refrigerate for extended freshness and firmer texture.
Store Peanut Butter Fudge for Later
What to Serve with Peanut Butter Fudge
Peanut Butter Fudge Topping Variations
FAQs
Yes, you can use granulated white sugar or brown sugar, but the texture and sweetness might slightly vary from the original recipe.
Whole milk is recommended for the creamiest and richest fudge, but 2% milk can also work well.
Look for large, rolling bubbles across the entire surface of the mixture, not just small bubbles around the edges. This indicates it’s at a rapid boil.
Creamy, classic peanut butter works best. Avoid natural or separated peanut butter as it might affect the fudge’s consistency and setting.
Print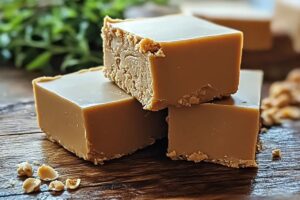
Peanut Butter Fudge Recipe
- Total Time: 15 minutes
- Yield: 16 1x
Description
Creamy Peanut Butter Fudge delivers a rich, indulgent experience that melts in your mouth with pure chocolate-peanut bliss. Smooth confectionery magic brings comfort and joy, inviting you to savor each delectable bite of this classic sweet treat.
Ingredients
Main Ingredients:
- 1 cup peanut butter
- 1 cup sugar
- 1/2 cup milk (120 milliliters)
Flavor Enhancers:
- 1 teaspoon vanilla extract
Instructions
- Create a smooth, sweet base by whisking sugar and milk together in a heavy-bottomed saucepan over medium-high heat.
- Allow the mixture to reach a vigorous, rolling boil, maintaining the intense bubbling for precisely two and a half minutes without stirring.
- Carefully remove the saucepan from the heat source and immediately introduce vanilla extract and creamy peanut butter.
- Vigorously whisk the ingredients until the peanut butter completely dissolves, creating a uniform, glossy texture with no visible lumps.
- Swiftly transfer the molten fudge mixture into a pre-greased baking pan, using a spatula to ensure even distribution and smooth the surface.
- Allow the fudge to rest and solidify at room temperature, which typically takes approximately 2-3 hours, ensuring a firm, sliceable consistency.
- Once fully set, use a sharp knife to cut the fudge into neat, uniform squares, creating delectable bite-sized pieces ready for serving and enjoying.
Notes
- Ensure precise timing when boiling sugar and milk to achieve the perfect fudge consistency without burning.
- Use a heavy-bottomed saucepan to distribute heat evenly and prevent scorching during the boiling process.
- Experiment with different peanut butter brands for varied flavor intensity, choosing natural or creamy options based on personal preference.
- Allow fudge to cool completely at room temperature, then refrigerate for cleaner, sharper cutting lines and a firmer texture.
- Prep Time: 10 minutes
- Cook Time: 5 minutes
- Category: Desserts, Snacks
- Method: Boiling
- Cuisine: American
Nutrition
- Serving Size: 16
- Calories: 159
- Sugar: 9 g
- Sodium: 37 mg
- Fat: 10 g
- Saturated Fat: 2 g
- Unsaturated Fat: 8 g
- Trans Fat: 0 g
- Carbohydrates: 16 g
- Fiber: 1 g
- Protein: 4 g
- Cholesterol: 1 mg
James Walker
Lead Recipe Developer & Culinary Educator
Expertise
Southern Cuisine & Farm-to-Table Cooking, Recipe Development & Testing, Culinary Education & Instruction
Education
School: Auguste Escoffier School of Culinary Arts
Program: Diploma in Culinary Arts and Operations
Focus: Comprehensive training in classical and modern culinary techniques, kitchen operations, and farm-to-table practices.
James didn’t learn cooking from a TV show, he learned it from busy kitchens, family gatherings, and long afternoons spent testing recipes the hard way.
After training at the Auguste Escoffier School of Culinary Arts, he brought his love for real, down-to-earth food to every dish he makes.
At Dining At Home, James loves building recipes that feel familiar but still have something special, like adding a twist to a classic or making a slow Sunday dinner feel brand new.
When he’s not in the kitchen, you’ll probably find him swapping garden tips at the farmers’ market or teaching his daughter how to flip pancakes without a mess (almost).