Easy Italian Sliders Recipe That’ll Wow Your Dinner Guests
Miniature burger magic meets italian sliders in a compact culinary adventure that promises big flavor.
Small bites pack tremendous punch with these handheld delights.
Mediterranean herbs and zesty ingredients transform ordinary slider expectations into something extraordinary.
Crispy edges and juicy centers create perfect textural harmony for every mouthful.
Weekend gatherings or casual game nights become instantly more delicious with these crowd-pleasing mini sandwiches.
Compact yet powerful, these sliders deliver an irresistible combination of traditional and modern tastes.
Dive right in and experience how these little sandwiches can become your next conversation starter.
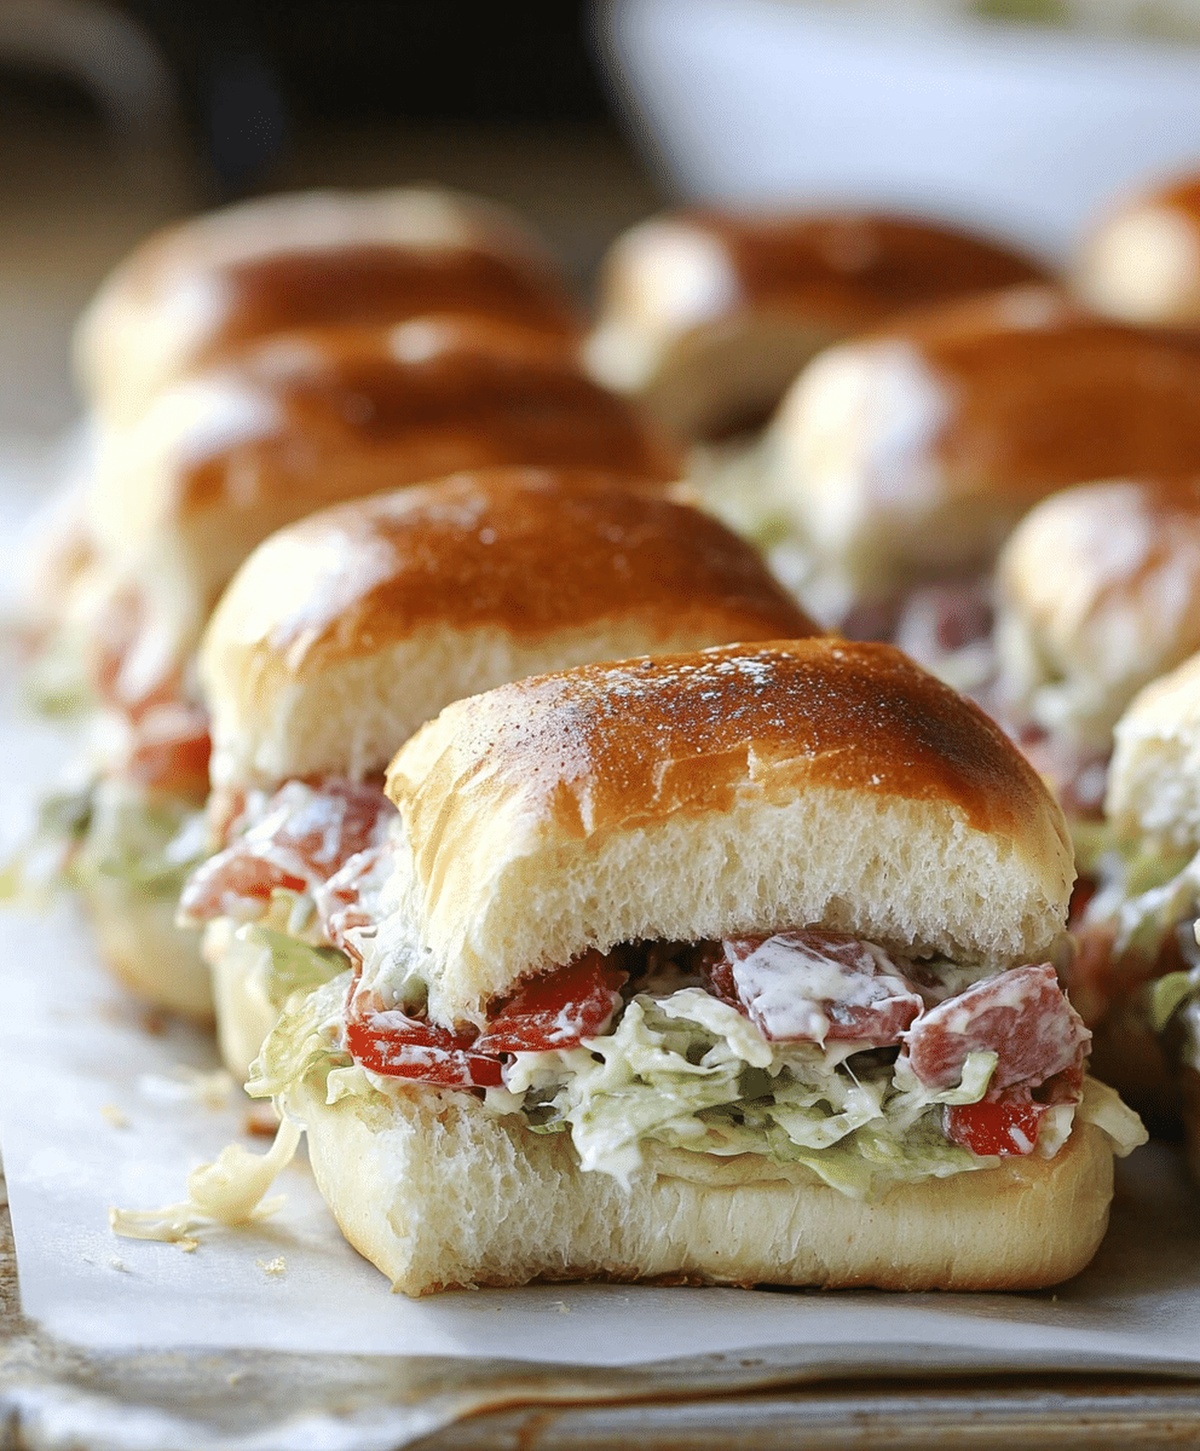
Italian Sliders and Their Irresistible Taste

Italian Sliders Cooking Elements
Bread Base:Deli Meats:Cheese Selection:Seasoning Blend:Binding Agent:Steps to Build Italian Sliders
Step 1: Warm Up the Oven
Preheat your oven to a cozy 350°F.
Grab a 9×13-inch baking dish and give it a light grease to prevent sticking.
Step 2: Slice the Rolls
Carefully slice the Hawaiian rolls horizontally, keeping them connected.
Gently place the bottom half into the prepared baking dish.
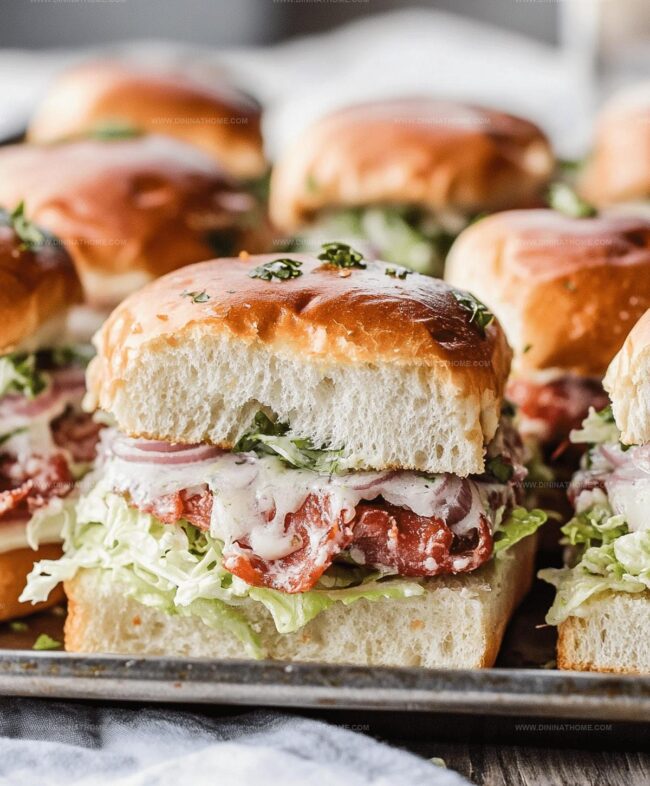
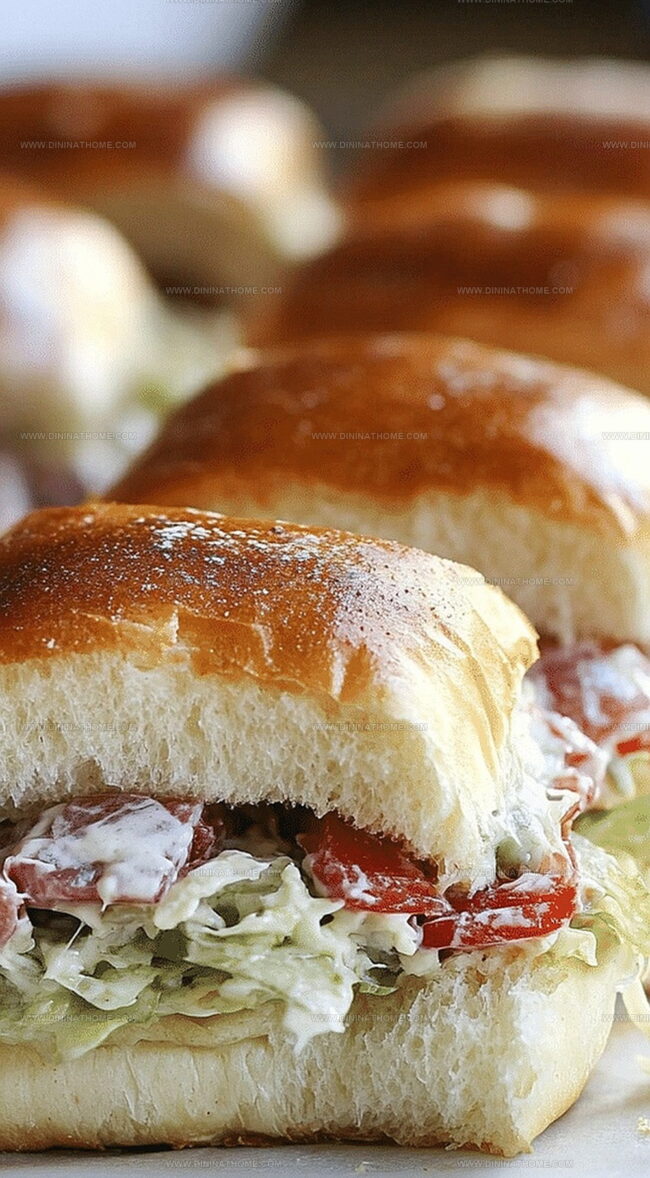
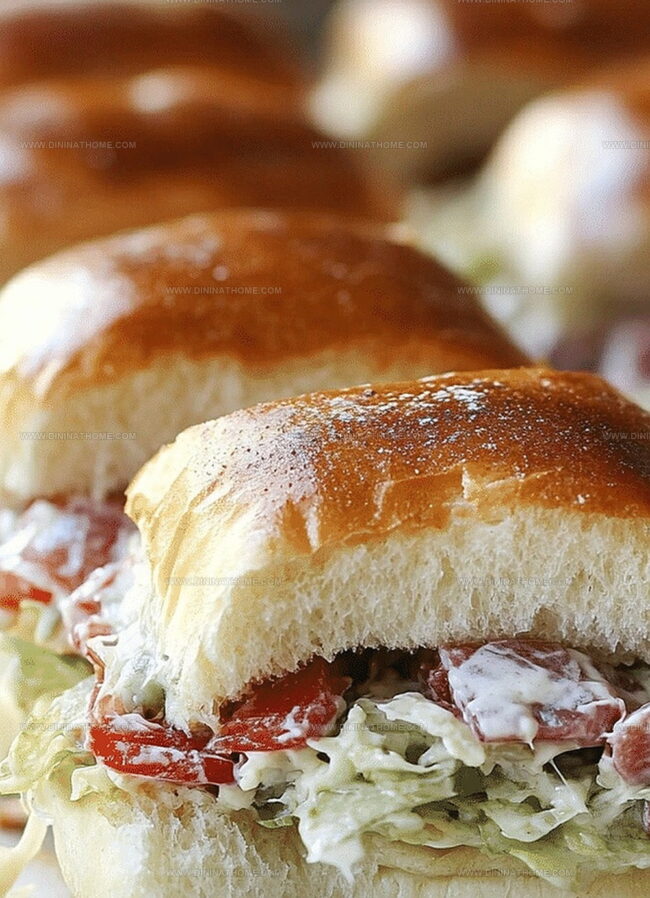
Step 3: Create Layers of Flavor
Build your slider masterpiece with these delicious ingredients:Lovingly arrange the top half of the rolls over the cheese layer.
Step 4: Craft the Magical Butter Blend
In a small bowl, whisk together:Generously brush this flavor-packed mixture over the tops of the rolls.
Step 5: Bake to Perfection
Cover the dish with foil and slide into the oven.
Bake for 10 minutes, then remove the foil.
Continue baking for an additional 5-7 minutes until the tops turn a gorgeous golden brown and the cheese melts into gooey deliciousness.
Step 6: Serve and Enjoy
Carefully remove from the oven and let cool briefly.
Slice into individual sliders and serve while warm.
Watch as your guests dive into these irresistible treats!
How to Assemble Italian Sliders Without the Mess
Store Italian Sliders For A Quick Warm-Up
What to Put Beside Italian Sliders
Italian Sliders with Tasty Topping Ideas
FAQs
Hawaiian rolls are perfect because they’re soft, slightly sweet, and hold together well when baked, creating a delicious base for these Italian-inspired mini sandwiches.
Yes, you can assemble the sliders up to a day in advance, cover them tightly, and refrigerate. Just bake them when you’re ready to serve, adding 5-10 minutes to the baking time if they’re cold from the refrigerator.
Absolutely! These sliders are great for game days, potlucks, and gatherings because they’re easy to make, can be prepared in advance, and are always crowd-pleasers with their cheesy, meaty goodness.
Definitely! While the recipe calls for salami and ham, you can swap in other deli meats like pepperoni, prosciutto, or turkey. Similarly, you can experiment with different cheese combinations like mozzarella, provolone, or even a sharp cheddar.
Print
Italian Sliders Recipe
- Total Time: 25 minutes
- Yield: 12 1x
Description
Succulent Italian sliders bring classic Mediterranean flavors to miniature burger perfection. Packed with zesty herbs, melted cheese, and aromatic seasonings, this compact dish delivers big taste in small, irresistible bites you will crave again and again.
Ingredients
Main Ingredients:
- 12 Hawaiian rolls (or slider buns)
- 6 slices salami
- 6 slices deli ham
- 6 slices provolone cheese
- 1 cup shredded mozzarella cheese
Seasonings:
- 1 teaspoon garlic powder
- 1 teaspoon Italian seasoning
Binding Ingredients:
- 1/4 cup (4 tablespoons) butter (melted)
- 1 tablespoon grated Parmesan cheese (optional)
Instructions
- Prepare the oven to reach 350°F and lightly coat a rectangular baking pan with cooking spray or butter to prevent sticking.
- Carefully slice the connected Hawaiian rolls horizontally, maintaining their structural integrity, creating a top and bottom layer.
- Arrange the bottom roll section in the prepared baking dish, creating a foundational layer for the sliders.
- Meticulously layer the rolls with alternating slices of salami and ham, ensuring complete coverage across the surface.
- Distribute provolone cheese evenly over the meat, followed by a generous sprinkle of shredded mozzarella to create a rich, melty base.
- Gently place the top half of the rolls over the cheese layer, aligning them precisely with the bottom section.
- In a separate mixing bowl, combine melted butter with garlic powder, Italian seasoning, and grated Parmesan cheese to create a flavorful glaze.
- Using a pastry brush, generously coat the top of the rolls with the prepared butter mixture, ensuring even distribution.
- Shield the sliders with aluminum foil and bake for 10 minutes to allow the cheese to begin melting.
- Remove the foil and continue baking for an additional 5-7 minutes until the tops turn golden brown and the cheese becomes fully melted and bubbly.
- Extract from the oven and allow the sliders to rest for a few minutes to set and cool slightly.
- Carefully slice into individual portions and serve while still warm, allowing guests to enjoy the gooey, flavorful mini sandwiches.
Notes
- Customize meat choices by swapping salami and ham with turkey, roast beef, or vegetarian alternatives for different dietary preferences.
- Use gluten-free Hawaiian rolls or make your own low-carb version using lettuce wraps for a celiac-friendly adaptation.
- Dial down garlic powder intensity for sensitive palates or boost herbs for more robust flavor profiles.
- Prepare sliders ahead of time by assembling and refrigerating, then baking just before serving to maintain maximum freshness and crispy texture.
- Prep Time: 10 minutes
- Cook Time: 15 minutes
- Category: Lunch, Appetizer, Snacks
- Method: Baking
- Cuisine: Italian
Nutrition
- Serving Size: 12
- Calories: 210
- Sugar: 1 g
- Sodium: 550 mg
- Fat: 12 g
- Saturated Fat: 6 g
- Unsaturated Fat: 4 g
- Trans Fat: 0 g
- Carbohydrates: 18 g
- Fiber: 0.5 g
- Protein: 10 g
- Cholesterol: 30 mg
James Walker
Lead Recipe Developer & Culinary Educator
Expertise
Southern Cuisine & Farm-to-Table Cooking, Recipe Development & Testing, Culinary Education & Instruction
Education
School: Auguste Escoffier School of Culinary Arts
Program: Diploma in Culinary Arts and Operations
Focus: Comprehensive training in classical and modern culinary techniques, kitchen operations, and farm-to-table practices.
James didn’t learn cooking from a TV show, he learned it from busy kitchens, family gatherings, and long afternoons spent testing recipes the hard way.
After training at the Auguste Escoffier School of Culinary Arts, he brought his love for real, down-to-earth food to every dish he makes.
At Dining At Home, James loves building recipes that feel familiar but still have something special, like adding a twist to a classic or making a slow Sunday dinner feel brand new.
When he’s not in the kitchen, you’ll probably find him swapping garden tips at the farmers’ market or teaching his daughter how to flip pancakes without a mess (almost).