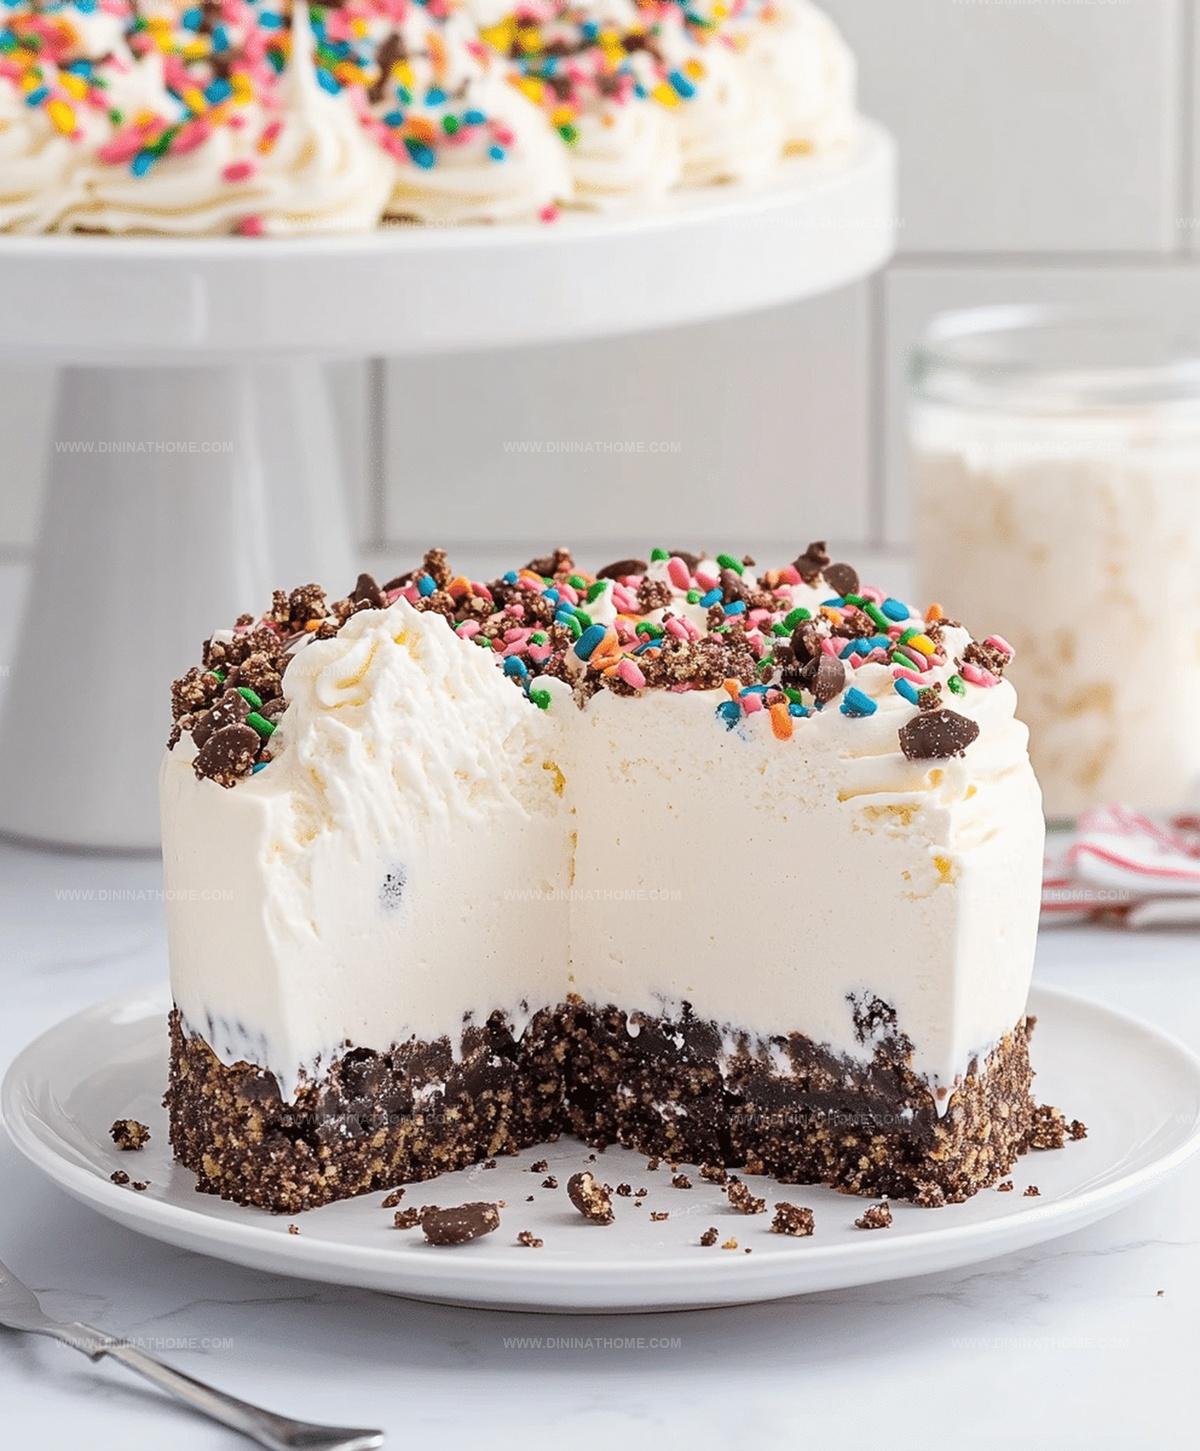
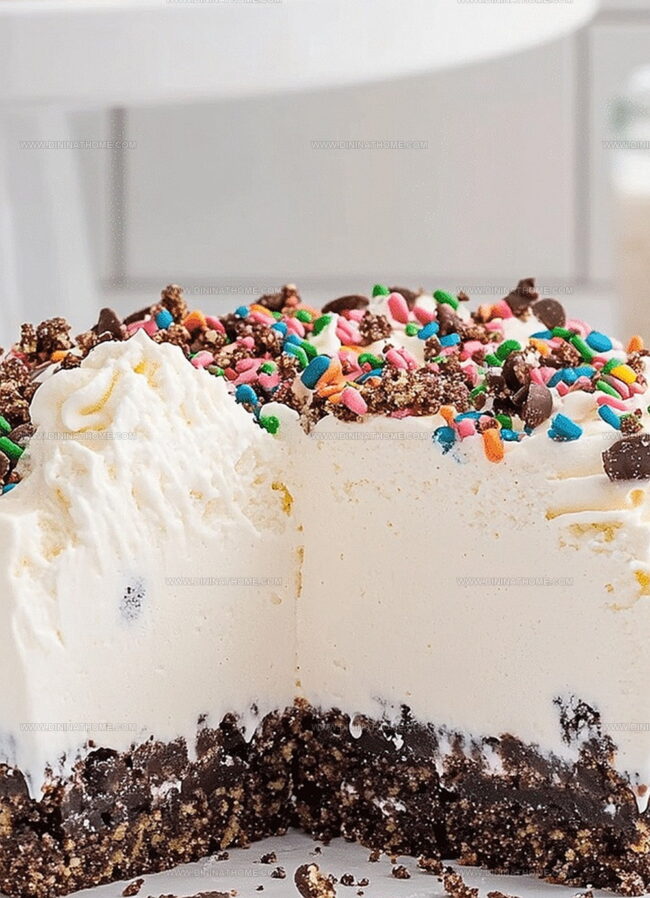
The Perfect Ice Cream Cake With Cookie Crunch Recipe for Summer
Cool summer afternoons demand a magical ice cream cake with cookie crunch that surprises every dessert lover.
Sweet layers of creamy delight promise an adventure for your taste buds.
Crisp cookie pieces create unexpected texture throughout each decadent slice.
Childhood memories merge with sophisticated flavors in this simple yet impressive treat.
Homemade desserts rarely feel this luxurious without complicated preparation steps.
Chocolate and vanilla mingle beneath a crunchy cookie landscape that delights everyone.
This irresistible creation will make you the star of any gathering.
Reasons You’ll Like Ice Cream Cake With Cookie Crunch
Cookie Crunch Ice Cream Cake Components
Crust Base:Ice Cream Layers:Topping and Sauce:Ice Cream Cake With Cookie Crunch Guide
Step 1: Create Cookie Crust Base
Crush chocolate sandwich cookies into fine crumbs and mix thoroughly with melted butter.
Press the mixture firmly and evenly into the bottom of a 9-inch springform pan.
Use the back of a spoon to compact the crust smoothly.
Place the pan in the freezer for 15 minutes to help the crust set and become firm.
Step 2: Layer Chocolate Ice Cream
Remove the pan from the freezer and spread softened chocolate ice cream in an even, thick layer over the chilled cookie crust.
Make sure to cover the entire surface completely.
Return the pan to the freezer for 30 minutes to allow the chocolate layer to solidify.
Step 3: Drizzle Fudge Sauce
Take the pan out of the freezer and generously drizzle half of the hot fudge sauce across the chocolate ice cream layer.
Allow the sauce to create beautiful swirls and patterns over the surface.
Step 4: Add Vanilla Ice Cream Layer
Spread softened vanilla ice cream over the fudge sauce, creating a smooth and even layer.
Gently press the ice cream to eliminate any air pockets.
Return the pan to the freezer for a minimum of 2 hours to ensure the layers are completely frozen and set.
Step 5: Decorate With Whipped Topping
Remove the cake from the freezer and cover the top with fluffy whipped topping.
Spread it evenly across the surface, creating decorative swirls if desired.
Step 6: Final Fudge and Garnish
Drizzle the remaining hot fudge sauce over the whipped topping.
Sprinkle chocolate chips across the top for extra texture and visual appeal.
Return the cake to the freezer for one final hour to ensure everything is perfectly chilled.
Step 7: Serve and Enjoy
Remove the cake from the freezer 5-10 minutes before serving to allow it to soften slightly.
Carefully release the springform pan sides and slice into wedges.
Serve immediately and enjoy the delicious layers of cookies, ice cream, and fudge.
Cookie Crunch Ice Cream Cake With Clean Layering Tips
Store Cookie Crunch Cake Cold And Firm
Flavors That Go with Ice Cream Cake With Cookie Crunch
Ice Cream Cake with Cookie Crunch Layers
FAQs
Yes, you can swap graham crackers, Oreos, or chocolate chip cookies for a personalized base that suits your taste preferences.
Work quickly and ensure your ice cream is softened but not completely melted. Keep the pan in the freezer between layers and work in a cool kitchen environment.
You can use a regular cake pan lined with plastic wrap, which will help you remove the cake more easily. Just make sure it’s freezer-safe.
Absolutely! You can prepare this ice cream cake up to a week in advance. Just keep it tightly covered in the freezer until you’re ready to serve.
Print
Ice Cream Cake With Cookie Crunch Recipe
- Total Time: 20 minutes
- Yield: 12 1x
Description
Indulgent chocolate ice cream cake with cookie crunch delivers a symphony of creamy textures and rich flavors. Cool dessert lovers will savor each delightful bite of this irresistible sweet sensation.
Ingredients
Main Ingredients:
- 1/2 gallon vanilla ice cream, softened (1.89 liters)
- 1/2 gallon chocolate ice cream, softened (1.89 liters)
- 2 cups crushed chocolate cookies (240 grams)
Sauce and Topping:
- 1 cup hot fudge sauce (240 milliliters)
- 1 cup whipped topping (240 milliliters)
Base Ingredients:
- 1/4 cup melted butter (60 milliliters)
Instructions
- Pulverize chocolate sandwich cookies into fine crumbs, then thoroughly blend with melted butter until the mixture resembles wet sand.
- Transfer the cookie mixture into a springform pan, firmly pressing and creating an even, compact base layer. Chill in the freezer for approximately 15 minutes to solidify.
- Remove the pan from the freezer and spread a smooth, consistent layer of chocolate ice cream over the chilled cookie foundation, ensuring complete coverage.
- Return the dessert to the freezer for half an hour, allowing the chocolate ice cream layer to become firm and set.
- Gently warm the hot fudge sauce and delicately cascade half of the sauce across the chocolate ice cream surface, creating an elegant, swirled pattern.
- Carefully distribute softened vanilla ice cream over the fudge layer, smoothing the surface with a spatula to create an even, pristine layer.
- Place the cake back into the freezer for a minimum of two hours to thoroughly solidify and meld the flavors.
- Extract the cake from the freezer and generously crown the top with billowy whipped topping, spreading it in soft, elegant peaks.
- Drizzle the remaining hot fudge sauce across the whipped topping, creating an attractive, artistic design.
- Optional: Sprinkle chocolate chips over the surface for additional texture and visual appeal.
- Return the cake to the freezer for one final hour to ensure perfect serving consistency.
Notes
- Crumble cookies more finely for a smoother, more compact base that holds together perfectly when slicing the cake.
- Let ice cream soften at room temperature for 5-10 minutes before spreading to achieve a smooth, even layer without tearing the crust.
- Use room temperature hot fudge sauce for easier drizzling and better absorption into the ice cream layers.
- For a gluten-free version, substitute regular cookies with gluten-free sandwich cookies or graham crackers.
- Prep Time: 20 minutes
- Cook Time: 0 minutes
- Category: Desserts
- Method: Freezing
- Cuisine: American
Nutrition
- Serving Size: 12
- Calories: 350
- Sugar: 28 g
- Sodium: 210 mg
- Fat: 18 g
- Saturated Fat: 10 g
- Unsaturated Fat: 8 g
- Trans Fat: 0 g
- Carbohydrates: 41 g
- Fiber: 2 g
- Protein: 4 g
- Cholesterol: 30 mg
James Walker
Lead Recipe Developer & Culinary Educator
Expertise
Southern Cuisine & Farm-to-Table Cooking, Recipe Development & Testing, Culinary Education & Instruction
Education
School: Auguste Escoffier School of Culinary Arts
Program: Diploma in Culinary Arts and Operations
Focus: Comprehensive training in classical and modern culinary techniques, kitchen operations, and farm-to-table practices.
James didn’t learn cooking from a TV show, he learned it from busy kitchens, family gatherings, and long afternoons spent testing recipes the hard way.
After training at the Auguste Escoffier School of Culinary Arts, he brought his love for real, down-to-earth food to every dish he makes.
At Dining At Home, James loves building recipes that feel familiar but still have something special, like adding a twist to a classic or making a slow Sunday dinner feel brand new.
When he’s not in the kitchen, you’ll probably find him swapping garden tips at the farmers’ market or teaching his daughter how to flip pancakes without a mess (almost).