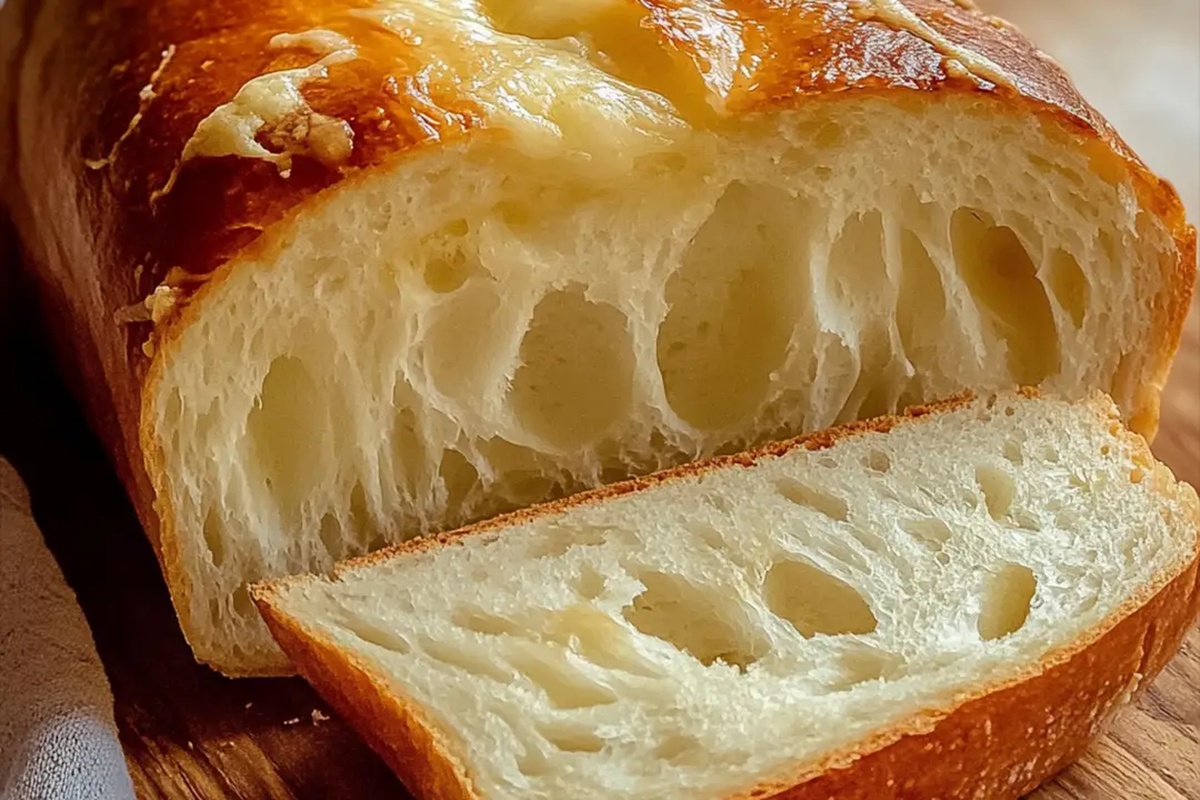
The Fluffiest Homemade White Bread Recipe for Cozy Baking Days
Baking this delightful homemade white bread fills my kitchen with memories of grandmother’s warm embrace.
Soft aromas dance through the air, promising comfort in every slice.
Kneading dough becomes a meditative experience that connects generations.
Simple ingredients transform into something magical with patient care.
My hands love the rhythmic motion of pressing and folding.
Warm bread straight from the oven invites you to slow down and savor each delectable moment.
Slice into this recipe and create delicious magic today.
White Bread That’s Simple, Soft, And Homemade With Love
All You Need for Homemade White Bread
Base Ingredients:Dry Ingredients:Preparation Ingredients:Note: Choose neutral oil like vegetable oil or use unsalted butter for coating.
Note: Room temperature butter works best for greasing pan smoothly.
Soft & Simple White Bread Baking Guide
Step 1: Activate the Yeast Magic
Grab a large mixing bowl and combine warm water, yeast, and sugar.
Watch the mixture transform as the yeast begins to bubble and foam, creating a magical base for your bread.
Let this sit quietly for about 10 minutes until it becomes wonderfully frothy and alive.
Step 2: Build the Dough Foundation
Slowly introduce salt and flour to your yeast mixture.
Start adding flour cup by cup, stirring gently until a shaggy dough begins to take shape.
Your ingredients will:Mix until everything comes together into a cohesive mass.
Step 3: Knead with Love
Transfer the dough to a lightly floured surface.
Begin working the dough with your hands, pushing and folding rhythmically.
Knead for 6-8 minutes until the dough becomes smooth, stretchy, and develops a silky texture that springs back when touched.
Step 4: First Rise Adventure
Place the kneaded dough in a generously greased bowl.
Cover with a clean kitchen towel or plastic wrap.
Find a warm, cozy spot in your kitchen and let the dough rest and expand.
Wait about an hour until the dough doubles in size, transforming into a puffy, soft cloud.
Step 5: Shape Your Bread Dream
Gently deflate the risen dough with a soft punch.
Shape it into a neat loaf that will fit perfectly in a greased loaf pan.
Smooth the top with your hands to create an even surface.
Step 6: Second Rise Preparation
Cover the shaped loaf and let it rise again in a warm area.
This second rise takes about 30-45 minutes, allowing the bread to become light and airy.
Step 7: Preheat the Oven
Warm up your oven to 350°F.
The consistent heat will help create that beautiful golden crust we all love.
Step 8: Bake to Perfection
Slide the risen loaf into the preheated oven.
Bake for 30-35 minutes.
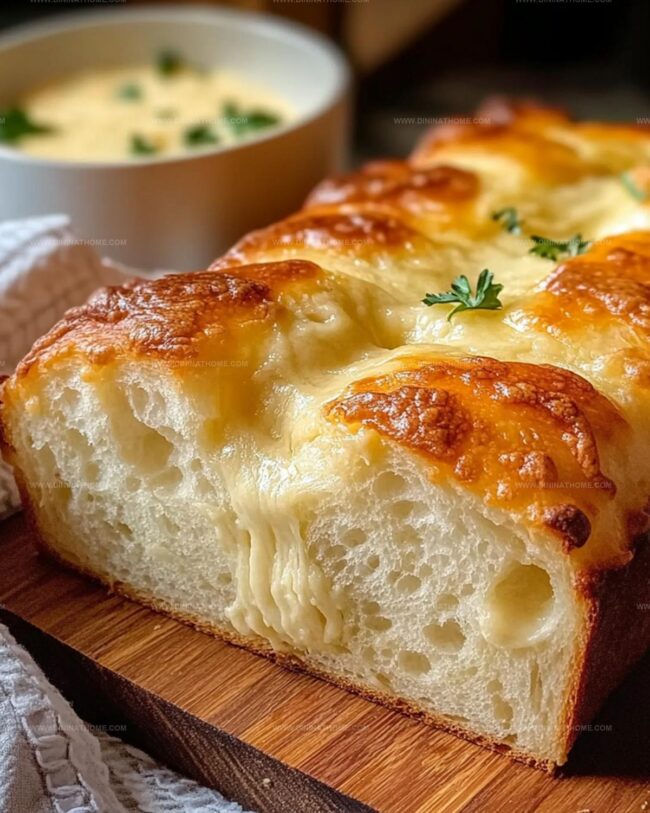
You’ll know it’s ready when the top turns a gorgeous golden brown and tapping the bottom produces a hollow, satisfying sound.
Step 9: Cool and Enjoy
Remove the bread from the oven and let it cool completely on a wire rack.
This patience allows the interior to set perfectly.
Slice, serve, and savor your homemade bread!
Bread-Making Tips for Soft Homemade Loaves
Ensure water is warm (110-115°F) to help yeast activate without killing it, creating a frothy mixture that guarantees soft, fluffy bread.
Knead dough until smooth and elastic, which develops gluten and creates that perfect chewy bread texture with a beautiful rise.
Place dough in a draft-free, warm spot around 80-85°F to help it rise consistently, using a slightly damp cloth to prevent surface drying.
Tap the bottom of the bread – a hollow sound indicates it’s fully baked, while golden-brown color signals perfect crust development.
Wrap cooled bread in a clean kitchen towel or store in an airtight container to maintain freshness and prevent quick staleness.
Store Homemade White Bread Properly
Pairing Ideas for Homemade White Bread
White Bread Baking Style Tweaks
FAQs
Rising twice helps develop better flavor and texture. The first rise allows yeast to create air pockets, while the second rise ensures a lighter, more even loaf with improved structure.
If your yeast mixture becomes frothy and bubbly within 10 minutes after mixing with warm water and sugar, it means the yeast is alive and ready to help your bread rise. If no bubbles form, your yeast might be old or inactive.
Under-kneading results in dense, heavy bread because gluten hasn’t developed properly. Over-kneading makes bread tough and chewy as gluten becomes too tight and breaks down the dough’s structure. Aim for 6-8 minutes of smooth, consistent kneading.
Yes! Tap the bottom of the bread – if it sounds hollow, your bread is fully baked. A golden brown top and a firm crust are also good indicators that your bread is done and ready to enjoy.
Print
Homemade White Bread Recipe
- Total Time: 45 minutes
- Yield: 12 1x
Description
Warm, freshly baked homemade white bread emerges from your oven with golden-brown perfection and irresistible aroma. Simple ingredients blend into a comforting classic that wraps your kitchen in wholesome charm, inviting hungry souls to savor each tender slice.
Ingredients
Bread Base:
- 3 cups all-purpose flour
- 1 cup warm water
- 1 package (2 1/4 teaspoons) active dry yeast
Sweeteners and Enhancers:
- 1/4 cup granulated sugar
Seasoning:
- 1 teaspoon salt
Instructions
- Activate the yeast by combining it with warm water and a touch of sugar in a mixing vessel, allowing the mixture to foam and become bubbly for approximately 10 minutes.
- Incorporate salt into the activated yeast solution, then methodically blend in flour, integrating each portion thoroughly to create a cohesive dough mixture.
- Transfer the nascent dough onto a lightly dusted work surface, then engage in a rhythmic kneading process, working the dough with firm, consistent motions until it transforms into a smooth, resilient texture.
- Nestle the prepared dough into a generously greased receptacle, drape with a clean kitchen cloth, and position in a draft-free, warm environment to encourage expansion until the volume doubles.
- Gently deflate the risen dough with a controlled press, then artfully shape it into a loaf-like configuration, carefully positioning it within a prepared baking pan.
- Allow the shaped dough a second rising period, covering it to retain moisture, until it achieves a noticeably increased volume.
- Calibrate the oven to 350°F, ensuring precise temperature for optimal baking conditions.
- Slide the risen loaf into the preheated oven, baking until the exterior develops a rich, golden-brown complexion and produces a distinctive hollow sound when tapped.
- Extract the freshly baked bread, allowing it to cool completely on a wire rack before slicing to preserve its delicate internal structure.
Notes
- Choose a precise yeast measurement to ensure proper bread rising and texture.
- Maintain water temperature between 100-110°F to activate yeast without killing it.
- Knead dough thoroughly to develop gluten, creating a softer, more structured bread.
- For gluten-free variation, substitute all-purpose flour with a blend of rice, almond, and xanthan gum.
- Prep Time: 15 minutes
- Cook Time: 30 minutes
- Category: Breakfast, Lunch, Snacks
- Method: Baking
- Cuisine: American
Nutrition
- Serving Size: 12
- Calories: 150
- Sugar: 6 g
- Sodium: 180 mg
- Fat: 0.5 g
- Saturated Fat: 0.1 g
- Unsaturated Fat: 0.4 g
- Trans Fat: 0 g
- Carbohydrates: 30 g
- Fiber: 1 g
- Protein: 3 g
- Cholesterol: 0 mg
James Walker
Lead Recipe Developer & Culinary Educator
Expertise
Southern Cuisine & Farm-to-Table Cooking, Recipe Development & Testing, Culinary Education & Instruction
Education
School: Auguste Escoffier School of Culinary Arts
Program: Diploma in Culinary Arts and Operations
Focus: Comprehensive training in classical and modern culinary techniques, kitchen operations, and farm-to-table practices.
James didn’t learn cooking from a TV show, he learned it from busy kitchens, family gatherings, and long afternoons spent testing recipes the hard way.
After training at the Auguste Escoffier School of Culinary Arts, he brought his love for real, down-to-earth food to every dish he makes.
At Dining At Home, James loves building recipes that feel familiar but still have something special, like adding a twist to a classic or making a slow Sunday dinner feel brand new.
When he’s not in the kitchen, you’ll probably find him swapping garden tips at the farmers’ market or teaching his daughter how to flip pancakes without a mess (almost).