
Sizzling Homemade Grilled Pizza Recipe: Backyard Magic On A Plate
Crafting a homemade grilled pizza sparks culinary excitement in my kitchen every single time.
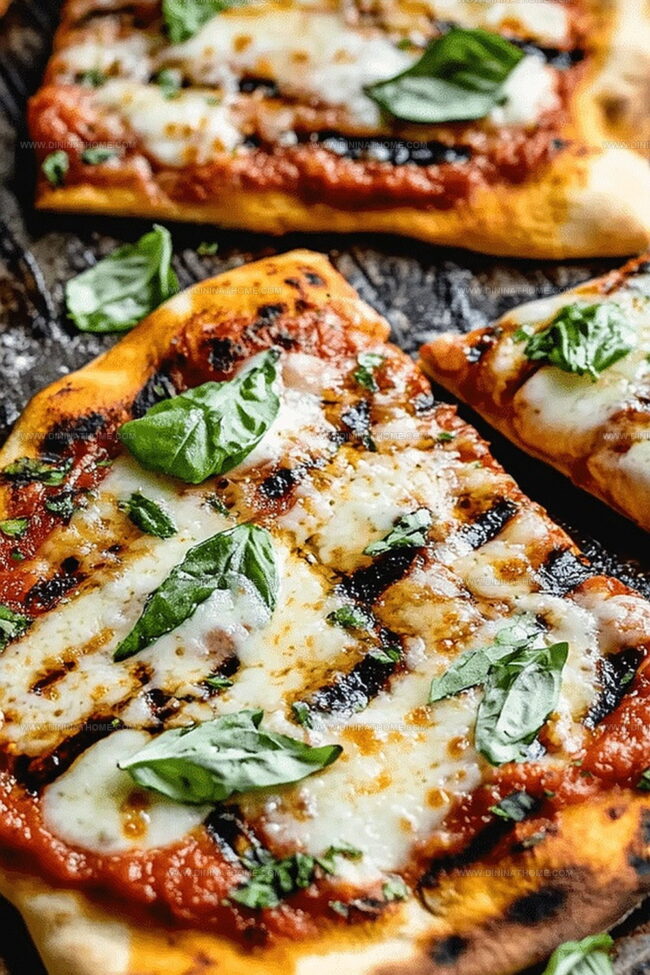
Flames dance beneath crispy dough, creating magical charred edges that store-bought versions never achieve.
Summer evenings call for outdoor cooking adventures with simple ingredients.
Neighbors always peek over the fence, curious about the enticing aromas wafting through backyard spaces.
Unexpected techniques turn ordinary pizza-making into an interactive grilling experience you’ll absolutely love.
Assembling fresh toppings becomes a playful ritual that connects people around delicious shared meals.
This recipe promises to revolutionize your cooking approach and inspire weekend gatherings.
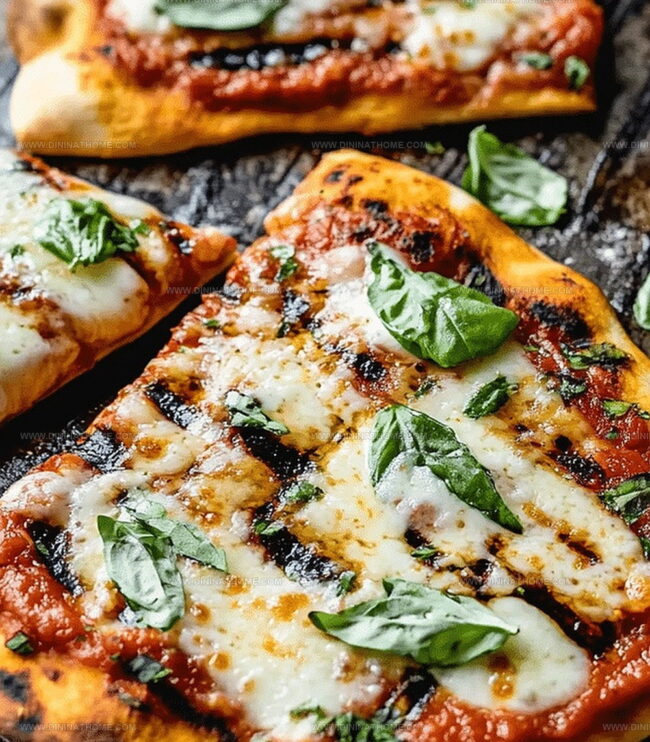
Homemade Grilled Pizza That Brings Smoky Crust To Life
Boost Your Cooking Confidence: Master a Gourmet Technique that Makes Homemade Pizza Incredibly Easy
Elements In A Homemade Grilled Pizza
Pizza Base:Pizza Sauce and Cheese:Pizza Toppings:Homemade Grilled Pizza Process
Step 1: Activate Yeast Mixture
Create a frothy yeast base by mixing warm water and sugar.
Sprinkle yeast into the liquid and allow it to sit until bubbles form and the mixture becomes foamy.
Step 2: Develop Pizza Dough
Combine flour and salt in a large mixing bowl.
Pour the activated yeast mixture into the dry ingredients.
Knead the dough thoroughly until it becomes smooth and elastic, about 8-10 minutes.
The texture should be soft and pliable.
Step 3: Allow Dough to Expand
Cover the dough with a clean kitchen towel or plastic wrap.
Place in a warm location and let it rise until the volume doubles, typically 1-2 hours.
The dough will become puffy and soft.
Step 4: Prepare Dough Rounds
Punch down the risen dough and divide it into individual portions.
Roll each portion into circular shapes using a rolling pin.
Aim for thin, even pizza crusts.
Step 5: Warm the Grilling Surface
Preheat the grill to medium-high heat.
Clean the grates and lightly oil them to prevent sticking.
Step 6: Grill the Pizza Base
Brush one side of the dough with olive oil.
Carefully place the oiled side onto the hot grill.
Cook for 2-3 minutes until light grill marks appear and the bottom becomes crispy.
Step 7: Layer Delicious Toppings
Quickly spread marinara sauce on the grilled side of the dough.
Sprinkle cheese and add desired toppings.
Close the grill lid and cook until the cheese melts and toppings heat through.
Step 8: Serve and Savor
Remove the pizza from the grill using a large spatula.
Transfer to a cutting board, slice into wedges, and serve immediately while hot and crispy.
Grilled Pizza – Handy Advice
Grilled Pizza Tastes Fresh Again When Stored Properly
Good Choices with Homemade Grilled Pizza
Breakfast Pizza Edits
FAQs
Yes, you can prepare the dough up to 24 hours in advance. After kneading, cover and refrigerate. Just let it come to room temperature before shaping and grilling.
Both gas and charcoal grills work great. The key is maintaining a medium-high heat around 400-450°F for perfect crust and crispy edges.
Brush the dough with olive oil and ensure the grill grates are clean and lightly oiled. This creates a non-stick surface and helps achieve beautiful grill marks.
Absolutely! Store-bought pizza dough works well. Just bring it to room temperature and follow the same grilling techniques for a delicious result.
Print
Homemade Grilled Pizza Recipe
- Total Time: 1 hour 45 minutes
- Yield: 4 1x
Description
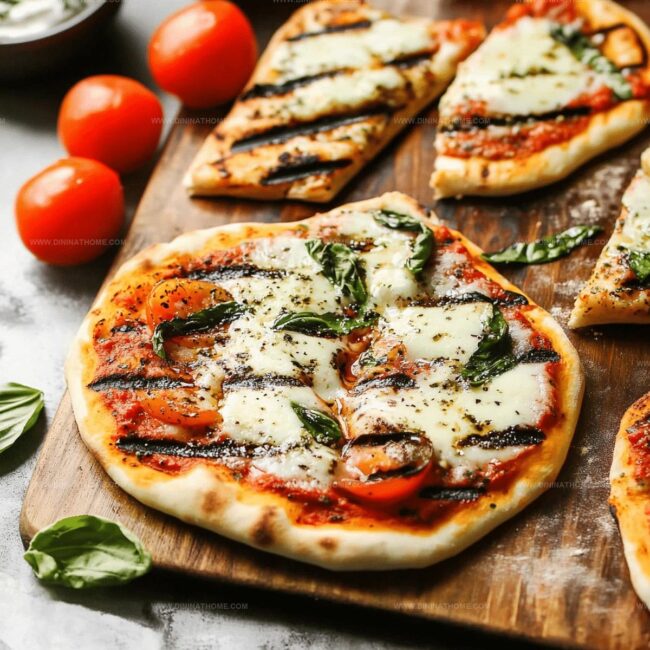
Delightful homemade grilled pizza brings Italian charm right to backyard cookouts with crispy crusts and melted cheese. Grill masters and home cooks alike can savor this simple yet impressive dish that turns ordinary ingredients into a memorable summer meal you’ll crave again and again.
Ingredients
Main Ingredients:
- 4 cups all-purpose flour
- 3 cups mozzarella cheese
- 1/2 cup pepperoni
Dough Components:
- 1 1/4 cups warm water (95–110 degrees F / 35–43 degrees C)
- 3 tablespoons sugar
- 2 tablespoons active dry yeast
- 1 teaspoon salt
- 1/2 cup olive oil (for brushing)
Sauce and Additional Topping:
- 1 cup marinara sauce
Instructions
- Activate the yeast by dissolving sugar in warm water, then sprinkle yeast on top and allow to bloom until foamy and fragrant.
- Create a flour mixture with salt, forming a well in the center to incorporate the activated yeast mixture. Gently knead the dough until it transforms into a smooth, elastic texture.
- Transfer the dough to a lightly oiled bowl, cover with a clean kitchen towel, and let it rest in a warm environment until it expands to double its original volume.
- Punch down the risen dough and divide it into individual portions for personal-sized pizzas.
- Roll out each dough section into thin, uniform circles using gentle, outward motions with a rolling pin.
- Prepare the grill by heating it to medium-high temperature, ensuring even heat distribution across the cooking surface.
- Brush one side of each dough round with olive oil to prevent sticking and enhance flavor during grilling.
- Carefully place the oiled dough directly onto the grill grates, cooking for 2-3 minutes until distinct grill marks appear and the surface becomes lightly crisp.
- Quickly flip the dough and immediately spread marinara sauce, sprinkle cheese, and arrange selected toppings across the surface.
- Close the grill lid to create an oven-like environment, allowing the cheese to melt and toppings to heat through.
- Remove the grilled pizza when the cheese is perfectly melted and the crust achieves a golden-brown crispness.
- Transfer to a cutting board, slice into wedges, and serve immediately while hot and fresh.
Notes
- Ensure water temperature is lukewarm (around 110°F) to activate yeast without killing it, creating perfect dough rise.
- Preheat grill thoroughly to prevent sticking and achieve those desirable crispy grill marks on pizza crust.
- Keep toppings light and pre-cooked to prevent soggy centers and ensure quick melting during grilling process.
- Consider alternative flour options like whole wheat or gluten-free for dietary modifications without compromising texture.
- Prep Time: 1 hour 30 minutes
- Cook Time: 15 minutes
- Category: Lunch, Dinner, Snacks
- Method: Grilling
- Cuisine: Italian
Nutrition
- Serving Size: 4
- Calories: 550
- Sugar: 6 g
- Sodium: 800 mg
- Fat: 20 g
- Saturated Fat: 10 g
- Unsaturated Fat: 8 g
- Trans Fat: 0 g
- Carbohydrates: 70 g
- Fiber: 2 g
- Protein: 22 g
- Cholesterol: 40 mg
Emily Harper
Nutrition Consultant & Recipe Analyst
Expertise
Healthy Recipe Modification, Nutritional Analysis & Meal Planning, Global Cuisine & Dietary Adaptations
Education
School: French Pastry School, Chicago, IL
Program: L’Art de la Pâtisserie
Focus: Intensive training in traditional French pastry techniques, baking theory, and confectionery arts.
Emily’s journey started in a pastry kitchen but took a detour into the world of health and flavor science.
Graduating from the French Pastry School and studying nutrition opened her eyes to a new mission: making healthy food taste like something you’d actually crave.
At Dining At Home, Emily’s the go-to for smart, feel-good recipes that don’t trade flavor for nutrition.
She’s all about adding a fresh spin on old favorites and finding small ways to make everyday meals a little brighter.
Outside of the kitchen, Emily is most at home walking forest trails, testing plant-based recipes, or sharing a picnic under a wide-open sky.