
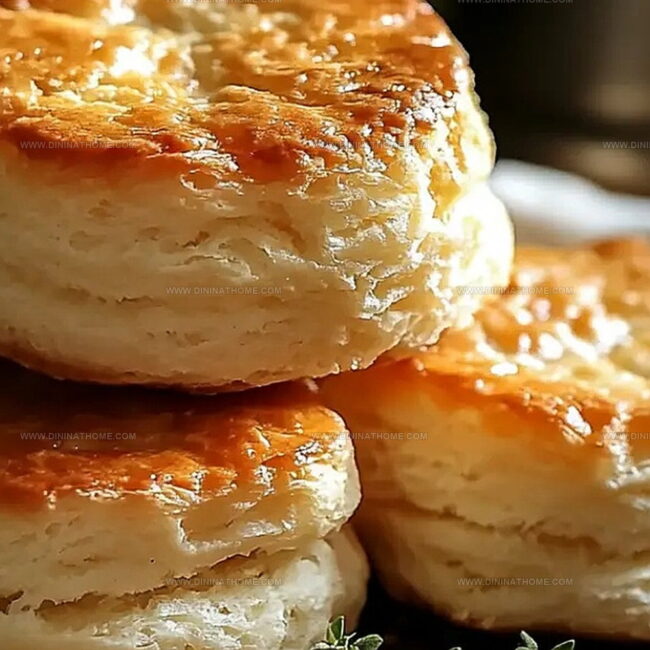
Fluffy Homemade Angel Biscuits Recipe: Heavenly Morning Magic
Crafting delectable homemade angel biscuits transports you to a world of buttery, cloud-like comfort.
Soft layers promise pure breakfast bliss with minimal effort.
Southern kitchens cherish these magical treats passed through generations.
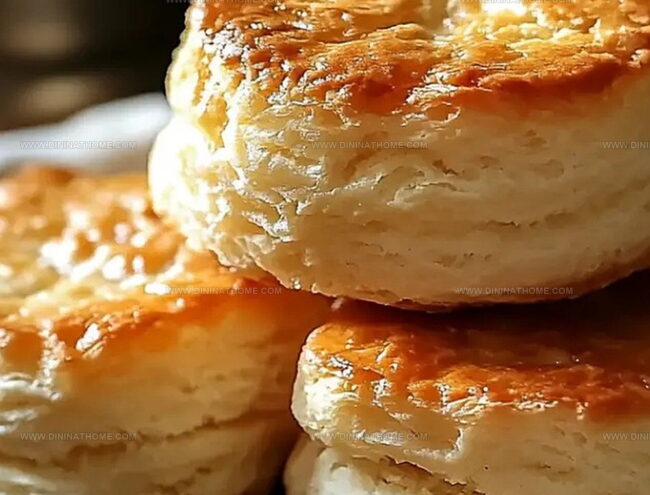
Fluffy textures melt effortlessly on your tongue, creating instant joy.
Simple ingredients combine into something extraordinary without complicated techniques.
A pinch of yeast gives these biscuits their signature rise and tender crumb.
You’ll adore how quickly these delightful morsels come together in your own kitchen.
One bite promises to make these your new weekend breakfast tradition.
Angel Biscuits That Bake Up Soft and Fluffy
Unlock Versatile Baking Magic: Craft Irresistible Angel Biscuits with These Winning Features
Homemade Angel Biscuits Ingredient Guide
Leavening Ingredients:Flour and Dry Ingredients:Fat and Moisture Ingredients:Angel Biscuit Instructions for Fluffy Layers
Step 1: Awaken the Yeast
Sprinkle yeast into warm water with a touch of sugar.
Watch the mixture transform into a bubbly, frothy potion that signals the magic is about to begin.
Step 2: Create the Flour Foundation
Combine flour, sugar, and salt in a spacious mixing bowl.
This dry blend will be the canvas for your culinary masterpiece.
Step 3: Work the Fat into Flakiness
Dive into the bowl with cold butter and shortening.
Use your fingertips or a pastry blender to break down the fats until the mixture looks like coarse breadcrumbs.
This is where the biscuits get their melt-in-your-mouth texture.
Step 4: Bring the Dough to Life
Pour in the activated yeast and buttermilk.
Gently stir until the ingredients just come together.
Don’t overwork the dough – let it remain slightly shaggy and mysterious.
Step 5: Rest and Develop Flavor
Wrap the bowl in plastic and tuck it into the refrigerator.
Let the dough chill and develop its complex flavors for at least 2 hours or up to 5 days.
Step 6: Shape the Biscuits
Preheat the oven to a toasty 400°F.
Dust your work surface with flour and turn out the dough.
Knead it gently 3-4 times, adding a sprinkle of flour if it feels sticky.
Roll the dough to a generous 3/4-inch thickness.
Fold it over and roll again for extra layers of flakiness.
Use a cookie cutter to transform the dough into perfect circular biscuits.
Step 7: Prepare for Baking
Choose your baking vessel:Nestle the biscuits close together so they rise and touch.
Brush the tops with melted butter for a golden, glossy finish.
Step 8: Bake to Perfection
Slide the biscuits into the oven.
Bake for 15-20 minutes until they turn a gorgeous golden brown.
Step 9: Final Butter Flourish
Give the hot biscuits a final brush of melted butter.
This adds shine and an extra layer of rich flavor.
Angel Biscuit Tips for Soft, Fluffy Layers
Store Homemade Angel Biscuits
Savory Complements to Homemade Angel Biscuits
Angel Biscuits with Dough Adjustments
FAQs
The combination creates a lighter, fluffier texture with both chemical and biological leavening, ensuring a soft, tender biscuit that rises beautifully.
You can substitute buttermilk with regular milk mixed with a tablespoon of vinegar or lemon juice. Let it sit for 5 minutes before using to create a similar tangy, acidic effect.
Check for frothiness after 5 minutes. If the mixture doesn’t become foamy and increase in volume, your yeast is likely dead and won’t work properly in the recipe.
Yes, chilling develops flavor and makes the dough easier to handle. It also allows the gluten to relax, resulting in more tender biscuits.
Print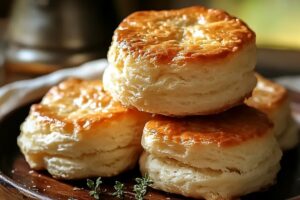
Homemade Angel Biscuits Recipe
- Total Time: 35 minutes
- Yield: 12 1x
Description
Delicate homemade angel biscuits float like clouds from Southern kitchens, promising pure comfort. Southern hospitality meets buttery perfection, inviting you to savor each heavenly, flaky bite of pure culinary joy.
Ingredients
Main Ingredients:
- 5 1/2 cups Lilly white yeast flour
- 2 cups buttermilk
- 1/2 cup cold butter, cubed
- 1/2 cup cold shortening, cubed
Yeast and Sugar:
- 1 (1/4 ounce) active dry yeast
- 1/4 cup sugar
- 1 teaspoon sugar
- 1/2 cup hot water (100 to 110 degrees)
Additional Ingredients:
- 3/4 teaspoon salt
- 1/4 cup melted butter (for brushing)
Instructions
- Activate the yeast by dissolving it in warm water with a pinch of sugar, allowing the mixture to bloom and become foamy for about 5 minutes.
- Sift together the dry ingredients in a spacious mixing bowl, creating a light and airy foundation for the biscuits.
- Transform the cold butter and shortening into a crumbly texture by methodically cutting them into the flour mixture using a pastry blender or two forks.
- Incorporate the frothy yeast mixture and buttermilk into the dry ingredients, gently stirring until the dough reaches a cohesive, moistened consistency.
- Wrap the dough securely and nestle it in the refrigerator for a minimum of 2 hours, allowing the flavors to develop and the gluten to relax.
- Prepare the baking environment by preheating the oven to 400°F (200°C) and creating a lightly floured workspace.
- Liberate the chilled dough onto the floured surface, kneading it gently 3-4 times to ensure smooth integration. Adjust with a sprinkle of flour if the dough feels too tacky.
- Roll the dough into a generous 3/4-inch thick circle, then fold it in half and roll again to maintain an even thickness.
- Craft the biscuits by pressing a cookie cutter through the dough, creating uniform rounds with clean edges.
- Arrange the cut biscuits in a seasoned cast iron skillet or on a parchment-lined baking sheet, positioning them so they barely touch, which encourages rising.
- Lavish the biscuit tops with a brushing of melted butter, creating a golden promise of deliciousness.
- Slide the skillet or baking sheet into the preheated oven, baking for 15-20 minutes until the biscuits transform into a rich, amber-hued delicacy.
- Complete the culinary journey by painting the freshly baked biscuits with a final layer of melted butter, ensuring a lustrous and inviting finish.
Notes
- Activate the yeast carefully by using warm water between 100-110°F to ensure proper activation without killing the microorganisms.
- Chill the dough thoroughly to develop complex flavor profiles and enhance the texture of the biscuits, allowing gluten to relax and creating a more tender crumb.
- Keep butter and shortening extremely cold when cutting into the flour mixture to create flaky, layered biscuits that separate beautifully when pulled apart.
- Experiment with gluten-free flour blends for those with wheat sensitivities, using a 1:1 replacement ratio to maintain similar texture and richness.
- Prep Time: 15 minutes
- Cook Time: 20 minutes
- Category: Breakfast, Snacks, Appetizer
- Method: Baking
- Cuisine: American
Nutrition
- Serving Size: 12
- Calories: 260
- Sugar: 6 g
- Sodium: 200 mg
- Fat: 14 g
- Saturated Fat: 8 g
- Unsaturated Fat: 4 g
- Trans Fat: 0 g
- Carbohydrates: 32 g
- Fiber: 1 g
- Protein: 4 g
- Cholesterol: 30 mg
James Walker
Lead Recipe Developer & Culinary Educator
Expertise
Southern Cuisine & Farm-to-Table Cooking, Recipe Development & Testing, Culinary Education & Instruction
Education
School: Auguste Escoffier School of Culinary Arts
Program: Diploma in Culinary Arts and Operations
Focus: Comprehensive training in classical and modern culinary techniques, kitchen operations, and farm-to-table practices.
James didn’t learn cooking from a TV show, he learned it from busy kitchens, family gatherings, and long afternoons spent testing recipes the hard way.
After training at the Auguste Escoffier School of Culinary Arts, he brought his love for real, down-to-earth food to every dish he makes.
At Dining At Home, James loves building recipes that feel familiar but still have something special, like adding a twist to a classic or making a slow Sunday dinner feel brand new.
When he’s not in the kitchen, you’ll probably find him swapping garden tips at the farmers’ market or teaching his daughter how to flip pancakes without a mess (almost).