
Easy Homemade 4 Ingredient Ricotta Recipe: Silky & Fresh Magic
Crafting a silky homemade ricotta recipe requires minimal effort and maximum deliciousness.
Cheese lovers understand the magic of fresh ingredients transforming into something spectacular.
Simple pantry staples become a creamy culinary marvel with just four components.
Milk, salt, and acid work together to create something extraordinary.
Kitchen novices can master this technique quickly and confidently.
Professional chefs and home cooks alike appreciate the simplicity of this approach.
Each spoonful promises incredible texture and rich, smooth flavor that store-bought versions can’t match.
Jump into this delightful recipe and experience fresh ricotta like never before.
Ricotta Made With Only Four Simple Ingredients

Homemade Ricotta Using 4 Simple Ingredients
Dairy Base:Seasoning:Curdling Agent:Homemade Ricotta in Just Four Ingredients
Step 1: Warm the Dairy Blend
In a medium saucepan, combine whole milk, heavy cream, and salt.
Heat the mixture over medium heat, gently stirring occasionally.
Watch for the temperature to reach approximately 190°F, which is just shy of boiling.
The dairy should look smooth and start to steam slightly.
Step 2: Create Cheese Curds
Take the saucepan off the heat source.
Slowly pour in fresh lemon juice while softly stirring.
Allow the mixture to rest completely undisturbed for 5-10 minutes.
During this time, magical cheese curds will begin separating from the liquid whey.
Step 3: Strain the Fresh Cheese
Prepare a fine-mesh strainer by draping clean cheesecloth inside.
Position the strainer over a large bowl to catch the draining liquid.
Carefully transfer the entire curd mixture into the lined strainer.
Let gravity do its work as the whey begins to separate.
Step 4: Achieve Perfect Texture
Allow the ricotta to drain naturally.
For a creamier spread, drain for 15 minutes.
If you prefer a firmer cheese, let it strain up to 60 minutes.
The longer it drains, the thicker and more concentrated the ricotta becomes.
Step 5: Store and Enjoy
Move the freshly made ricotta into an airtight container.
Refrigerate immediately and consume within 3-5 days for maximum flavor and freshness.
Your homemade ricotta is now ready to elevate any dish from pasta to desserts.
Ricotta in 4 Ingredients? Tips to Make It Creamy Every Time

Select fresh, full-fat milk and cream for the richest, most creamy ricotta texture and flavor.
Adjust straining duration to achieve your preferred consistency – shorter for a creamier spread, longer for a firmer cheese.
Use a reliable digital thermometer to hit the exact 190°F for perfect curd formation and smooth texture.
Swap lemon juice for white vinegar or apple cider vinegar to create subtle variations in taste and tanginess.
Keep homemade ricotta in an airtight container and consume within 3-5 days for optimal freshness and food safety.
Chill 4 Ingredient Ricotta for Later
What Goes with Homemade 4-Ingredient Ricotta
4-Ingredient Ricotta Adjustments
FAQs
Whole milk provides the richest flavor and creamiest texture. You can also use a combination of whole milk and cream for extra richness.
Yes, white vinegar works perfectly as an alternative. Both lemon juice and vinegar help separate the curds and whey effectively.
The mixture should look separated with clear, white curds floating in a yellowish liquid (whey). When you strain it, the curds should look soft and fluffy.
Absolutely! Homemade ricotta tastes fresher, has a more delicate texture, and contains no preservatives. You control the ingredients and quality.
Print
Homemade 4 Ingredient Ricotta Recipe
- Total Time: 25 minutes
- Yield: 2 1x
Description
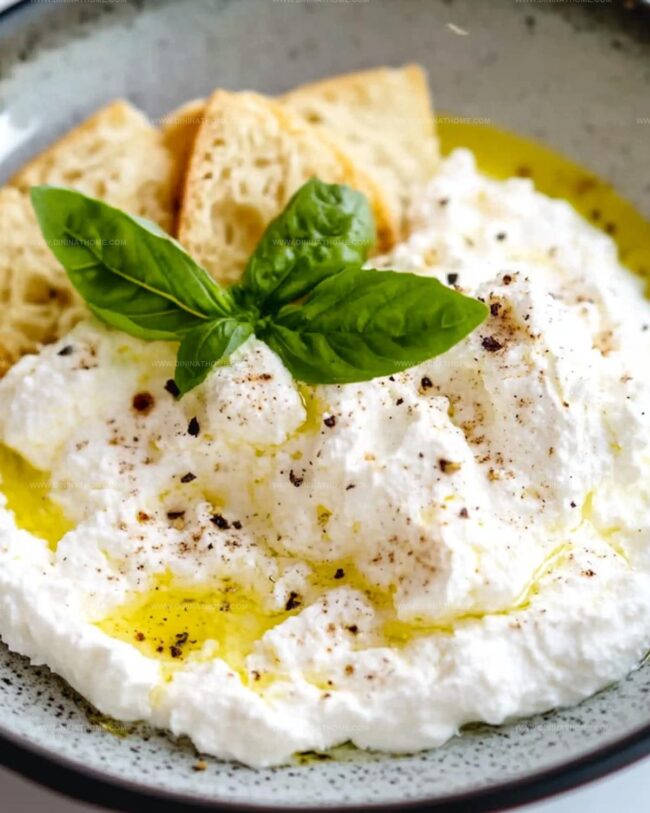
Creamy homemade ricotta cheese brings Italian culinary magic to your kitchen with minimal effort and maximum flavor. Simple ingredients blend seamlessly to create a luxurious spreadable delight you can proudly serve at any gathering.
Ingredients
Primary Ingredients:
- 4 cups whole milk
- 1 cup heavy cream
Seasoning:
- 1/2 teaspoon salt
Acidic Ingredient:
- 3 tablespoons lemon juice (or white vinegar)
Instructions
- Assemble whole milk, heavy cream, salt, and fresh lemon juice in a medium saucepan, ensuring all ingredients are at room temperature for optimal curd formation.
- Gradually heat the milk and cream mixture over medium flame, gently stirring to prevent scorching, until the liquid reaches a precise temperature of 190°F, just shy of boiling point.
- Immediately remove the pan from heat and introduce fresh lemon juice, stirring delicately to initiate protein separation and curd development.
- Allow the mixture to rest undisturbed for 5-10 minutes, enabling natural coagulation and distinct curd formation.
- Prepare a fine-mesh strainer with several layers of clean cheesecloth, positioning it securely over a spacious collection bowl.
- Carefully transfer the warm, separated mixture into the lined strainer, permitting the liquid whey to drain naturally without disturbing the delicate curds.
- Monitor the draining process, adjusting the duration between 15-60 minutes depending on desired ricotta texture – shorter time yields creamier consistency, longer time results in firmer cheese.
- Once drained to preferred consistency, gently transfer the fresh ricotta to a sealed container, ensuring minimal handling to preserve delicate texture.
- Refrigerate immediately and consume within 3-5 days for optimal flavor and freshness.
Notes
- Experimenting with milk types can create different ricotta textures, like using goat or sheep milk for unique flavor profiles.
- Straining time directly impacts ricotta’s consistency, so watch closely for your preferred thickness – shorter drain time means creamier cheese.
- Leftover whey works perfectly in baking recipes like bread or pancakes, reducing kitchen waste and adding subtle tangy richness.
- Adding fresh herbs like basil or chives during final mixing can elevate the ricotta’s flavor, making it versatile for appetizers or spreads.
- Prep Time: 5 minutes
- Cook Time: 20 minutes
- Category: Appetizer, Snacks
- Method: Simmering
- Cuisine: Italian
Nutrition
- Serving Size: 2
- Calories: 600
- Sugar: 0 g
- Sodium: 115 mg
- Fat: 50 g
- Saturated Fat: 30 g
- Unsaturated Fat: 18 g
- Trans Fat: 0 g
- Carbohydrates: 4 g
- Fiber: 0 g
- Protein: 10 g
- Cholesterol: 150 mg
James Walker
Lead Recipe Developer & Culinary Educator
Expertise
Southern Cuisine & Farm-to-Table Cooking, Recipe Development & Testing, Culinary Education & Instruction
Education
School: Auguste Escoffier School of Culinary Arts
Program: Diploma in Culinary Arts and Operations
Focus: Comprehensive training in classical and modern culinary techniques, kitchen operations, and farm-to-table practices.
James didn’t learn cooking from a TV show, he learned it from busy kitchens, family gatherings, and long afternoons spent testing recipes the hard way.
After training at the Auguste Escoffier School of Culinary Arts, he brought his love for real, down-to-earth food to every dish he makes.
At Dining At Home, James loves building recipes that feel familiar but still have something special, like adding a twist to a classic or making a slow Sunday dinner feel brand new.
When he’s not in the kitchen, you’ll probably find him swapping garden tips at the farmers’ market or teaching his daughter how to flip pancakes without a mess (almost).