
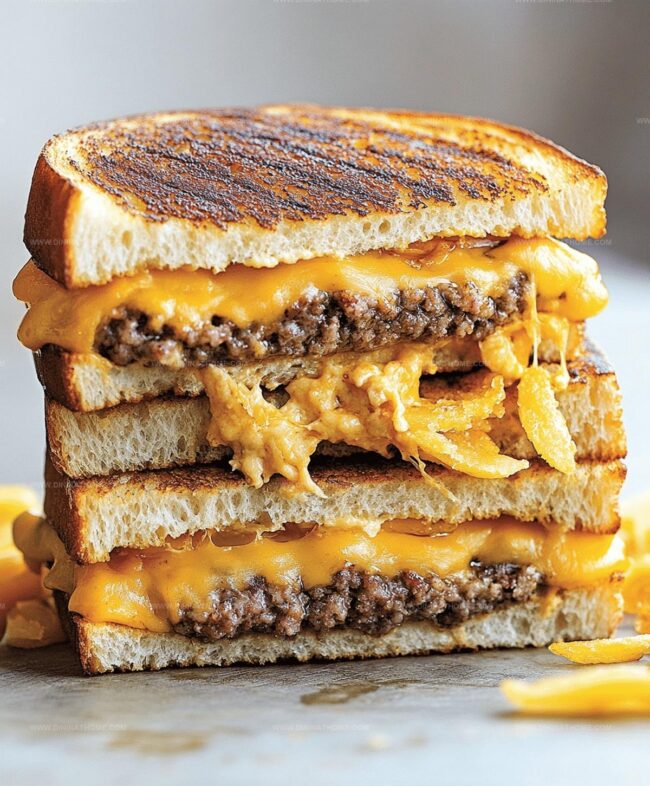
Sizzling Grilled Cheese Patty Melts Recipe for Cozy Comfort
Melted cheese and beef transform classic grilled sandwiches into mouthwatering patty melts that’ll make you smile.
Crispy bread hugs succulent seasoned meat with golden-brown edges.
Each bite delivers incredible flavor combinations that dance across your palate.
Comfort food meets gourmet goodness in this simple yet irresistible dish.
Weeknight dinners just got a serious upgrade with these hearty sandwiches.
Restaurant-quality results come straight from your own kitchen without complicated techniques.
Hungry?
This recipe promises to become your new favorite meal that everyone will request again and again.
Grilled Cheese Patty Melts Everyone Keeps Coming Back To

Patty Melts Grilled Cheese Base
Main Protein:Bread and Cheese:Aromatics and Binding:Grilled Cheese Patty Melts Prep Plan
Step 1: Prepare Beef Patties
Grab ground beef and shape into four hearty patties.
Sprinkle salt and pepper generously over each patty to enhance the flavor profile.
Step 2: Cook Beef Patties
Heat a skillet over medium temperature.
Place patties in the pan and cook thoroughly, ensuring each side gets a perfect golden-brown sear for 4-5 minutes.
Step 3: Caramelize Onions
In a separate pan, melt butter and add sliced onions.
Slowly cook onions, stirring occasionally, until they transform into a rich, sweet golden-brown delight, which takes around 10 minutes.
Step 4: Prepare Bread Bases
Take bread slices and butter one side completely.
Spread a layer of mayonnaise on the opposite side to create a crispy, tangy foundation.
Step 5: Layer Cheese and Meat
Place slices of cheddar and Swiss cheese on the bread.
Add a cooked beef patty and top with those luscious caramelized onions.
Step 6: Complete Sandwich Assembly
Crown the loaded slice with another bread slice, ensuring the buttered side faces outward.
Step 7: Grill to Perfection
Position the sandwich in a skillet over medium heat.
Grill until each side reaches a gorgeous golden-brown color, approximately 2-3 minutes per side.
Patty Melt Grilled Cheese – Toasting Tips That Help
How to Keep Patty Melts Fresh and Reheat Smoothly
Patty Melts With Cheese Side Picks
Grilled Cheese Patty Melts New Ways to Serve
FAQs
Ground beef with a fat content around 80/20 works best. The fat helps keep the patty juicy and flavorful during cooking.
It’s best to assemble and cook just before serving. Precooked patties and caramelized onions can be prepared in advance to save time.
Yes! Mayonnaise creates a crispy, golden exterior while butter adds rich flavor. This combo ensures a perfectly toasted sandwich with a delicious crunch.
Use a meat thermometer to check internal temperature. For ground beef, aim for 160°F to ensure food safety. When pressed, the patty should feel firm and have no pink in the center.
Print
Grilled Cheese Patty Melts Recipe
- Total Time: 25 minutes
- Yield: 4 1x
Description
Comfort meets culinary magic in these irresistible grilled cheese patty melts, blending juicy beef patties with melted cheese between perfectly toasted bread. Crispy edges, gooey center, and bold flavors make this sandwich a hearty meal you’ll crave again and again.
Ingredients
Meat and Protein:
- 1 pound (454 grams) ground beef
- 4 slices cheddar cheese
- 4 slices Swiss cheese
Vegetables and Seasonings:
- 1 large onion, sliced
- Salt to taste
- Black pepper to taste
Bread and Spread:
- 8 slices rye bread
- 8 slices sourdough bread
- 2 tablespoons mayonnaise
- 2 tablespoons butter
Instructions
- Mold ground beef into uniform patties, generously seasoning with salt and pepper to enhance flavor profile.
- Heat skillet to medium temperature and cook patties thoroughly, ensuring even browning and reaching desired internal doneness, approximately 4-5 minutes per side.
- Simultaneously, prepare caramelized onions in a separate pan, slowly transforming raw onions into rich, golden-brown delicacies through patient, low-heat sautéing.
- Prepare bread slices by coating one side with softened butter, creating a crisp exterior, while spreading creamy mayonnaise on the opposite side for additional depth of flavor.
- Layer cheese varieties strategically – placing cheddar and Swiss on bread surfaces to ensure complete melting coverage.
- Carefully position cooked beef patties atop cheese layer, followed by a generous portion of caramelized onions to introduce complex, sweet undertones.
- Complete sandwich assembly by crowning with second bread slice, maintaining buttered exterior facing outward for optimal grilling potential.
- Transfer assembled sandwich to preheated skillet, grilling until exterior transforms into a golden-brown, crispy masterpiece, rotating midway to achieve balanced coloration and thorough cheese melting.
Notes
- Customize meat patties by mixing ground beef with finely chopped herbs like parsley or thyme for extra flavor depth.
- Control burger doneness by using a meat thermometer, aiming for 160°F internal temperature to ensure food safety.
- Select higher fat content ground beef (80/20) to maintain juiciness and prevent dry patty melts during cooking.
- Experiment with alternative cheese combinations like sharp provolone or smoky gouda for unique taste variations.
- Prep Time: 10 minutes
- Cook Time: 15 minutes
- Category: Lunch, Snacks
- Method: Frying
- Cuisine: American
Nutrition
- Serving Size: 4
- Calories: 550
- Sugar: 2 g
- Sodium: 800 mg
- Fat: 34 g
- Saturated Fat: 18 g
- Unsaturated Fat: 12 g
- Trans Fat: 0 g
- Carbohydrates: 40 g
- Fiber: 2 g
- Protein: 26 g
- Cholesterol: 90 mg
James Walker
Lead Recipe Developer & Culinary Educator
Expertise
Southern Cuisine & Farm-to-Table Cooking, Recipe Development & Testing, Culinary Education & Instruction
Education
School: Auguste Escoffier School of Culinary Arts
Program: Diploma in Culinary Arts and Operations
Focus: Comprehensive training in classical and modern culinary techniques, kitchen operations, and farm-to-table practices.
James didn’t learn cooking from a TV show, he learned it from busy kitchens, family gatherings, and long afternoons spent testing recipes the hard way.
After training at the Auguste Escoffier School of Culinary Arts, he brought his love for real, down-to-earth food to every dish he makes.
At Dining At Home, James loves building recipes that feel familiar but still have something special, like adding a twist to a classic or making a slow Sunday dinner feel brand new.
When he’s not in the kitchen, you’ll probably find him swapping garden tips at the farmers’ market or teaching his daughter how to flip pancakes without a mess (almost).