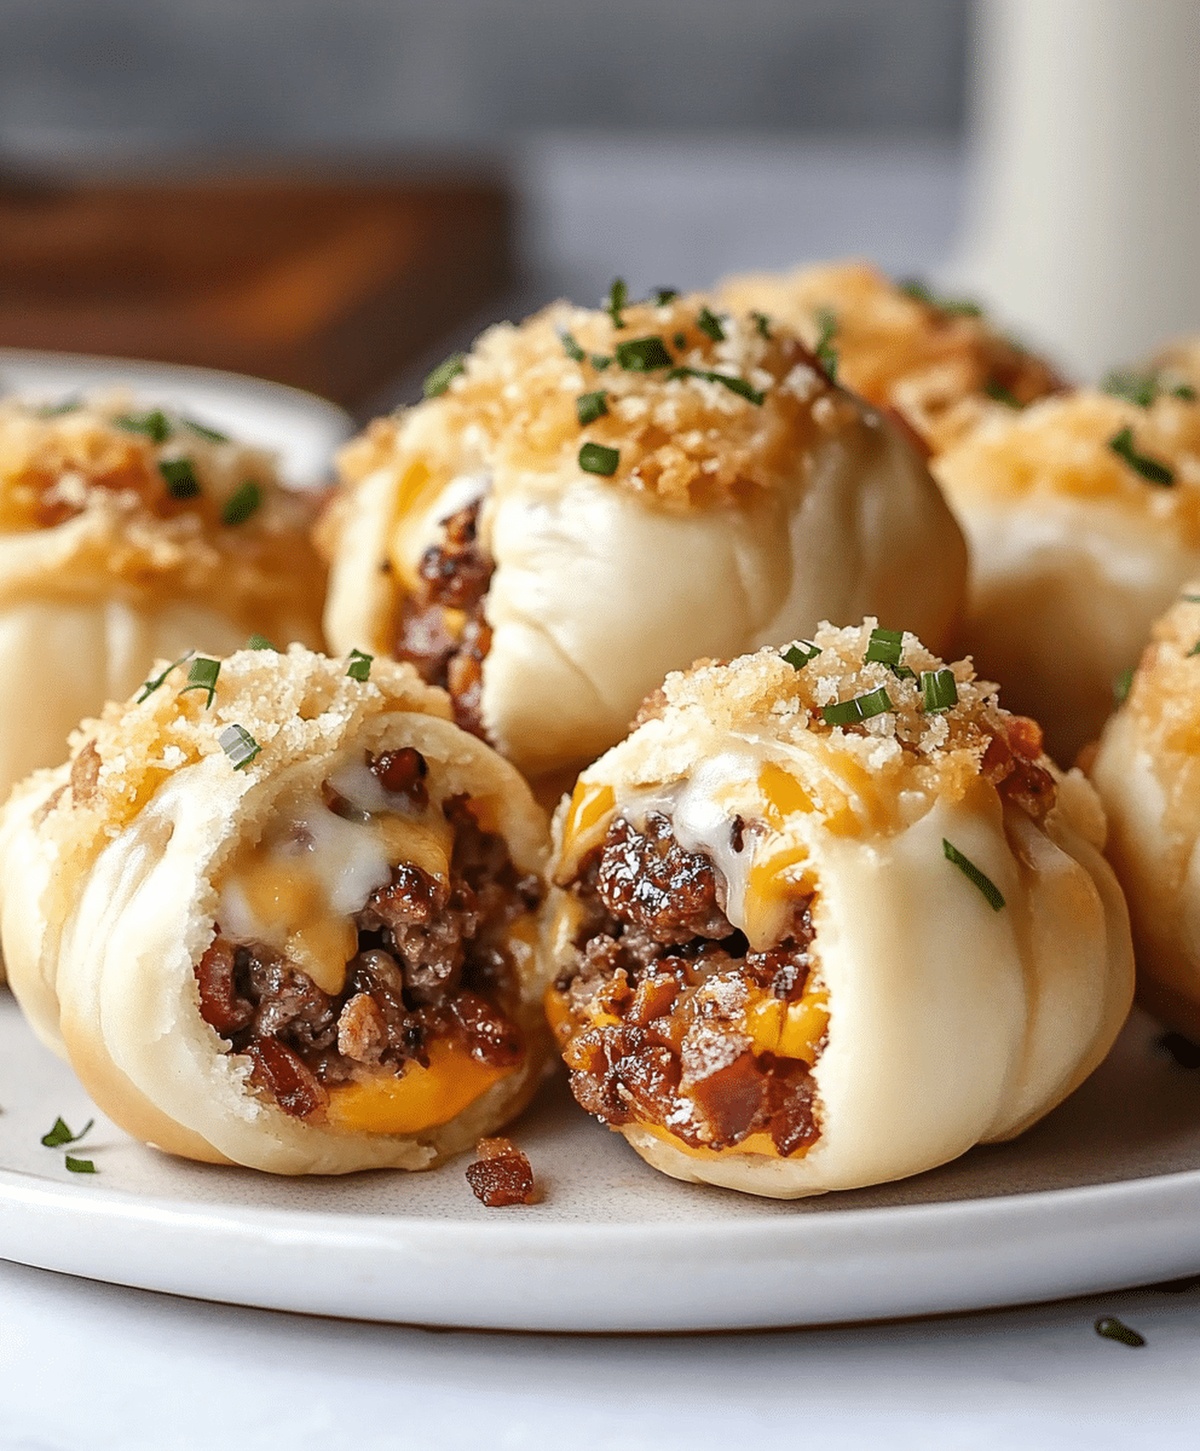
Sizzling Garlic Parmesan Bacon Cheeseburger Bombs Recipe
My obsession with garlic parmesan bacon cheeseburger bombs started during a late-night kitchen experiment.
Culinary curiosity led me to blend unexpected flavors into a single, irresistible bite.
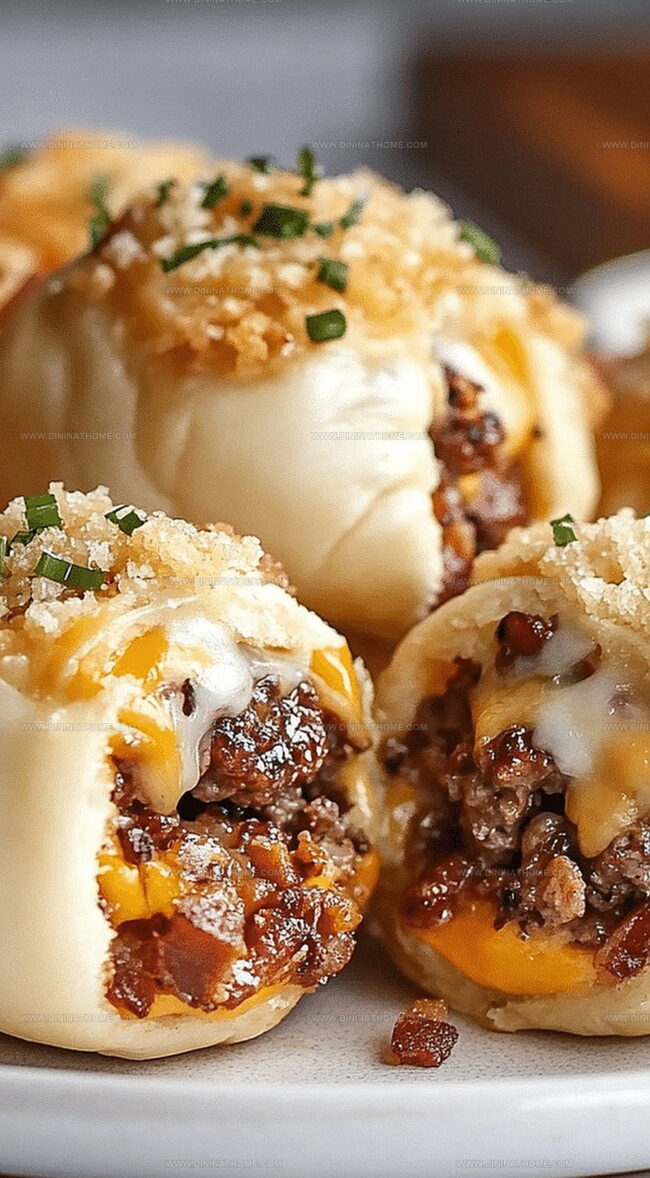
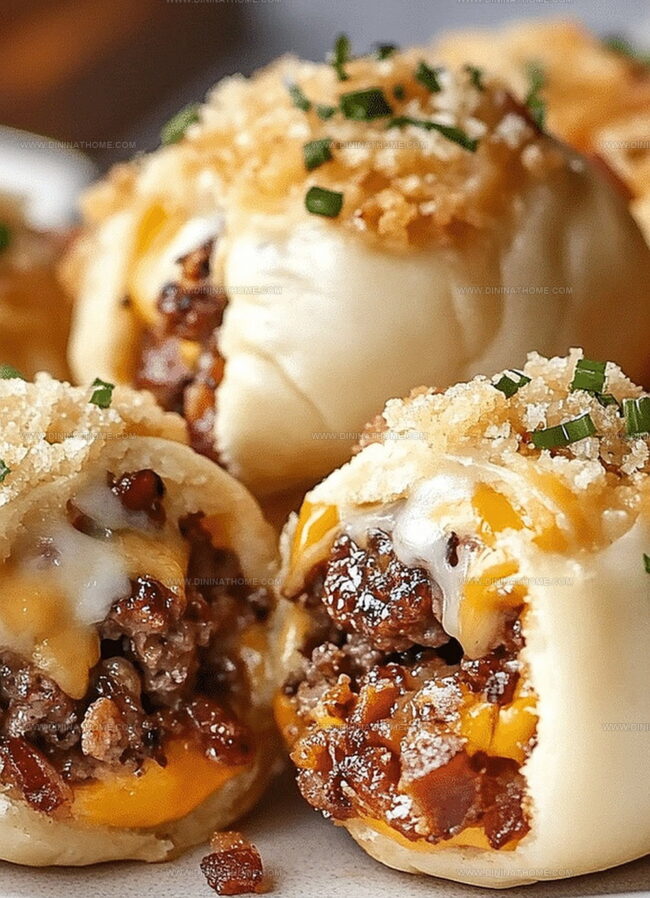
Crispy bacon, melted cheese, and aromatic garlic create a symphony of taste sensations.
Comfort food takes on a whole new meaning with these delectable morsels.
Each bomb promises an explosion of rich, savory goodness that will make you the star of any gathering.
Packed with bold ingredients and simple preparation, these handheld delights will transform your meal into a memorable experience.
Venture into this mouthwatering creation and watch everyone’s eyes light up with pure delight.
Garlic Bacon Cheeseburger Bombs You’ll Keep Making
Everything You Need For Garlic Parmesan Bacon Cheeseburger Bombs
Meat and Protein:Cheese and Dairy:Flavor Enhancers and Seasonings:Dough and Base:Finishing Touch:Simple Steps To Make Garlic Parmesan Bacon Cheeseburger Bombs

Step 1: Sizzle the Bacon
Fry bacon in a skillet over medium heat until it reaches a perfect crispy texture.
Transfer the crispy bacon to a paper towel-lined plate to drain excess grease.
Step 2: Brown the Beef
Heat a skillet over medium-high heat and add ground beef.
Sprinkle in minced garlic, salt, and pepper.
Cook the beef until it’s completely browned and no pink remains, breaking it into small crumbles as it cooks.
Step 3: Prepare the Dough
Grab your pre-made dough and roll it out on a clean surface.
Cut the dough into equal-sized squares or circles that will be large enough to hold the filling.
Step 4: Assemble the Bombs
Place a spoonful of browned beef in the center of each dough piece.
Top the beef with:Carefully fold the dough edges over the filling, pinching and sealing to create a complete pocket.
Step 5: Add the Finishing Touches
Brush the exterior of each bomb with melted butter.
Generously sprinkle grated Parmesan cheese over the top of each bomb.
Step 6: Bake to Golden Perfection
Preheat the oven to 375°F.
Arrange the bombs on a baking sheet lined with parchment paper.
Bake for 15-20 minutes until the bombs turn a beautiful golden brown color.
Let cool for a few minutes before serving.
Expert Advice For Cooking Garlic Parmesan Bacon Cheeseburger Bombs
How To Keep Garlic Parmesan Bacon Cheeseburger Bombs Fresh
Best Matches For Garlic Parmesan Bacon Cheeseburger Bombs
Creative Spins On Garlic Parmesan Bacon Cheeseburger Bombs
FAQs
Ground beef, bacon, cheese, dough (like pizza or biscuit dough), garlic, salt, pepper, butter, and Parmesan cheese are the key ingredients.
Yes, you can substitute ground beef with ground turkey, chicken, or even plant-based meat alternatives for a different flavor profile.
Absolutely! Kids usually love these cheesy, meaty bites and they’re easy to eat as a handheld snack or meal.
Make sure to seal the edges of the dough completely by pinching and folding them carefully, and avoid overfilling the dough pockets.
Print
Garlic Parmesan Bacon Cheeseburger Bombs Recipe
- Total Time: 40 minutes
- Yield: 4 1x
Description
Garlic parmesan bacon cheeseburger bombs deliver an explosive flavor journey through comfort cuisine. Melted cheese, crispy bacon, and savory garlic create an irresistible handheld experience you won’t want to miss.
Ingredients
Main Proteins:
- 1 pound ground beef
- 4 slices bacon
Cheeses:
- 1 cup cheddar cheese, shredded
- 1/4 cup parmesan cheese, grated
Additional Ingredients:
- 1 can biscuits or crescent dough
- 2 cloves garlic, minced
- 1/2 teaspoon salt
- 1/4 teaspoon black pepper
- 2 tablespoons butter
Instructions
- Crisp bacon strips in a skillet until they reach a deep golden-brown texture and develop a crunchy consistency.
- In the same skillet, sauté ground beef with minced garlic, incorporating salt and black pepper for robust flavor enhancement.
- Gently stretch pizza dough into thin, uniform circles, creating a smooth surface for filling.
- Position a generous portion of seasoned beef mixture at the center of each dough circle.
- Crumble cooled bacon and sprinkle cheese atop the beef, creating a layered filling.
- Carefully gather dough edges, pinching and folding to completely encase the filling, forming sealed parcels.
- Melt butter and delicately brush the exterior of each dough bomb, ensuring complete coverage.
- Liberally dust the surface with freshly grated Parmesan cheese for a rich, tangy coating.
- Transfer bombs to a preheated oven and bake at 375°F, monitoring until they transform into a golden-brown, puffy masterpiece.
- Remove from oven and allow to cool slightly before serving, ensuring the molten interior doesn’t cause burns.
Notes
- Crisp bacon ahead of time to enhance texture and prevent soggy results inside the bombs.
- Use lean ground beef to reduce excess grease and prevent soggy dough pockets.
- Ensure dough edges are completely sealed to prevent filling from leaking during baking.
- For gluten-free option, substitute regular dough with gluten-free pizza or crescent roll dough for those with wheat sensitivities.
- Prep Time: 20 minutes
- Cook Time: 20 minutes
- Category: Lunch, Dinner, Appetizer, Snacks
- Method: Baking
- Cuisine: American
Nutrition
- Serving Size: 4
- Calories: 450
- Sugar: 2 g
- Sodium: 850 mg
- Fat: 28 g
- Saturated Fat: 12 g
- Unsaturated Fat: 14 g
- Trans Fat: 0 g
- Carbohydrates: 30 g
- Fiber: 1 g
- Protein: 22 g
- Cholesterol: 70 mg
James Walker
Lead Recipe Developer & Culinary Educator
Expertise
Southern Cuisine & Farm-to-Table Cooking, Recipe Development & Testing, Culinary Education & Instruction
Education
School: Auguste Escoffier School of Culinary Arts
Program: Diploma in Culinary Arts and Operations
Focus: Comprehensive training in classical and modern culinary techniques, kitchen operations, and farm-to-table practices.
James didn’t learn cooking from a TV show, he learned it from busy kitchens, family gatherings, and long afternoons spent testing recipes the hard way.
After training at the Auguste Escoffier School of Culinary Arts, he brought his love for real, down-to-earth food to every dish he makes.
At Dining At Home, James loves building recipes that feel familiar but still have something special, like adding a twist to a classic or making a slow Sunday dinner feel brand new.
When he’s not in the kitchen, you’ll probably find him swapping garden tips at the farmers’ market or teaching his daughter how to flip pancakes without a mess (almost).