
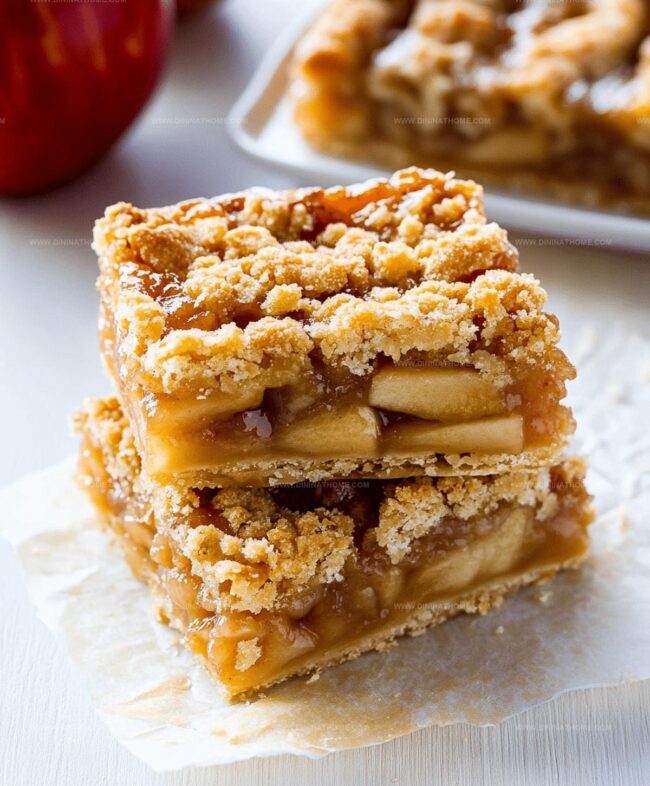
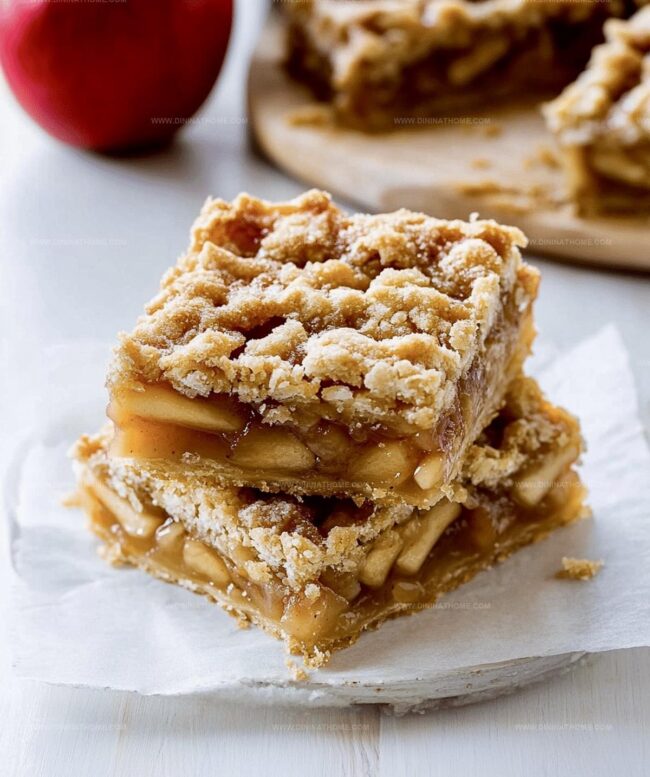
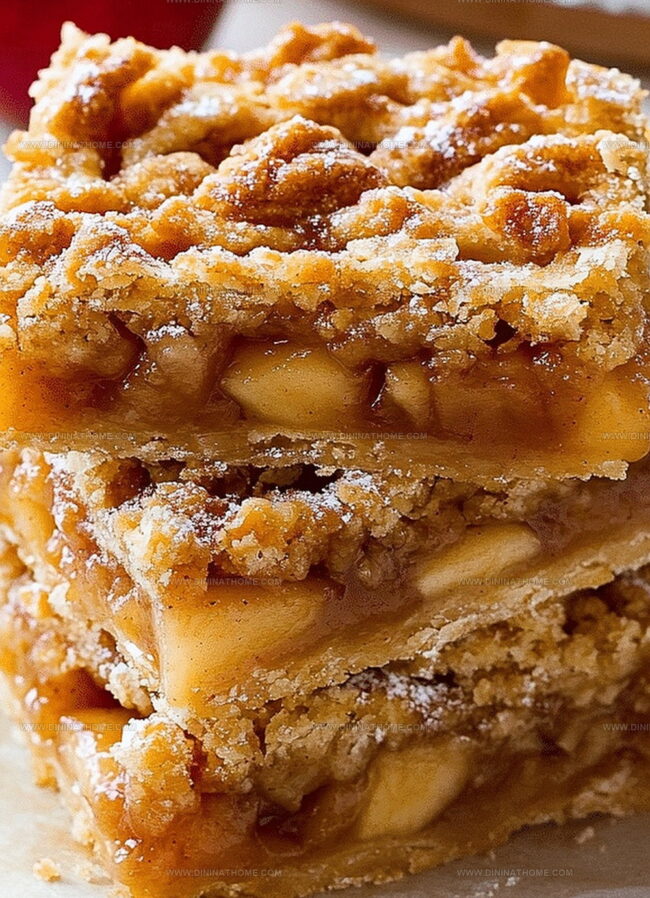
Irresistibly Flaky Apple Pie Bars Recipe: Sweet Autumn Magic
My grandma’s secret technique for creating irresistible flaky apple pie bars always brings smiles around our kitchen table.
Crisp autumn apples dance with buttery pastry in this delightful dessert that feels like a warm hug.
Sweet cinnamon whispers memories of cozy afternoons spent baking together.
Layers of tender fruit nestled between golden, crumbly crusts promise pure comfort in every single bite.
Baking these bars requires minimal effort but delivers maximum satisfaction for anyone craving a nostalgic treat.
Simple ingredients transform into something magical when mixed with love and a pinch of patience.
Flaky Apple Pie Bars: What Makes Them Fall-Perfect
Flaky Apple Pie Bar Ingredients
Pie Crust Base:Pie Filling:Finishing Touches:Instructions for Flaky Apple Pie Bars
Step 1: Warm Up the Oven
Turn your oven to 375°F.
Line a baking pan with parchment paper, creating a smooth surface for your delicious apple pie bars.
Step 2: Craft the Buttery Crust
In a mixing bowl, combine:Use a pastry cutter to work cold butter into the dry ingredients until the mixture looks like coarse crumbs.
Slowly add ice water, mixing until the dough comes together.
Wrap the dough and chill in the refrigerator for half an hour to let the flavors meld and the butter firm up.
Step 3: Prepare the Apple Filling
In a separate bowl, toss together:Mix gently to coat the apples with the sweet and spicy mixture.
Step 4: Shape the Bottom Crust
Roll out half of the chilled dough and press it evenly into the prepared baking pan.
Make sure the crust covers the entire bottom surface.
Step 5: Add the Apple Layer
Spread the apple filling uniformly over the bottom crust, creating a luscious fruity layer.
Step 6: Top with Remaining Dough
Roll out the second half of the dough and carefully place it over the apple filling.
You can create a rustic top or use a lattice pattern for extra flair.
Step 7: Prepare for Baking
Brush the top crust with egg wash and sprinkle with coarse sugar for a beautiful golden shine and extra crunch.
Step 8: Bake to Perfection
Slide the pan into the preheated oven and bake for 40-45 minutes.
Look for a gorgeous golden-brown color that signals your bars are ready.
Step 9: Cool and Slice
Remove from the oven and let the bars cool completely.
This helps them set and makes cutting easier.
Slice into delightful squares and serve.
Apple Pie Bars With Flaky Crust and Sweet Filling Tips

Reheat Apple Pie Bars Without Losing Crunch
Sweet Sides for Flaky Apple Pie Bars
Flaky Apple Pie Bars with Sweet Crumble Ideas
FAQs
Yes, you can use varieties like Granny Smith, Honeycrisp, or Braeburn. Each apple type brings a unique flavor and texture to the bars.
Sprinkle a thin layer of breadcrumbs or ground nuts on the bottom crust before adding the apple filling. This helps absorb excess moisture and keeps the crust crisp.
Chilling the dough helps prevent the butter from melting too quickly and ensures a flakier, more tender crust. It allows the gluten to relax and creates a better texture.
Absolutely! You can prepare the bars a day in advance and store them in an airtight container at room temperature. They’ll stay fresh and delicious for 2-3 days.
Print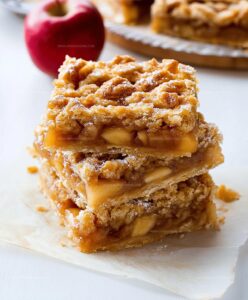
Flaky Apple Pie Bars Recipe
- Total Time: 1 hour 5 minutes
- Yield: 12 1x
Description
Delectable Flaky Apple Pie Bars bring classic American dessert comfort into convenient handheld squares packed with sweet cinnamon-spiced apple goodness. Buttery pastry and warm seasonal flavors combine perfectly for an irresistible treat you’ll want to savor slowly.
Ingredients
Main Ingredients:
- 4 cups apples, peeled and sliced
- 2.5 cups all-purpose flour
- 1 cup unsalted butter, cold and cubed
Filling and Spices:
- 0.5 cup brown sugar
- 0.5 cup granulated sugar
- 1 teaspoon cinnamon
- 0.25 teaspoon nutmeg
- 1 tablespoon lemon juice
- 1 tablespoon cornstarch
- 1 teaspoon vanilla extract
Additional Ingredients:
- 0.25 teaspoon salt
- 0.5 cup ice water
- 1 egg (for egg wash)
- 1 tablespoon coarse sugar (optional)
Instructions
- Prepare the workspace by setting the oven temperature to 375°F and lining a baking pan with parchment paper for easy removal.
- Create the pastry base by combining flour, sugar, and salt in a mixing bowl, then incorporate cold butter using a pastry cutter until the mixture resembles coarse crumbs.
- Gradually add ice water to the flour mixture, gently kneading until a cohesive dough forms, then refrigerate for half an hour to enhance flakiness.
- Meanwhile, craft the apple filling by tossing sliced apples with brown sugar, ground cinnamon, nutmeg, fresh lemon juice, cornstarch, and vanilla extract until fruit is evenly coated.
- Remove chilled dough and roll out the first half, carefully pressing it into the prepared baking pan to create a smooth, even bottom crust.
- Distribute the seasoned apple mixture uniformly across the bottom crust, ensuring complete and consistent coverage.
- Roll out the remaining dough and delicately layer it over the apple filling, sealing the edges to create a complete enclosure.
- Brush the top crust with egg wash for a golden shine, and optionally sprinkle with coarse sugar for added texture and sweetness.
- Transfer the pie bars to the preheated oven and bake for 40-45 minutes until the crust turns a rich, golden brown and the filling bubbles slightly.
- Allow the baked dessert to cool completely before slicing into individual bars, ensuring clean and precise cuts.
Notes
- Choose cold butter straight from the refrigerator to ensure ultra-flaky pastry texture.
- Slice apples uniformly to guarantee even baking and consistent flavor distribution.
- Consider using Granny Smith or Honeycrisp apples for optimal tartness and structural integrity during baking.
- Substitute gluten-free flour blend for a celiac-friendly version without compromising delicate crust quality.
- Prep Time: 20 minutes
- Cook Time: 45 minutes
- Category: Desserts, Snacks
- Method: Baking
- Cuisine: American
Nutrition
- Serving Size: 12
- Calories: 250
- Sugar: 10 g
- Sodium: 120 mg
- Fat: 12 g
- Saturated Fat: 7 g
- Unsaturated Fat: 4 g
- Trans Fat: 0 g
- Carbohydrates: 36 g
- Fiber: 2 g
- Protein: 2 g
- Cholesterol: 30 mg
James Walker
Lead Recipe Developer & Culinary Educator
Expertise
Southern Cuisine & Farm-to-Table Cooking, Recipe Development & Testing, Culinary Education & Instruction
Education
School: Auguste Escoffier School of Culinary Arts
Program: Diploma in Culinary Arts and Operations
Focus: Comprehensive training in classical and modern culinary techniques, kitchen operations, and farm-to-table practices.
James didn’t learn cooking from a TV show, he learned it from busy kitchens, family gatherings, and long afternoons spent testing recipes the hard way.
After training at the Auguste Escoffier School of Culinary Arts, he brought his love for real, down-to-earth food to every dish he makes.
At Dining At Home, James loves building recipes that feel familiar but still have something special, like adding a twist to a classic or making a slow Sunday dinner feel brand new.
When he’s not in the kitchen, you’ll probably find him swapping garden tips at the farmers’ market or teaching his daughter how to flip pancakes without a mess (almost).