
Whip Up Dreamy Dreamsicle Jelly: A Sweet Summer Recipe
Summers call for cool, refreshing dreamsicle jelly that captures childhood memories in a delightful spread.
Sweet nostalgia bursts through every spoonful of this citrusy creation.
Orange zest and vanilla whisper delectable promises of creamy indulgence.
Homemade preserves often feel like magical culinary adventures waiting to unfold.
Crafting this treat becomes a playful dance between tangy and smooth flavors.
Simple ingredients transform into something extraordinary with just a few careful steps.
Each jar holds a little piece of sunshine you can savor slowly.
Come explore how magical this dreamsicle jelly can be on your morning toast!
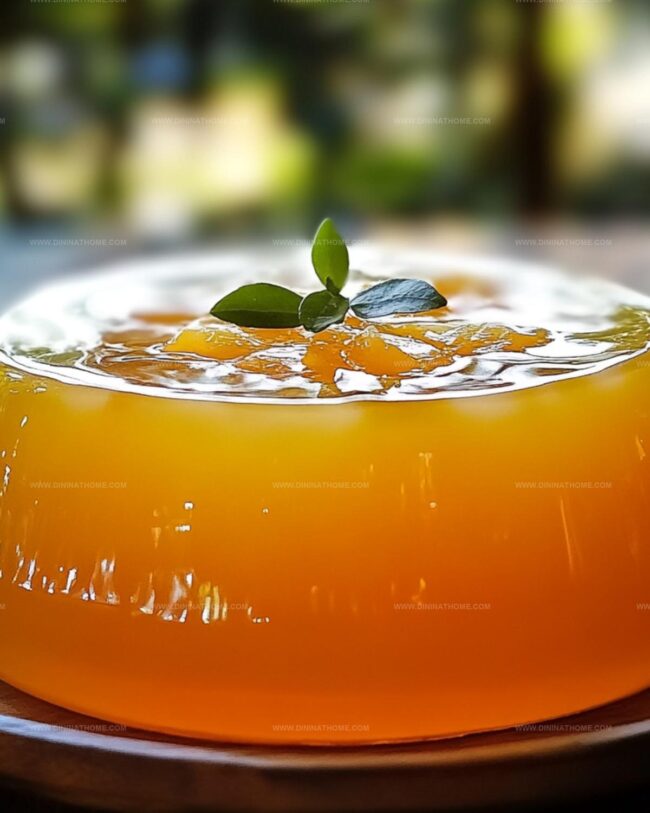
Dreamsicle Jelly That’s Sweet and Citrus Bright

Dreamsicle Jelly Ingredient Collection
Main Ingredients:
Fresh Citrus:Sweeteners:Flavor Enhancers:Preparation Ingredients:
Binding Agents:Processing Ingredients:Equipment Ingredients:
Heat Management:Dreamsicle Jelly Cooking and Canning Instructions
Step 1: Squeeze and Strain Fresh Oranges
Grab ripe, juicy oranges and squeeze them to extract bright, vibrant juice.
Pour the juice through a fine cheesecloth to catch any pulp, ensuring a smooth and silky liquid base for your jelly.
Step 2: Assemble Flavor Powerhouses
Gather your flavor-packed ingredients:In a spacious, heavy-bottomed pot, combine these ingredients to create a magical flavor foundation.
Step 3: Ignite the Boiling Flames
Crank up the heat and bring your mixture to a vigorous, rolling boil.
Watch the bubbles dance and the aromas mingle, signaling the start of jelly transformation.
Step 4: Activate Pectin Magic
If using pectin, sprinkle it into the boiling mixture.
Stir enthusiastically and let it return to a robust boil.
Maintain this intense boil for precisely one minute to activate the pectin’s gelling powers.
Step 5: Test Jelly Readiness
Without pectin, monitor the temperature carefully.
Ensure the mixture reaches and maintains 220°F for three minutes.
This crucial step determines the perfect jelly consistency.
Step 6: Remove From Heat
Once the jelly reaches its ideal state, swiftly remove the pot from the heat.
Let the bubbling calm and the flavors settle.
Step 7: Prepare Jars
Carefully extract the vanilla bean.
Using a ladle, transfer the molten jelly into clean, sterilized glass jars.
Leave a small headspace at the top.
Step 8: Seal With Care
Wipe jar rims meticulously to ensure a clean seal.
Place lids and bands, tightening them securely but not overly forcefully.
Step 9: Water Bath Processing
Submerge the sealed jars in a boiling water canner.
Process for ten minutes to create a vacuum seal and ensure long-term preservation.
Step 10: Cool and Distribute
Gently remove jars and place them on a towel-lined surface.
Allow them to cool naturally, away from drafts.
Every ten minutes, give the jars a gentle flip to distribute vanilla specks evenly.
Step 11: Store and Enjoy
Once completely cooled, check jar seals by pressing the center.
Sealed jars can be stored in a pantry, while any unsealed ones should be refrigerated.
Your dreamy Dreamsicle Jelly is ready to delight taste buds!
Jelly-Making Tips for a Creamy Dreamsicle Spread
Chill Dreamsicle Jelly Leftovers
Snacks and Toasts for Dreamsicle Jelly
Dreamsicle Jelly with Flavor Twists
FAQs
The combination of fresh orange juice and vanilla bean scrapings creates a creamy, bright flavor reminiscent of the classic Dreamsicle ice cream treat.
Fresh squeezed orange juice works best for maximum flavor and brightness. Bottled juice may result in a less vibrant taste and can have added preservatives that affect the jelly’s texture.
Test the jelly’s set by placing a small amount on a chilled plate. If it wrinkles when you push it with your finger, it has reached the right consistency. The mixture should also reach 220°F when using the temperature method.
Flipping the jars helps distribute the vanilla specks evenly throughout the jelly, ensuring a consistent flavor and appearance in each jar.
Print
Dreamsicle Jelly Recipe
- Total Time: 35 minutes
- Yield: 5 1x
Description
Dreamsicle jelly brings nostalgic summer memories with its creamy orange and vanilla swirls. Smooth, tangy, and refreshingly sweet, this dessert promises to delight your senses and transport you to childhood moments of pure joy.
Ingredients
Main Ingredients:
- 4 cups freshly squeezed orange juice
- 4 cups sugar
- 2 vanilla beans, split and scraped
Secondary Ingredients:
- 1 pat of butter
Optional Ingredients:
- 1 box pectin
Instructions
- Meticulously filter freshly extracted citrus liquid through a fine mesh cloth, eliminating any fibrous residue to ensure a smooth texture.
- Transfer the strained juice into a spacious cooking vessel, incorporating crystalline sweetener, creamy dairy fat, aromatic vanilla pod essence, and the split vanilla pod itself.
- Elevate the mixture to a vigorous, bubbling thermal state using maximum flame intensity.
- When utilizing natural thickening agent, incorporate the entire packet while continuously stirring until the concoction returns to an aggressive boil, maintaining this state precisely for 60 seconds.
- Alternatively, without chemical stabilizers, monitor the liquid’s thermal progression, ensuring it reaches and sustains 220°F for a precise three-minute duration.
- Immediately extract the cooking vessel from direct heat source.
- Delicately extract the spent vanilla pods, then systematically transfer the molten preserve into sterilized glass receptacles using a specialized ladle.
- Meticulously cleanse jar rim edges, positioning protective lids and securing adjustment rings with measured tension.
- Submerge sealed containers in rapidly churning water bath, maintaining elevated temperature for a precise ten-minute preservation cycle.
- Gently transfer jars onto a cushioned textile surface, allowing gradual temperature equilibration in a draft-free environment. Periodically rotate containers to distribute vanilla speckling evenly.
- Upon complete cooling, validate seal integrity. Refrigerate any compromised containers and store successfully sealed preserves in a cool, dark pantry location.
Notes
- Straining ensures a smooth, pulp-free jelly with a silky texture that spreads beautifully on toast or pastries.
- Using fresh, ripe oranges maximizes the vibrant citrus flavor and natural sweetness of the dreamsicle jelly.
- Vanilla bean adds luxurious depth and elegant specks, transforming a simple jelly into a gourmet preserve.
- Experiment with alternative sweeteners like honey or maple syrup for unique flavor profiles and dietary adaptations.
- Prep Time: 10 minutes
- Cook Time: 25 minutes
- Category: Desserts, Snacks
- Method: Boiling
- Cuisine: American
Nutrition
- Serving Size: 5
- Calories: 380
- Sugar: 76 g
- Sodium: 5 mg
- Fat: 0.2 g
- Saturated Fat: 0.1 g
- Unsaturated Fat: 0 g
- Trans Fat: 0 g
- Carbohydrates: 99 g
- Fiber: 0 g
- Protein: 0.3 g
- Cholesterol: 0 mg
James Walker
Lead Recipe Developer & Culinary Educator
Expertise
Southern Cuisine & Farm-to-Table Cooking, Recipe Development & Testing, Culinary Education & Instruction
Education
School: Auguste Escoffier School of Culinary Arts
Program: Diploma in Culinary Arts and Operations
Focus: Comprehensive training in classical and modern culinary techniques, kitchen operations, and farm-to-table practices.
James didn’t learn cooking from a TV show, he learned it from busy kitchens, family gatherings, and long afternoons spent testing recipes the hard way.
After training at the Auguste Escoffier School of Culinary Arts, he brought his love for real, down-to-earth food to every dish he makes.
At Dining At Home, James loves building recipes that feel familiar but still have something special, like adding a twist to a classic or making a slow Sunday dinner feel brand new.
When he’s not in the kitchen, you’ll probably find him swapping garden tips at the farmers’ market or teaching his daughter how to flip pancakes without a mess (almost).