
The Whimsical Dirt Cake Recipe Everyone Will Dig Into
Sweet memories often come alive with a childhood-favorite dirt cake that sparks instant nostalgia.
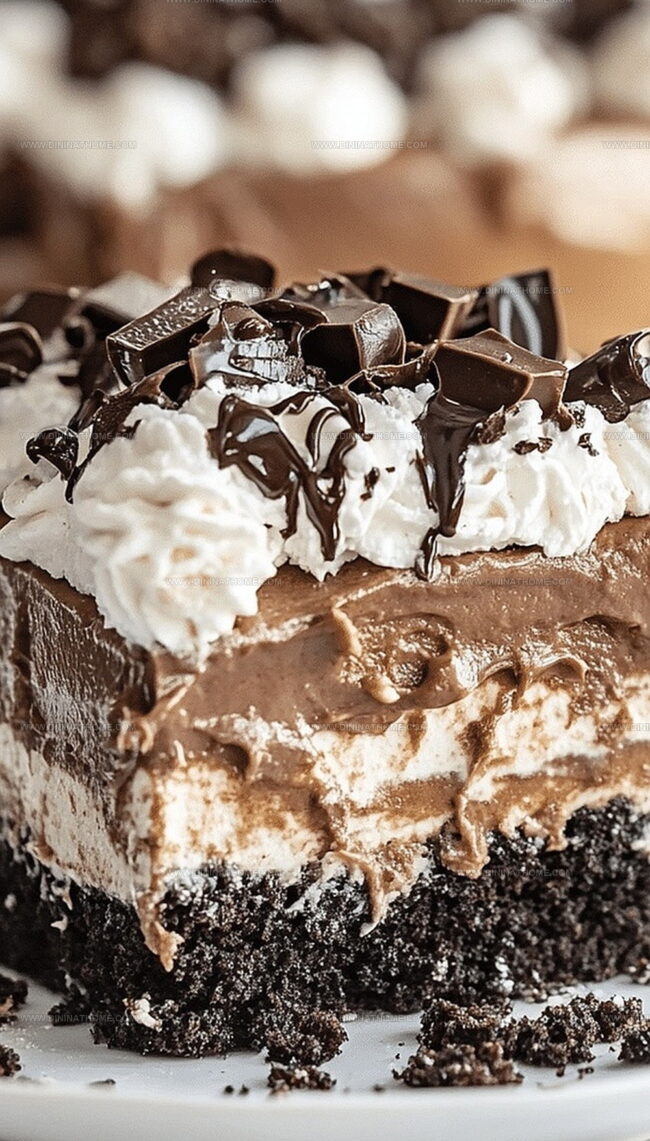
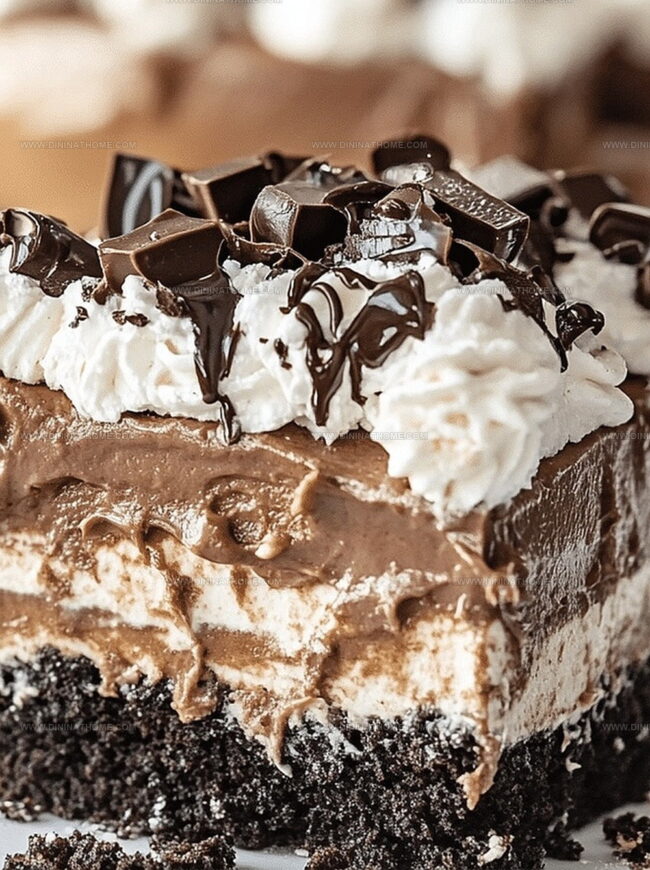
Layers of creamy pudding and crushed chocolate cookies create a playful dessert that mimics rich garden soil.
Kids absolutely adore this whimsical treat, which looks like an edible miniature landscape.
Crushing cookies becomes a delightful moment of kitchen fun for everyone involved.
Chocolate cookie crumbs mixed with smooth vanilla pudding deliver a delectable texture that surprises and delights.
Pudding cups and chocolate wafers transform into a magical dessert that feels like pure excitement.
You will want to serve this delightful creation at every celebration, watching faces light up with pure joy.
Dirt Cake Loved By Kids And Adults Alike
Quick and Easy Delight: Perfect for Busy Home Bakers
Dirt Cake Flavor Breakdown
Base Layer:Creamy Filling:Pudding Layer:Assembling Dirt Cake Easily
Step 1: Create Dreamy Cream Cheese Base
Beat cream cheese, butter, and powdered sugar together until the mixture becomes silky smooth and well-blended.
Use an electric mixer to ensure no lumps remain and the texture is perfectly creamy.
Step 2: Prepare Luscious Pudding Mixture
In a separate bowl, whisk pudding mix and milk until the mixture thickens and becomes smooth.
Gently fold in whipped topping, creating a light and airy consistency that will make your dirt cake irresistible.
Step 3: Blend Cream Cheese and Pudding
Carefully combine the pudding mixture with the cream cheese base, stirring gently until everything is perfectly integrated.
The result should be a velvety, rich filling that promises delicious flavor in every bite.
Step 4: Build Delectable Layers
Select a clear serving dish to showcase your creation.
Begin layering crushed Oreo cookies and the creamy pudding mixture.
Alternate between these two components, making sure each layer is evenly distributed.
Finish with a generous topping of crushed Oreos to create the classic “dirt” appearance.
Step 5: Chill and Serve
Refrigerate the dirt cake for at least one hour to allow flavors to meld and the dessert to set.
This cooling time helps the layers firm up and enhances the overall taste and texture of your delightful treat.
Dirt Cake – Layering Tips For Maximum Flavor
Keep Dirt Cake Cool And Delicious
Serve Dirt Cake With These Flavors
Dirt Cake Served in Creative Layered Styles
FAQs
Yes, dirt cake is a fun dessert kids love. It’s easy to make and looks like a playful “dirt” treat that children enjoy assembling and eating.
Absolutely! You can prepare dirt cake up to 2 days in advance. Keep it refrigerated and it will maintain its creamy texture and delicious flavor.
Instant vanilla pudding is the most traditional choice. It provides the right consistency and subtle sweet flavor that blends perfectly with the cream cheese and Oreo layers.
No special equipment is required. You’ll just need basic mixing bowls, a whisk, and a serving dish. A hand mixer or stand mixer can help make the cream cheese mixture smoother, but it’s not mandatory.
Print
Dirt Cake Recipe
- Total Time: 20 minutes
- Yield: 12 1x
Description
Chocolate lovers rejoice over this dirt cake, a playful dessert mimicking a garden landscape with crushed cookies and creamy pudding layers. Crumbly Oreo “soil” nestles rich chocolate pudding, creating a whimsical treat you can dig into with pure childhood delight.
Ingredients
Main Ingredients:
- 1 package (14 ounces / 397 grams) Oreo cookies, crushed
- 2 packages (3.4 ounces / 96 grams each) instant chocolate pudding mix
- 3 1/2 cups (840 milliliters) milk
Dairy and Soft Ingredients:
- 1 package (8 ounces / 227 grams) cream cheese, softened
- 1/4 cup (60 milliliters) butter, softened
- 1 container (8 ounces / 227 grams) whipped topping, thawed
Sweetener:
- 1 cup (120 grams) powdered sugar
Instructions
- Cream the cream cheese, butter, and powdered sugar in a large mixing bowl until the mixture achieves a velvety, uniform consistency.
- Prepare the pudding by whisking the pudding mix with milk, allowing it to thicken and develop a smooth texture.
- Incorporate the whipped topping into the pudding, gently folding to maintain its airy structure.
- Merge the pudding mixture with the cream cheese blend, stirring carefully to create a harmonious, creamy filling.
- Select a decorative serving dish and construct alternating layers, beginning with a foundation of finely crushed Oreo cookies.
- Carefully spread the cream cheese and pudding mixture over the cookie base, ensuring even distribution.
- Continue layering, alternating between crushed Oreos and the creamy filling, creating visual and textural contrast.
- Conclude the layering process with a generous topping of crushed Oreo cookies, completely covering the surface.
- Refrigerate the dessert for a minimum of 60 minutes, allowing the flavors to meld and the texture to set.
- Serve chilled, revealing the decadent layers and delightful cookie crumb topping.
Notes
- Experiment with different pudding flavors like chocolate or vanilla to customize the dessert’s taste profile.
- Use reduced-fat cream cheese and light whipped topping for a lighter version that cuts down on calories.
- Create gluten-free variation by substituting regular Oreos with gluten-free chocolate sandwich cookies for those with dietary restrictions.
- Add extra texture and flavor by sprinkling chopped nuts or chocolate shavings between layers for a more complex dessert experience.
- Prep Time: 20 minutes
- Cook Time: 0 minutes
- Category: Desserts, Snacks
- Method: None
- Cuisine: American
Nutrition
- Serving Size: 12
- Calories: 265
- Sugar: 21 g
- Sodium: 220 mg
- Fat: 15 g
- Saturated Fat: 8 g
- Unsaturated Fat: 5 g
- Trans Fat: 0 g
- Carbohydrates: 31 g
- Fiber: 1 g
- Protein: 3 g
- Cholesterol: 30 mg
James Walker
Lead Recipe Developer & Culinary Educator
Expertise
Southern Cuisine & Farm-to-Table Cooking, Recipe Development & Testing, Culinary Education & Instruction
Education
School: Auguste Escoffier School of Culinary Arts
Program: Diploma in Culinary Arts and Operations
Focus: Comprehensive training in classical and modern culinary techniques, kitchen operations, and farm-to-table practices.
James didn’t learn cooking from a TV show, he learned it from busy kitchens, family gatherings, and long afternoons spent testing recipes the hard way.
After training at the Auguste Escoffier School of Culinary Arts, he brought his love for real, down-to-earth food to every dish he makes.
At Dining At Home, James loves building recipes that feel familiar but still have something special, like adding a twist to a classic or making a slow Sunday dinner feel brand new.
When he’s not in the kitchen, you’ll probably find him swapping garden tips at the farmers’ market or teaching his daughter how to flip pancakes without a mess (almost).