
Dreamy Decadent Easy Espresso Chocolate Mousse Recipe
Whipping up a decadent easy espresso chocolate mousse sparks pure culinary magic in my kitchen.
chocolate and coffee create an irresistible dance of rich flavors.
Silky smooth textures promise an indulgent dessert experience.
Minimal ingredients mean maximum satisfaction for anyone craving a quick sweet treat.
Each spoonful delivers an intense blend of deep cocoa and robust coffee notes.
Creamy and luxurious, this dessert impresses without complicated techniques.
Savor every heavenly bite and let your taste buds celebrate this delightful creation.
Espresso Chocolate Mousse That’s Bold, Rich, and Easy
Espresso Chocolate Mousse (Easy Decadent) Ingredients
Chocolate Base:Cream Components:Garnish Options:Chocolate Mousse Espresso Prep Guide
Step 1: Melt And Infuse Chocolate
Break dark chocolate into small pieces.
Use a double boiler or microwave, heating in short bursts and stirring between each interval.
Once completely melted, mix in espresso powder and hot water, creating a smooth, glossy chocolate mixture.
Allow the blend to cool to room temperature.
Step 2: Whip Creamy Clouds
Grab a chilled mixing bowl.
Pour heavy whipping cream and add powdered sugar, vanilla extract, and a delicate pinch of salt.
Whip the mixture using an electric mixer or whisk until it forms beautiful, sturdy peaks that hold their shape.
Step 3: Fold With Gentle Touch
Pour the cooled chocolate mixture into the whipped cream.
Use a silicone spatula to fold ingredients together, moving from bottom to top in smooth, circular motions.
Blend until the mousse looks uniformly chocolatey without losing its airy texture.
Step 4: Chill And Set
Transfer the mousse into elegant serving glasses or decorative bowls.
Place in the refrigerator for at least one hour, allowing the dessert to firm up and develop rich, intense flavors.
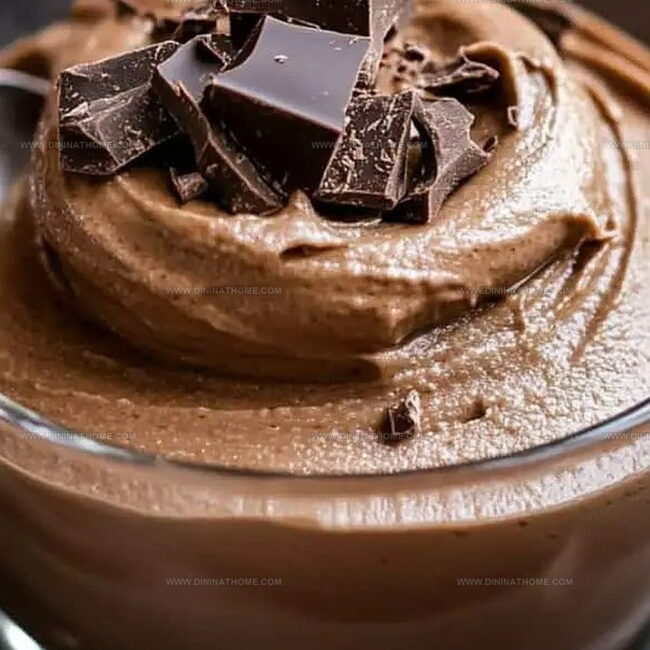
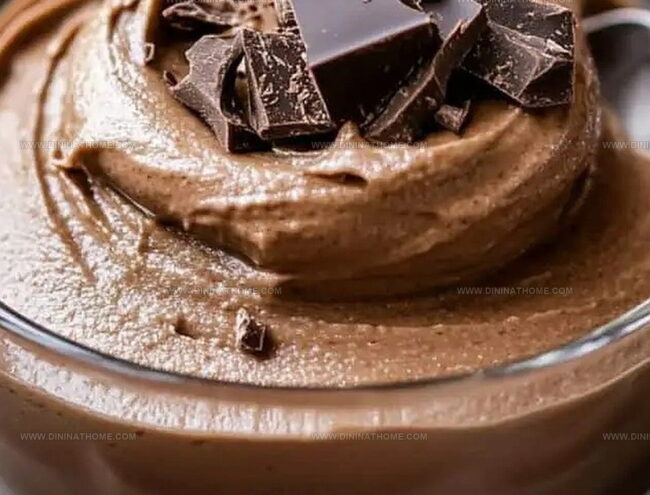
Step 5: Decorate And Delight
Before serving, consider adorning the mousse with optional toppings:Mousse Tips for Espresso Chocolate Lovers
Espresso Mousse Storage
Chocolate Pairings for Espresso Mousse
Espresso Chocolate Mousse Easy Variants
FAQs
Yes, you can substitute instant coffee for espresso powder. Use slightly less as instant coffee has a milder flavor, and dissolve it completely in hot water before mixing into the chocolate.
This recipe contains dairy (heavy cream) but no meat products. To make it vegetarian-friendly, ensure you use vegetarian chocolate and check that the ingredients are animal-product free.
Stiff peaks form when you lift the whisk and the cream stands up straight without falling over. It should look glossy and hold its shape firmly when the whisk is turned upside down.
Absolutely! You can prepare this mousse up to 2 days ahead of serving. Keep it covered in the refrigerator and add any fresh garnishes just before serving to maintain their texture and appearance.
Print
Decadent Easy Espresso Chocolate Mousse Recipe
- Total Time: 15 minutes
- Yield: 4 1x
Description
Silky espresso chocolate mousse blends rich Italian coffee notes with luxurious chocolate depths. Creamy layers of intense flavor promise a sophisticated dessert experience you’ll savor with pure indulgence.
Ingredients
Main Ingredients:
- 8 ounces (226 grams) dark chocolate (70% cocoa), chopped
- 1 cup (240 milliliters) heavy whipping cream
- 1 tablespoon instant espresso powder
Sweeteners and Flavor Enhancers:
- 3 tablespoons powdered sugar
- 1 teaspoon vanilla extract
- A pinch of salt
Garnish:
- 2 tablespoons hot water
- Whipped cream
- Shaved chocolate
- Cocoa powder
- Chocolate curls
Instructions
- Prepare a double boiler or microwave-safe bowl to gently melt the dark chocolate, stirring at regular intervals to ensure smooth consistency.
- Incorporate the espresso powder and hot water into the melted chocolate, whisking until the mixture becomes glossy and uniform in texture.
- Allow the chocolate mixture to cool to room temperature, preventing potential separation when combining with whipped cream.
- In a separate chilled mixing bowl, whip the heavy cream with powdered sugar, vanilla extract, and a delicate pinch of salt until the cream forms sturdy, defined peaks.
- Carefully fold the cooled chocolate mixture into the whipped cream, using a gentle circular motion to maintain the cream’s airy structure and prevent deflation.
- Delicately transfer the mousse into elegant serving glasses or decorative bowls, creating smooth and even layers.
- Refrigerate the mousse for a minimum of one hour, allowing the dessert to set and develop a rich, creamy consistency.
- Before serving, optionally embellish with a dollop of additional whipped cream, delicate chocolate shavings, or a light dusting of cocoa powder for an elegant finishing touch.
Notes
- Customize the espresso intensity by adjusting the amount of espresso powder to suit individual taste preferences.
- Ensure chocolate is completely cooled before folding into whipped cream to prevent separation and maintain mousse’s light texture.
- For a gluten-free version, verify all ingredients are certified gluten-free, especially the chocolate and any garnishes.
- Create a vegan alternative by using dairy-free dark chocolate and coconut whipped cream as substitutes for traditional ingredients.
- Prep Time: 10 minutes
- Cook Time: 5 minutes (for melting the chocolate)
- Category: Desserts
- Method: Blending
- Cuisine: French
Nutrition
- Serving Size: 4
- Calories: 380
- Sugar: 6 g
- Sodium: 50 mg
- Fat: 33 g
- Saturated Fat: 20 g
- Unsaturated Fat: 13 g
- Trans Fat: 0 g
- Carbohydrates: 27 g
- Fiber: 2 g
- Protein: 4 g
- Cholesterol: 80 mg
Emily Harper
Nutrition Consultant & Recipe Analyst
Expertise
Healthy Recipe Modification, Nutritional Analysis & Meal Planning, Global Cuisine & Dietary Adaptations
Education
School: French Pastry School, Chicago, IL
Program: L’Art de la Pâtisserie
Focus: Intensive training in traditional French pastry techniques, baking theory, and confectionery arts.
Emily’s journey started in a pastry kitchen but took a detour into the world of health and flavor science.
Graduating from the French Pastry School and studying nutrition opened her eyes to a new mission: making healthy food taste like something you’d actually crave.
At Dining At Home, Emily’s the go-to for smart, feel-good recipes that don’t trade flavor for nutrition.
She’s all about adding a fresh spin on old favorites and finding small ways to make everyday meals a little brighter.
Outside of the kitchen, Emily is most at home walking forest trails, testing plant-based recipes, or sharing a picnic under a wide-open sky.