
Swoon-Worthy Birthday Cake Oreo Fudge Brownies Recipe
My latest kitchen adventure involves decadent birthday cake oreo fudge brownies that promise pure chocolate bliss.
Sweet surprises often emerge from unexpected ingredient combinations.
Chocolate lovers will appreciate this indulgent treat that merges classic brownie richness with playful oreo crunch.
Layers of intense flavor create a dessert experience that feels simultaneously nostalgic and innovative.
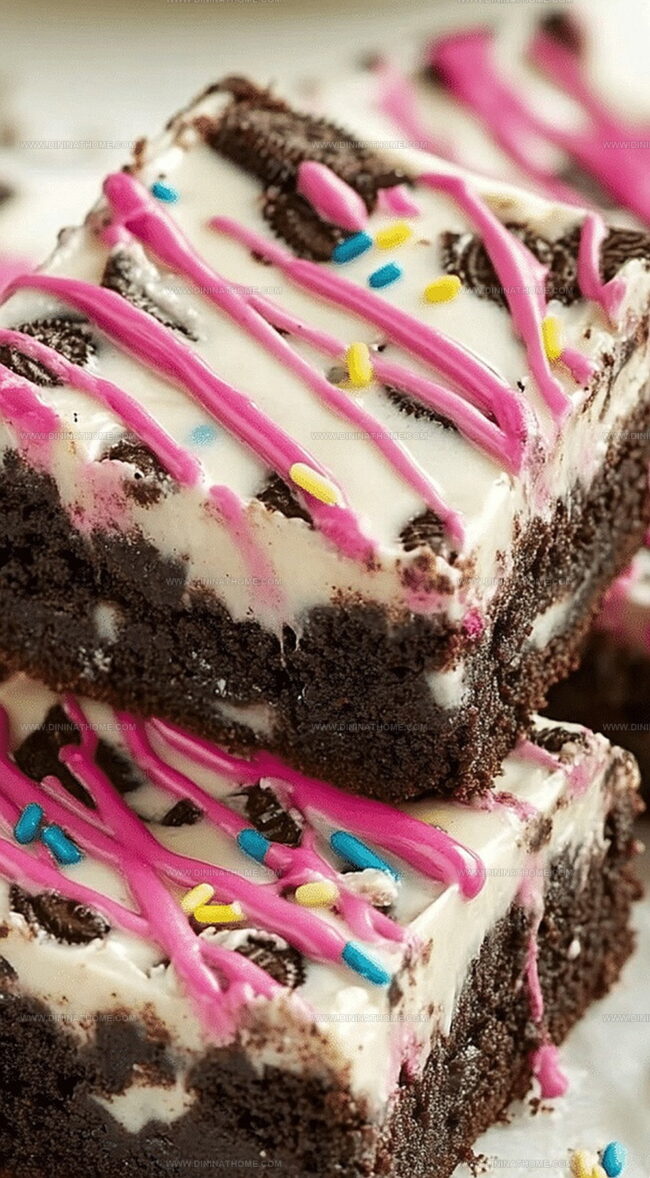
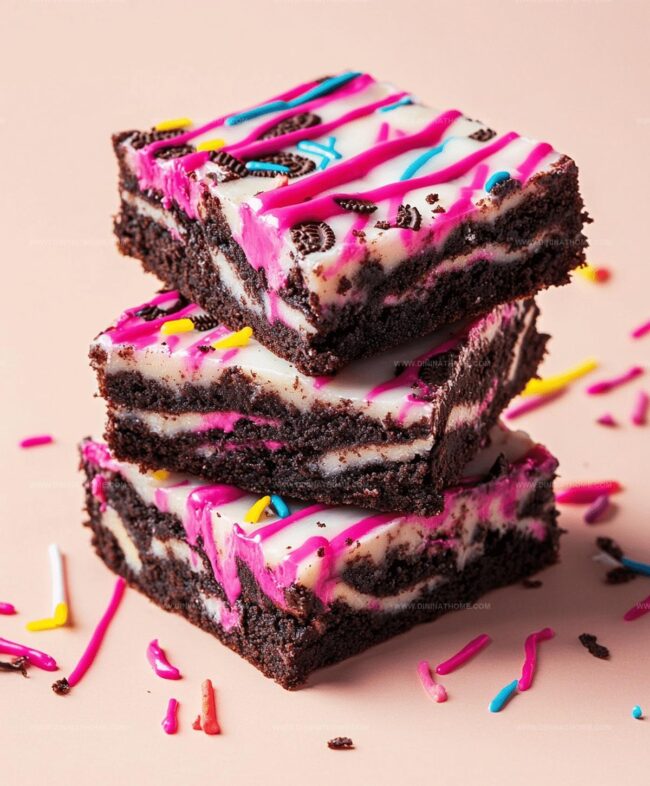
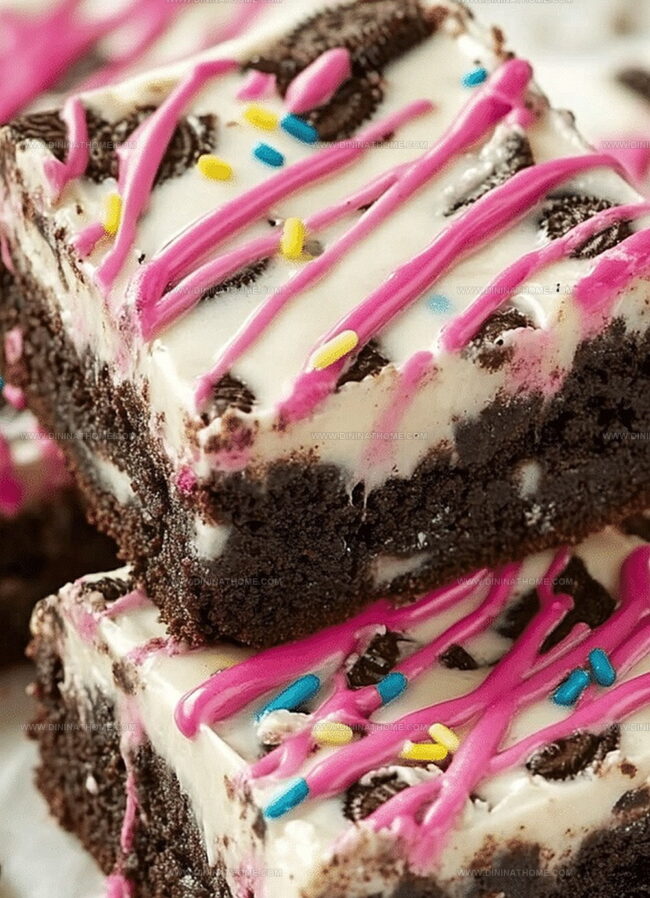
Each bite combines dense fudgy texture with creamy birthday cake notes.
Crumbled cookies scattered throughout add delightful unexpected crunch and visual appeal.
Birthday Cake Oreo Fudge Brownies Make Celebrations Sweeter
Birthday Oreo Fudge Brownies Elements
Base:Mix-Ins:Oreo Fudge Brownies For Birthdays Guide
Step 1: Prepare Baking Setup
Preheat the oven to 350°F.
Grease an 8×8-inch baking dish with cooking spray or butter to ensure easy brownie removal.
Step 2: Create Brownie Base
In a large mixing bowl, combine brownie mix, eggs, water, and oil.
Whisk the ingredients together until the batter becomes smooth and free of lumps.
Step 3: Enhance Brownie Texture
Gently fold in the chocolate chips and half of the crushed Oreo cookies.
This will create delightful pockets of chocolatey crunch throughout the brownies.
Step 4: Fill Baking Dish
Pour the prepared brownie batter into the greased baking dish.
Spread the mixture evenly using a spatula to ensure uniform baking.
Step 5: Add Oreo Topping
Sprinkle the remaining crushed Oreo cookies over the top of the batter, creating a tempting cookie crust.
Step 6: Bake to Perfection
Place the baking dish in the preheated oven and bake for 25-30 minutes.
Check for doneness by inserting a toothpick into the center – it should come out with a few moist crumbs.
Step 7: Cool and Serve
Remove the brownies from the oven and let them cool completely in the baking dish.
Once cooled, slice into squares and serve.
Enjoy the rich, fudgy texture with crunchy Oreo bits!
Tips For Perfecting Oreo Fudge Brownies Every Time
Oreo Brownies: Tips to Store and Warm Them Later
Fun Pairings for Oreo Fudge Brownies
Oreo Fudge Brownies for Birthday Celebrations with Flair
FAQs
Yes, you can absolutely use a homemade brownie mix recipe. Just ensure the consistency is similar to the box mix and follow the same mixing instructions.
Insert a toothpick into the center of the brownies. If it comes out with a few moist crumbs but not wet batter, they are done. The edges should also look set and slightly pulled away from the pan.
Yes, these brownies are quite sweet due to the combination of brownie mix, chocolate chips, and Oreo cookies. If you prefer less sweetness, consider using dark chocolate chips or reducing the amount of crushed Oreos on top.
You can try using a gluten-free brownie mix and gluten-free Oreo-style cookies to create a gluten-free version of this dessert. Always check ingredient labels to ensure they meet your dietary needs.
Print
Decadent Birthday Cake Oreo Fudge Brownies Recipe
- Total Time: 40 minutes
- Yield: 12 1x
Description
Indulgent Birthday Cake Oreo Fudge Brownies merge classic chocolate with festive Oreo crunch for an unforgettable dessert experience. Chocolate lovers will dive into rich layers of fudgy goodness, celebrating sweet moments with each delectable bite.
Ingredients
Main Ingredients:
- 1 box fudge brownie mix
- 2 eggs
- 12 cup chocolate chips
- 1 cup crushed Oreo cookies (Birthday Cake flavor recommended)
Liquid Ingredients:
- 14 cup water
- 12 cup vegetable oil
Instructions
- Warm the oven to 350°F and thoroughly coat an 8×8-inch baking pan with non-stick spray to prevent sticking.
- Whisk the brownie mix, eggs, water, and oil in a large mixing bowl until the mixture achieves a silky, uniform consistency.
- Gently incorporate chocolate chips and crumble half of the Oreo cookies into the batter, distributing them evenly throughout.
- Transfer the batter into the prepared pan, creating an even layer and scattering the remaining Oreo pieces across the top.
- Place the pan in the preheated oven and bake for approximately 25-30 minutes, checking doneness by inserting a toothpick into the center – it should emerge with minimal, moist crumbs.
- Remove from the oven and let the brownies rest at room temperature for complete cooling, which allows them to set and become easier to slice into perfect, fudgy squares.
Notes
- Swap traditional Oreos for gluten-free versions to make this recipe celiac-friendly and inclusive for all dietary needs.
- Experiment with different Oreo flavors like mint or peanut butter to create unique taste variations and personalize the dessert.
- Cool brownies completely before cutting to ensure clean, precise squares and prevent crumbling during slicing.
- Store brownies in an airtight container at room temperature for up to 3 days to maintain maximum freshness and soft texture.
- Prep Time: 10 minutes
- Cook Time: 30 minutes
- Category: Desserts
- Method: Baking
- Cuisine: American
Nutrition
- Serving Size: 12
- Calories: 220
- Sugar: 16 g
- Sodium: 180 mg
- Fat: 10 g
- Saturated Fat: 3.5 g
- Unsaturated Fat: 6 g
- Trans Fat: 0 g
- Carbohydrates: 30 g
- Fiber: 1 g
- Protein: 2 g
- Cholesterol: 20 mg
James Walker
Lead Recipe Developer & Culinary Educator
Expertise
Southern Cuisine & Farm-to-Table Cooking, Recipe Development & Testing, Culinary Education & Instruction
Education
School: Auguste Escoffier School of Culinary Arts
Program: Diploma in Culinary Arts and Operations
Focus: Comprehensive training in classical and modern culinary techniques, kitchen operations, and farm-to-table practices.
James didn’t learn cooking from a TV show, he learned it from busy kitchens, family gatherings, and long afternoons spent testing recipes the hard way.
After training at the Auguste Escoffier School of Culinary Arts, he brought his love for real, down-to-earth food to every dish he makes.
At Dining At Home, James loves building recipes that feel familiar but still have something special, like adding a twist to a classic or making a slow Sunday dinner feel brand new.
When he’s not in the kitchen, you’ll probably find him swapping garden tips at the farmers’ market or teaching his daughter how to flip pancakes without a mess (almost).