Festive Christmas Chocolate Rice Krispie Balls Recipe for Joy
Whipping up delightful christmas chocolate rice krispie balls can turn an ordinary afternoon into a festive celebration.
Sweet memories flood back with every chocolatey bite of this classic treat.
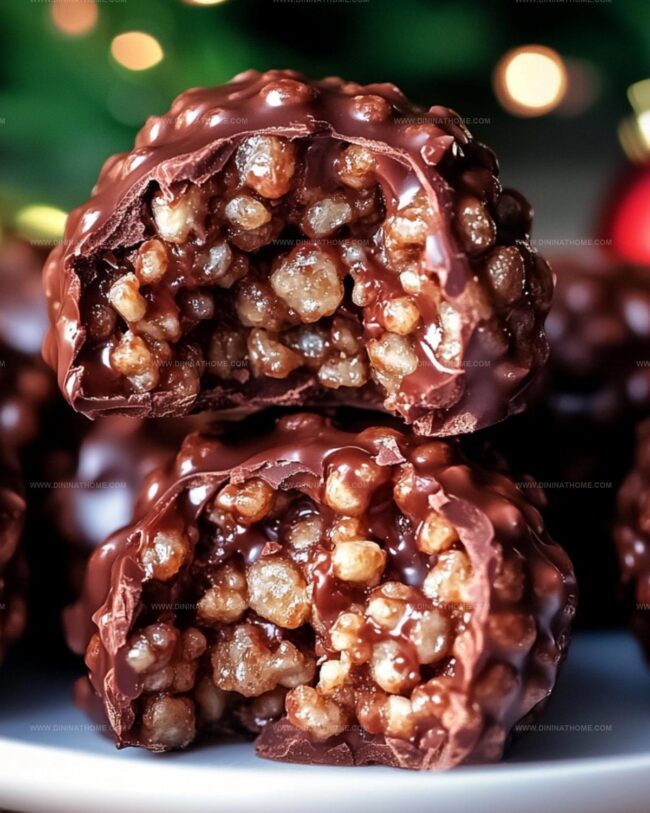
Marshmallows and crispy rice create a magical combination that sparks joy.
Kids and adults alike will adore the simple yet irresistible texture of these no-bake delights.
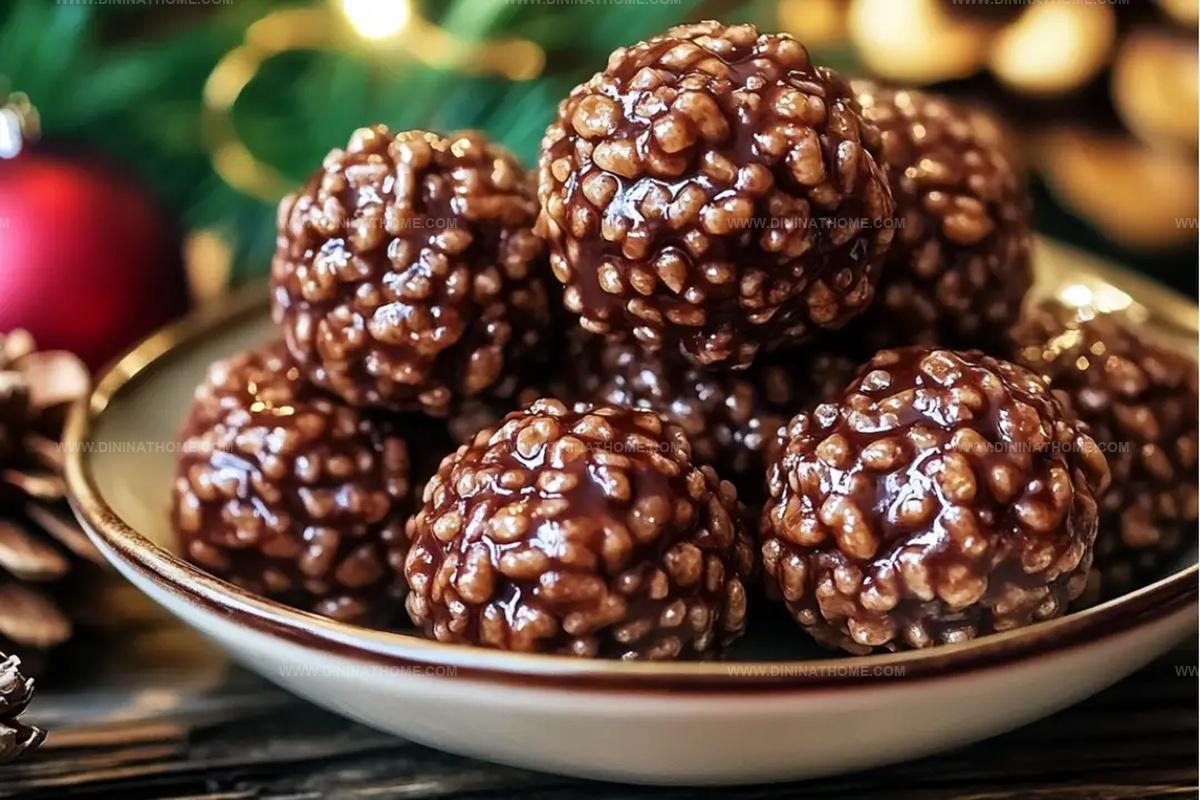
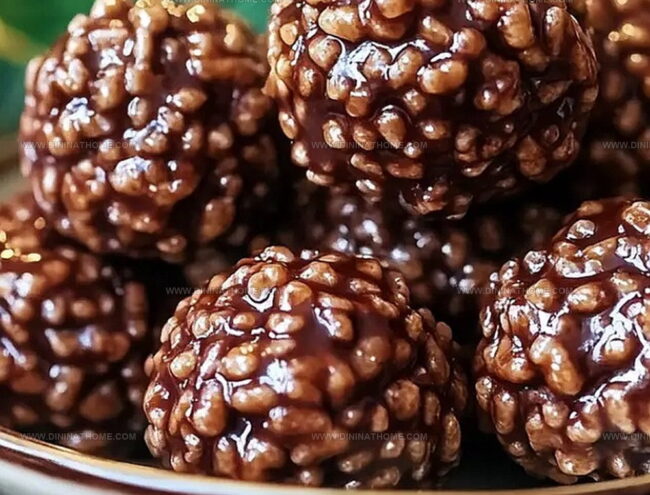
Rich chocolate coating adds a luxurious touch to the nostalgic snack.
Sprinkles and decorative drizzles make these treats look as spectacular as they taste.
Each bite promises a delectable journey through holiday cheer that you won’t want to miss.
A Crowd Favorite: Christmas Chocolate Rice Krispie Balls

Christmas Chocolate Rice Krispie Balls Components
Base Ingredients:Chocolate Coating:Decorative Touches:Rice Krispie Ball Instructions with Holiday Flair
Step 1: Prepare Tasty Ingredients
Grab your Rice Krispies cereal, marshmallows, butter, vanilla extract, white chocolate, and festive sprinkles.
Make sure everything is fresh and ready to go.
Step 2: Melt Marshmallow Magic
In a large pot, melt butter over low heat.
Add marshmallows and stir continuously until they transform into a smooth, gooey mixture.
Remove from heat and quickly mix in vanilla extract for an extra burst of flavor.
Step 3: Create Sticky Rice Krispie Base
Pour the marshmallow mixture over Rice Krispies cereal.
Use a spatula to gently fold and combine until every crispy piece is coated with marshmallow goodness.
Let the mixture cool slightly so it’s comfortable to handle.
Step 4: Shape Delightful Balls
With slightly damp hands, roll the mixture into small, even-sized balls.
Place them on a parchment-lined baking sheet and let them set for about 15 minutes.
Step 5: Chocolate Coating Extravaganza
Melt white chocolate in a microwave-safe bowl, stirring every 30 seconds to prevent burning.
Carefully dip each Rice Krispie ball into the melted chocolate, ensuring complete coverage.
Step 6: Decorate With Holiday Cheer
Immediately sprinkle holiday-themed decorations over the chocolate-coated balls before the chocolate sets.
This adds a festive touch and makes them look super cute.
Step 7: Chill and Enjoy
Place the decorated balls in the refrigerator for about 10 minutes to help the chocolate harden.
Once set, they’re ready to be devoured and shared with friends and family.
Festive Ideas for Chocolate Rice Krispie Balls
Store Christmas Chocolate Rice Krispie Balls
What to Plate with Christmas Rice Krispie Balls
Krispie Balls Holiday Style Options
FAQs
Yes, you can prepare these balls up to 2 days in advance and store them in an airtight container in the refrigerator.
The basic recipe doesn’t include nuts, but always check your specific ingredients to ensure they are nut-free.
Let the Rice Krispie balls sit at room temperature for a few minutes before dipping, and ensure the chocolate is at the right melting temperature.
Absolutely! You can sprinkle crushed candy canes, colored sprinkles, or holiday-themed decorations on the chocolate coating while it’s still wet.
Print
Christmas Chocolate Rice Krispie Balls Recipe
- Total Time: 25 minutes
- Yield: 12 1x
Description
Festive Christmas chocolate rice krispie balls bring holiday magic to sweet treats. Crispy, chocolatey spheres melt in your mouth, delivering Christmas cheer with each delightful bite you savor.
Ingredients
Filling Ingredients:
- 1/2 cup peanut butter
- 1 cup Rice Krispies
- 1/2 cup chopped pecans
- 1 cup shredded coconut
Binding Ingredients:
- 3 tablespoons butter (softened)
- 1 teaspoon vanilla
Coating Ingredients:
- 1 package chocolate chips (453 grams / 16 ounces)
- 1 square sweet chocolate (such as Bakers chocolate)
Instructions
- Thoroughly melt chocolate in a microwave-safe bowl, stirring at 30-second intervals to prevent burning and achieve a silky smooth consistency.
- In a large mixing bowl, combine crispy rice cereal with marshmallow mixture, gently folding to ensure even distribution without crushing the delicate cereal.
- Use clean, slightly dampened hands to shape the mixture into uniform round balls, working quickly before the mixture cools and becomes challenging to mold.
- Allow shaped balls to firm up at room temperature for approximately 10-15 minutes before initiating the chocolate coating process.
- Carefully dip each chilled rice krispie ball into the melted chocolate, using a fork to elegantly rotate and fully enrobe the treat, allowing excess chocolate to drip off.
- Place chocolate-covered balls on a parchment-lined baking sheet, immediately garnishing with festive sprinkles or holiday-themed decorations before the chocolate sets.
- For optimal texture and flavor preservation, refrigerate the completed chocolate rice krispie balls in an airtight container, where they will maintain their delightful crunch and sweetness.
- When preparing for longer storage, layer the balls between sheets of parchment paper to prevent sticking and preserve their decorative appearance.
Notes
- Melt chocolate slowly and gently using a double boiler or microwave in short bursts to prevent burning and achieve a silky smooth coating.
- Experiment with different chocolate varieties like white, milk, or dark chocolate to create unique flavor profiles and match personal preferences.
- Refrigerate or freeze these festive treats in an airtight container to extend their shelf life and maintain their delightful texture.
- For dietary variations, try using gluten-free Rice Krispies or dairy-free chocolate chips to accommodate different nutritional needs and allergies.
- Prep Time: 15 minutes
- Cook Time: 10 minutes
- Category: Snacks, Desserts
- Method: Melting
- Cuisine: American
Nutrition
- Serving Size: 12
- Calories: 210
- Sugar: 10g
- Sodium: 60mg
- Fat: 12g
- Saturated Fat: 5g
- Unsaturated Fat: 7g
- Trans Fat: 0g
- Carbohydrates: 24g
- Fiber: 2g
- Protein: 4g
- Cholesterol: 10mg
James Walker
Lead Recipe Developer & Culinary Educator
Expertise
Southern Cuisine & Farm-to-Table Cooking, Recipe Development & Testing, Culinary Education & Instruction
Education
School: Auguste Escoffier School of Culinary Arts
Program: Diploma in Culinary Arts and Operations
Focus: Comprehensive training in classical and modern culinary techniques, kitchen operations, and farm-to-table practices.
James didn’t learn cooking from a TV show, he learned it from busy kitchens, family gatherings, and long afternoons spent testing recipes the hard way.
After training at the Auguste Escoffier School of Culinary Arts, he brought his love for real, down-to-earth food to every dish he makes.
At Dining At Home, James loves building recipes that feel familiar but still have something special, like adding a twist to a classic or making a slow Sunday dinner feel brand new.
When he’s not in the kitchen, you’ll probably find him swapping garden tips at the farmers’ market or teaching his daughter how to flip pancakes without a mess (almost).