
Irresistible Chocolate Chip Cookie Dough Twists Recipe
Chocolate chip cookie dough twists spark memories of childhood kitchen adventures.
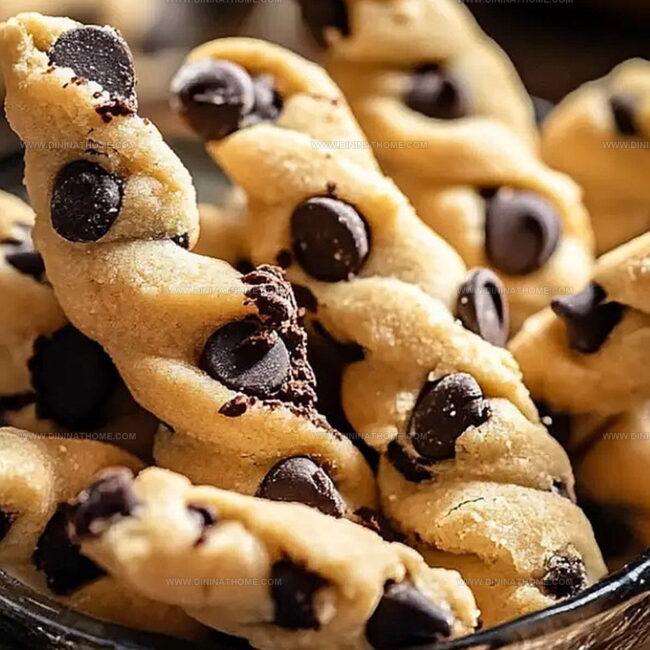
Sweet memories dance between layers of buttery pastry and nostalgic chocolate morsels.
Spiral shapes promise unexpected delight with every delectable bite.
Comfort meets creativity in these playful treats that challenge traditional dessert expectations.
Crisp edges and soft centers create a magical texture contrast.
Mixing simple ingredients becomes an exciting culinary experiment for anyone who loves spontaneous baking.
Why Chocolate Chip Cookie Dough Twists Are Fun to Eat
Chocolate Chip Cookie Dough Twists – Ingredient Details
Fats and Sugars:Liquid and Flavor Enhancers:Dry Ingredients:Mix-In:Chocolate Dough Twisting for Cookie Perfection

Step 1: Warm Up The Oven
Fire up your oven to a toasty 350°F (175°C) so it’s ready for baking.
Step 2: Create A Creamy Base
Grab a mixing bowl and whip together:Blend these ingredients until they transform into a fluffy, light mixture that looks like delicious clouds.
Step 3: Add Liquid Magic
Pour in:Mix everything until the ingredients dance together smoothly.
Step 4: Combine Dry Ingredients
In a separate bowl, whisk together:Ensure all dry ingredients are well blended and free of lumps.
Step 5: Merge Wet And Dry Worlds
Slowly introduce dry ingredients into wet mixture, stirring gently until just combined.
Avoid overmixing to keep the dough tender.
Step 6: Sprinkle Chocolate Goodness
Fold chocolate chips into the dough, distributing them evenly throughout.
Step 7: Shape The Twists
Roll dough into long strips and twist them into playful, curvy shapes that will make everyone smile.
Step 8: Prepare For Baking
Place twisted dough onto a parchment-lined baking sheet, giving each twist some breathing room.
Step 9: Bake To Golden Perfection
Slide the baking sheet into the preheated oven and bake for 10-12 minutes until edges turn a beautiful golden brown.
Step 10: Cool And Enjoy
Allow twists to cool slightly before devouring these delectable treats.
Easy Twisting Tips for Cookie Dough Treats

Reheat Chocolate Chip Cookie Dough Twists
What to Eat with Cookie Dough Twists
Dough Twists Filling Suggestions
FAQs
Yes, but reduce or omit the added salt in the recipe to prevent the cookies from becoming too salty.
Stop mixing when the dry and wet ingredients are just combined. Overmixing can lead to tough cookies with a dense texture.
Semi-sweet or milk chocolate chips are ideal. You can also use dark chocolate chips for a richer flavor profile.
Absolutely! Roll the dough into twists, place on a baking sheet, and freeze for up to 2 months. Bake directly from frozen, adding 1-2 extra minutes to the baking time.
Print
Chocolate Chip Cookie Dough Twists Recipe
- Total Time: 20 minutes
- Yield: 12 1x
Description
Sinful chocolate chip cookie dough twists spiral with indulgent charm, offering a playful dessert that dances between classic comfort and creative innovation. Crisp edges and gooey centers invite sweet-toothed explorers to savor each delightful bite of pure deliciousness.
Ingredients
Main Ingredients:
- 1 cup (240 ml) all-purpose flour
- 1/2 cup (113 grams) unsalted butter, softened
- 1/2 cup (100 grams) brown sugar, packed
- 1/4 cup (50 grams) granulated sugar
- 1/2 cup (85 grams) chocolate chips
Liquid and Flavoring Ingredients:
- 1/4 cup (60 ml) milk
- 1 teaspoon vanilla extract
Leavening and Seasoning Ingredients:
- 1/2 teaspoon baking soda
- 1/4 teaspoon salt
Instructions
- Prepare the kitchen workspace by heating the oven to a moderate temperature, ensuring an even cooking environment for the sweet treats.
- Transform softened butter and both sugar varieties into a creamy, aerated mixture using vigorous mixing techniques until the texture becomes light and voluminous.
- Introduce liquid elements – milk and aromatic vanilla extract – blending thoroughly to create a smooth, cohesive base.
- Construct the dry foundation by whisking flour, leavening agent, and seasoning in a separate vessel, ensuring uniform distribution of ingredients.
- Gently marry the wet and dry components, stirring with minimal manipulation to prevent overdeveloping gluten and maintain a tender texture.
- Generously disperse chocolate morsels throughout the dough, creating pockets of rich, melty goodness in each twist.
- Craft playful, intertwined shapes by expertly rolling and manipulating the dough into elegant, curled configurations.
- Arrange the sculptured twists on a parchment-protected baking surface, allowing adequate spacing for potential expansion.
- Bake in the preheated oven, monitoring closely until the edges transform into a golden-brown hue, indicating perfect doneness.
- Allow the freshly baked delicacies a brief resting period, permitting slight cooling to enhance structural integrity before serving.
Notes
- Experiment with different chocolate chip varieties like dark, milk, or white chocolate for unique flavor profiles.
- For a gluten-free version, substitute all-purpose flour with a 1:1 gluten-free baking blend to maintain texture.
- Chill the dough for 30 minutes before twisting to prevent spreading and help maintain intricate shapes during baking.
- Add a sprinkle of sea salt on top before baking to enhance the sweet-salty contrast and elevate the cookie’s complexity.
- Prep Time: 10 minutes
- Cook Time: 10 minutes
- Category: Desserts, Snacks
- Method: Baking
- Cuisine: American
Nutrition
- Serving Size: 12
- Calories: 200
- Sugar: 10 g
- Sodium: 100 mg
- Fat: 10 g
- Saturated Fat: 6 g
- Unsaturated Fat: 4 g
- Trans Fat: 0 g
- Carbohydrates: 25 g
- Fiber: 1 g
- Protein: 2 g
- Cholesterol: 20 mg
James Walker
Lead Recipe Developer & Culinary Educator
Expertise
Southern Cuisine & Farm-to-Table Cooking, Recipe Development & Testing, Culinary Education & Instruction
Education
School: Auguste Escoffier School of Culinary Arts
Program: Diploma in Culinary Arts and Operations
Focus: Comprehensive training in classical and modern culinary techniques, kitchen operations, and farm-to-table practices.
James didn’t learn cooking from a TV show, he learned it from busy kitchens, family gatherings, and long afternoons spent testing recipes the hard way.
After training at the Auguste Escoffier School of Culinary Arts, he brought his love for real, down-to-earth food to every dish he makes.
At Dining At Home, James loves building recipes that feel familiar but still have something special, like adding a twist to a classic or making a slow Sunday dinner feel brand new.
When he’s not in the kitchen, you’ll probably find him swapping garden tips at the farmers’ market or teaching his daughter how to flip pancakes without a mess (almost).