
Fluffy Choco Swiss Roll Delight Recipe: Heavenly Swirls
A delectable choco swiss roll delight captures the essence of indulgent dessert magic.
Chocolate lovers find pure bliss in this elegant treat.
Soft sponge layers whisper sweet promises of delightful textures.
Creamy filling melts seamlessly between delicate cake boundaries.
Rich cocoa notes dance across your palate with surprising grace.
Decadent swirls promise moments of pure culinary happiness.
You’ll fall in love with every single bite of this irresistible dessert.
Choco Swiss Roll That’s Always A Hit
Swirled Strawberry White Chocolate Cake
Cake Base Ingredients:Wet Ingredients:Filling and Topping:Strawberry White Chocolate Swirl Cake Method
Step 1: Prepare Baking Zone
Set the oven to 350°F.
Line a baking sheet with parchment paper, ensuring complete coverage and smooth edges.
This foundation sets the stage for your delightful dessert.
Step 2: Create Dry Ingredient Blend
Grab a mixing bowl and whisk together:Ensure the ingredients are thoroughly combined with no lumps.
Step 3: Whip Egg Mixture
In a separate large bowl, beat eggs and sugar until the mixture becomes light, fluffy, and pale yellow.
The texture should be thick and ribbony.
Gently incorporate vanilla extract and melted butter, stirring until smooth.
Step 4: Merge Mixtures
Carefully fold the dry ingredient blend into the egg mixture.
Use gentle circular motions to maintain the airiness of the batter.
Stop mixing as soon as ingredients are just combined to keep the cake tender.
Step 5: Spread And Bake
Pour the batter onto the prepared baking sheet.
Use a spatula to spread evenly, creating a thin, uniform layer.
Slide into the preheated oven and bake for 10-12 minutes.
The cake is ready when it springs back lightly when touched.
Step 6: Initial Rolling
Once baked, immediately transfer the cake (still on parchment) and roll it up carefully.
This prevents cracking and helps create the classic Swiss roll shape.
Allow to cool completely.
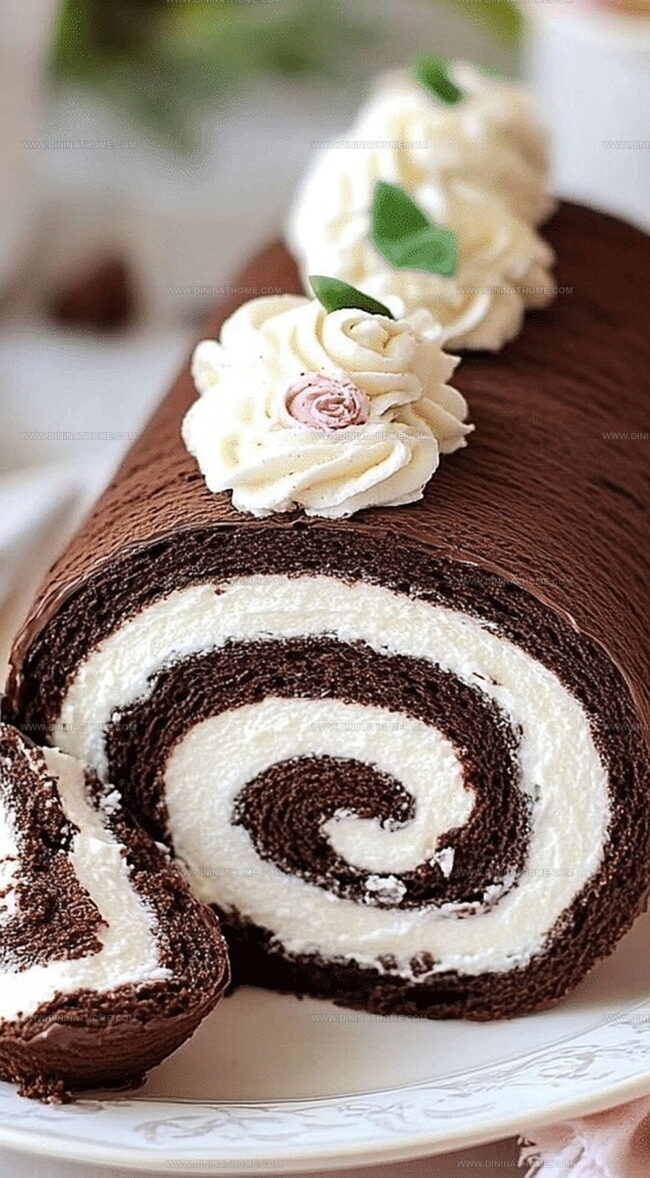
Step 7: Whip Cream Filling
Combine heavy cream and powdered sugar in a chilled bowl.
Whip until stiff peaks form, creating a luscious, cloud-like filling.
Step 8: Final Assembly
Gently unroll the cooled cake.
Spread the whipped cream evenly across the surface.
Carefully roll the cake back up, using the parchment as a guide.
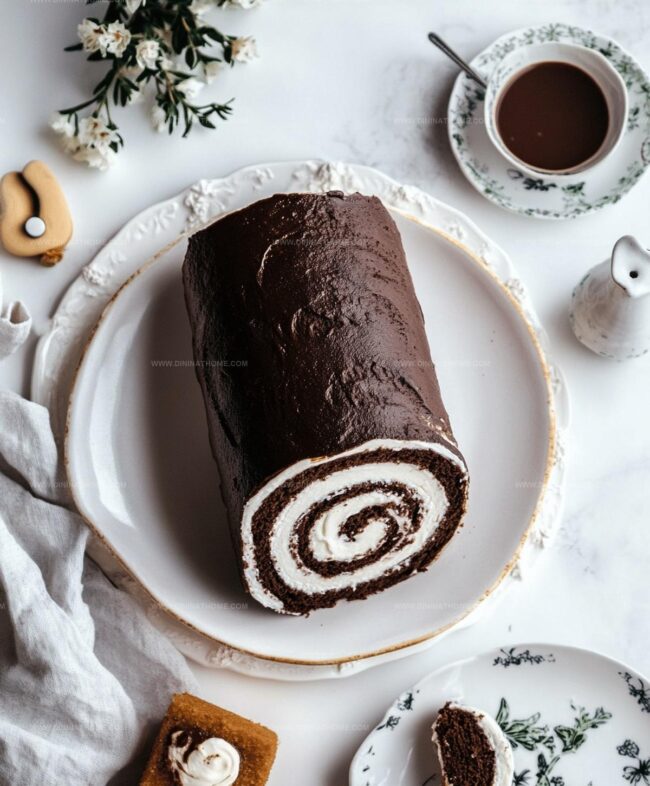
Step 9: Chill And Serve
Wrap the rolled cake in plastic wrap and refrigerate for at least one hour.
This helps set the filling and intensifies the flavors.
Slice and serve chilled for a dreamy dessert experience.
Strawberry Swirl Cake – Baking Tips For Color And Flavor Swirls

Chill Strawberry White Chocolate Cake And Enjoy Again
Best Sweets to Serve Alongside Strawberry Swirled Cake
Swiss Roll Chocolate Delight with Creamy Filling Ideas
FAQs
Immediately after baking, roll the cake while it’s still warm using the parchment paper. This helps the cake stay flexible and prevents cracking when you add the filling later.
Yes, replace the regular flour with a gluten-free flour blend. Make sure to use a blend that contains xanthan gum for better texture and structure.
Use a clean kitchen towel dusted with powdered sugar when rolling, and be gentle but firm. Roll the cake while it’s still warm to prevent breaking.
Gently press the cake surface – it should spring back immediately and look slightly golden around the edges. If it leaves an indentation, it needs a bit more baking time.
Print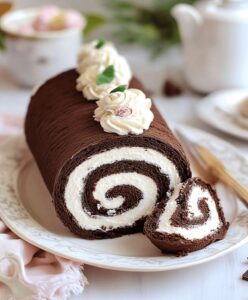
Choco Swiss Roll Delight Recipe
- Total Time: 32 minutes
- Yield: 8 1x
Description
Indulgent chocolate swiss roll brings together silky cream and rich cocoa in a luxurious dessert that whispers pure comfort. Delicate layers melt seamlessly, promising a heavenly experience you cannot resist.
Ingredients
Main Ingredients:
- 4 large eggs
- 3/4 cup sugar
- 1 cup all-purpose flour
- 1/2 cup cocoa powder
Wet Ingredients:
- 1/4 cup melted butter
- 1 teaspoon vanilla extract
- 1 cup heavy cream
Finishing Ingredients:
- 1/2 teaspoon baking powder
- 1/2 cup powdered sugar
Instructions
- Warm the oven to 350°F and prepare a baking sheet with parchment paper, ensuring complete surface coverage.
- Sift together cocoa powder, flour, and baking powder in a mixing bowl, creating a uniform dry mixture.
- Using an electric mixer, whip eggs and sugar until the mixture becomes voluminous and transforms into a pale, creamy texture.
- Incorporate vanilla extract and gently fold in melted butter, maintaining the mixture’s airy consistency.
- Gradually blend the dry ingredients into the egg mixture, stirring minimally to preserve the delicate air bubbles.
- Transfer the batter onto the prepared sheet, using a spatula to distribute evenly and create a smooth, thin layer.
- Slide the baking sheet into the preheated oven and bake for 10-12 minutes, watching for the cake to develop a subtle springy texture when lightly pressed.
- Immediately after removing from the oven, carefully roll the cake with the parchment paper while still warm, which prevents cracking and helps set the shape.
- Allow the rolled cake to cool completely at room temperature, preventing moisture buildup.
- Whip heavy cream with powdered sugar until stiff, glossy peaks form, creating a light and airy filling.
- Gently unroll the cooled cake, spread the whipped cream evenly across the surface, leaving a small margin at the edges.
- Carefully re-roll the cake, encasing the cream filling, and place seam-side down on a serving plate.
- Refrigerate the Swiss roll for at least one hour to set the cream and enhance the flavor melding.
- Before serving, dust with additional powdered sugar or cocoa powder for an elegant finishing touch.
Notes
- Achieve a perfect sponge by ensuring eggs are at room temperature, which helps create a lighter, fluffier texture.
- Dust cocoa powder lightly over the parchment paper before pouring batter to prevent sticking and add extra chocolate flavor.
- For a gluten-free version, replace wheat flour with almond or coconut flour, adjusting moisture accordingly.
- Enhance the cream filling by adding a splash of liqueur like Baileys or strong espresso for an adult twist.
- Prep Time: 20 minutes
- Cook Time: 12 minutes
- Category: Desserts, Snacks
- Method: Baking
- Cuisine: Swiss
Nutrition
- Serving Size: 8
- Calories: 320
- Sugar: 18 g
- Sodium: 120 mg
- Fat: 22 g
- Saturated Fat: 12 g
- Unsaturated Fat: 10 g
- Trans Fat: 0 g
- Carbohydrates: 30 g
- Fiber: 1 g
- Protein: 5 g
- Cholesterol: 100 mg
James Walker
Lead Recipe Developer & Culinary Educator
Expertise
Southern Cuisine & Farm-to-Table Cooking, Recipe Development & Testing, Culinary Education & Instruction
Education
School: Auguste Escoffier School of Culinary Arts
Program: Diploma in Culinary Arts and Operations
Focus: Comprehensive training in classical and modern culinary techniques, kitchen operations, and farm-to-table practices.
James didn’t learn cooking from a TV show, he learned it from busy kitchens, family gatherings, and long afternoons spent testing recipes the hard way.
After training at the Auguste Escoffier School of Culinary Arts, he brought his love for real, down-to-earth food to every dish he makes.
At Dining At Home, James loves building recipes that feel familiar but still have something special, like adding a twist to a classic or making a slow Sunday dinner feel brand new.
When he’s not in the kitchen, you’ll probably find him swapping garden tips at the farmers’ market or teaching his daughter how to flip pancakes without a mess (almost).