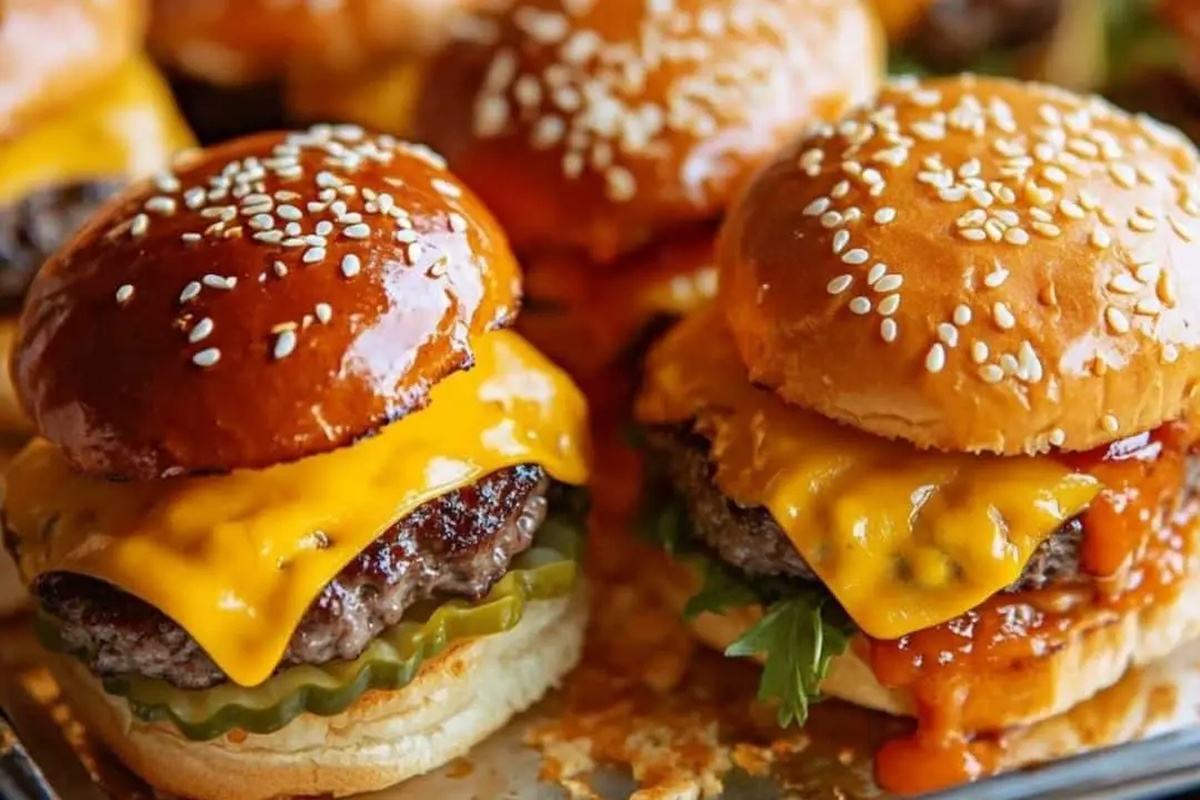
Juicy Mini Delights: Cheeseburger Sliders Recipe for Family Fun
These mini cheeseburger sliders pack a serious flavor punch for weekend game nights.
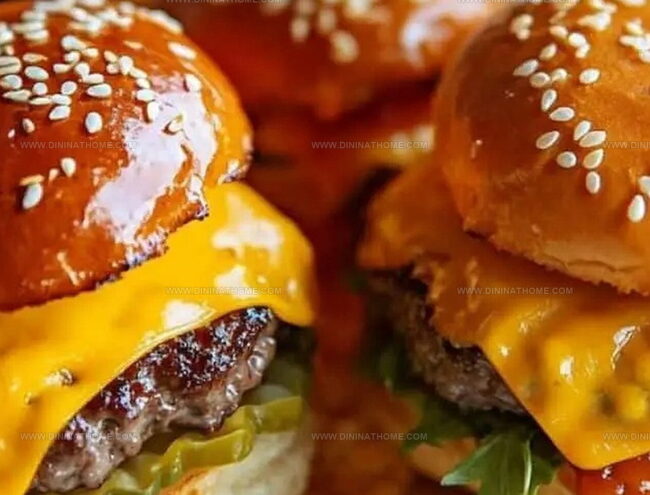
Crispy edges and juicy centers make them irresistible to everyone at the table.
Small yet mighty, each bite delivers maximum satisfaction without overwhelming your appetite.
Tender beef patties nestled between soft mini buns create the perfect handheld treat.
Quick assembly means you can whip up these crowd-pleasers in under thirty minutes.
Spices and seasonings elevate these little sandwiches from basic to spectacular.
Hungry guests will absolutely devour every single one of these delectable miniature burgers.
Cheeseburger Sliders That Deliver in Every Bite

Cheeseburger Sliders Ingredients
Main Protein:Seasoning Blend:Bread Component:Sliders Cheeseburger Style Bake
Step 1: Fire Up the Cooking Surface
Warm your oven to a toasty 375°F (190°C) or get your grill sizzling at medium-high heat.
This sets the stage for perfectly cooked mini burgers that’ll make mouths water.
Step 2: Craft the Flavor-Packed Beef Mixture
Grab a spacious mixing bowl and gently combine ground beef with these flavor boosters:Use a light touch when mixing to keep the meat tender and juicy.
Step 3: Shape Adorable Mini Patties
Transform your seasoned beef into 12 cute little patties.
Make them slightly larger than your slider buns because they’ll shrink during cooking.
Aim for uniform size to ensure even cooking.
Step 4: Sear the Patties
Place patties on a hot grill or baking sheet.
Cook for about 3-4 minutes per side until they reach a delicious golden-brown exterior and are cooked through.
Step 5: Melt Cheesy Goodness
Top each patty with a slice of cheese during the last minute of cooking.
Watch the cheese get delightfully melty and drape over the meat.
Step 6: Prepare Slider Buns
Lightly toast slider buns on the grill or in the oven until they’re warm and slightly crispy around the edges.
Step 7: Assemble Mouthwatering Sliders
Stack each cheesy patty onto a toasted bun.
Add your favorite toppings like:Step 8: Serve and Enjoy
Arrange sliders on a platter and watch them disappear in seconds.
Perfect for parties, game days, or a fun family meal.
Slider Assembly Tips for Cheeseburger Buns
Cheeseburger Sliders Reheat Tips
What Matches With Cheeseburger Sliders
Cheeseburger Sliders Mini Burger Styles
FAQs
Use ground beef with a slightly higher fat content (80/20 or 85/15) and avoid overmixing the meat. Don’t press down on the patties while cooking, as this squeezes out the juices.
Yes, you can prepare the patties up to a day in advance. Store them covered in the refrigerator with parchment paper between each patty to prevent sticking.
Pat the patties dry with paper towels before cooking to remove excess moisture. This helps create a nice crust and prevents steaming. Ensure your grill or pan is hot before adding the patties.
Use a meat thermometer to check the internal temperature. Ground beef should reach 160°F (71°C) for food safety. For medium burgers, aim for 140-145°F (60-63°C).
Print
Cheeseburger Sliders Recipe
- Total Time: 25 minutes
- Yield: 12 1x
Description
Cheeseburger sliders pack powerful flavor into mini handheld bites perfect for parties and game nights. Crispy beef patties nestled with melted cheese and classic toppings promise crowd-pleasing satisfaction you’ll devour in just a few delicious mouthfuls.
Ingredients
Meat and Protein:
- 1 pound (1 lb) ground beef (80/20 blend for juiciness)
Seasonings:
- 1 teaspoon garlic powder
- 1 teaspoon onion powder
- 1/2 teaspoon salt
- 1/4 teaspoon black pepper
- 1 teaspoon sesame seeds (optional, for garnish)
Bread and Toppings:
- 12 slider buns
- 6 slices of cheddar cheese, halved
- Dill pickle slices
- Lettuce leaves (optional)
- Sliced tomatoes (optional)
- 2 tablespoons butter, melted
- Ketchup, mustard, or mayonnaise (optional)
Instructions
- Prepare the meat mixture by gently blending ground beef with aromatic seasonings, ensuring minimal handling to maintain tenderness.
- Craft compact patties slightly oversized to accommodate natural shrinkage during cooking, forming 12 uniform mini portions.
- Select your preferred cooking method – oven or grill – heating to medium-high temperature for optimal meat preparation.
- Position patties on a clean cooking surface, allowing even heat distribution and potential caramelization.
- Cook patties for approximately 3-4 minutes per side, aiming for a golden-brown exterior and safe internal temperature.
- During final moments of cooking, layer each patty with a slice of cheese, allowing it to melt luxuriously over the hot meat.
- Simultaneously warm slider buns until lightly toasted, creating a crisp foundation for assembling.
- Construct each slider by placing the cheese-topped patty onto the prepared bun.
- Enhance flavor profiles by adding classic condiments like crisp lettuce, ripe tomato slices, tangy pickles, and creamy spreads.
- Serve immediately while ingredients remain warm and cheese maintains its molten, appetizing consistency.
Notes
- For extra flavor, mix in finely chopped fresh herbs like parsley or chives into the ground beef mixture.
- Create a leaner version by using ground turkey or chicken instead of beef, which reduces overall fat content.
- Prevent dry sliders by not pressing down on patties while cooking, which helps retain natural meat juices.
- Customize toppings for dietary needs like using dairy-free cheese for lactose-intolerant guests or gluten-free buns for those with wheat sensitivities.
- Prep Time: 15 minutes
- Cook Time: 10 minutes
- Category: Lunch, Dinner, Snacks
- Method: Baking
- Cuisine: American
Nutrition
- Serving Size: 12
- Calories: 300
- Sugar: 2 g
- Sodium: 600 mg
- Fat: 17 g
- Saturated Fat: 7 g
- Unsaturated Fat: 9 g
- Trans Fat: 0 g
- Carbohydrates: 24 g
- Fiber: 1 g
- Protein: 15 g
- Cholesterol: 60 mg
Emily Harper
Nutrition Consultant & Recipe Analyst
Expertise
Healthy Recipe Modification, Nutritional Analysis & Meal Planning, Global Cuisine & Dietary Adaptations
Education
School: French Pastry School, Chicago, IL
Program: L’Art de la Pâtisserie
Focus: Intensive training in traditional French pastry techniques, baking theory, and confectionery arts.
Emily’s journey started in a pastry kitchen but took a detour into the world of health and flavor science.
Graduating from the French Pastry School and studying nutrition opened her eyes to a new mission: making healthy food taste like something you’d actually crave.
At Dining At Home, Emily’s the go-to for smart, feel-good recipes that don’t trade flavor for nutrition.
She’s all about adding a fresh spin on old favorites and finding small ways to make everyday meals a little brighter.
Outside of the kitchen, Emily is most at home walking forest trails, testing plant-based recipes, or sharing a picnic under a wide-open sky.