
Easy Caramel Chocolate Crunch Bars Recipe: Sweet Bliss in Every Bite
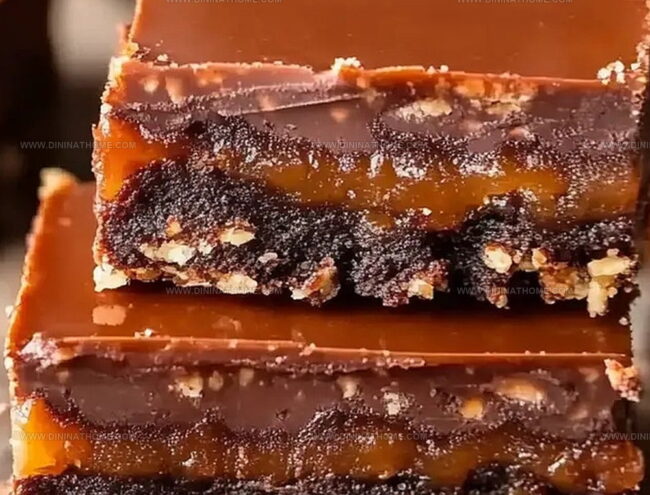
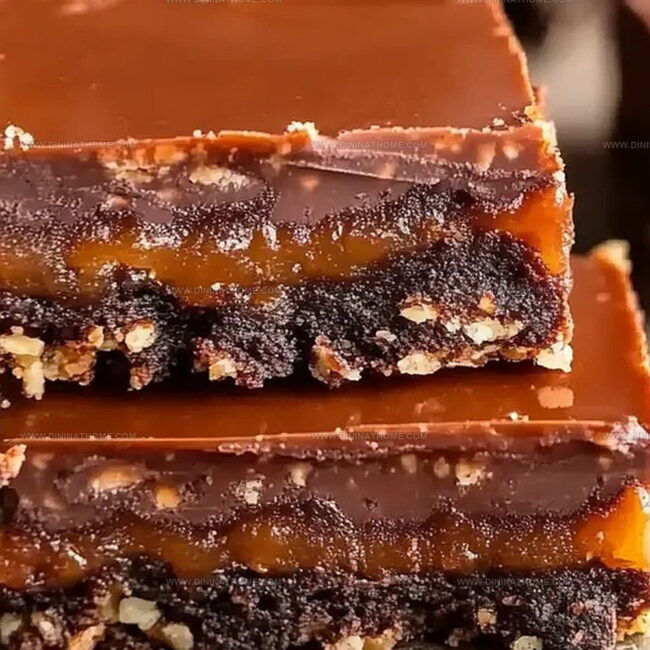
Sweet caramel chocolate crunch bars tantalize taste buds with unexpected layers of decadence.
Crisp textures dance between smooth chocolate and golden caramel ribbons.
My grandmother’s secret technique inspired this incredible dessert that combines rich flavors effortlessly.
Each bite promises a delightful crunch that melts perfectly on your tongue.
Homemade treats like these create magical moments around the kitchen counter.
Weekend baking becomes an adventure with such an irresistible recipe.
Let’s whip up something extraordinary that will make everyone ask for seconds.
Caramel Chocolate Crunch Bars Ingredient List
Base Ingredients:Caramel Sauce Components:Chocolate Topping:Additional Preparation Items:No-Fail Caramel Chocolate Crunch Bar Instructions
Step 1: Prepare Cereal Base
Grab a large mixing bowl and place your crispy rice cereal inside.
This will be the foundation of your delectable treat.
Set the bowl aside while you prepare the magical caramel coating.
Step 2: Craft Luxurious Caramel Sauce
In a medium saucepan, melt butter over medium heat.
Add:Stir constantly and bring the mixture to a gentle simmer.
Cook for 3-4 minutes, stirring occasionally, until the sauce thickens and develops a rich, golden color.
Step 3: Combine Caramel and Cereal
Pour the warm caramel sauce over the cereal.
Gently fold the mixture, ensuring every crisp piece gets coated with the sweet, buttery caramel.
Step 4: Form Crunchy Base Layer
Transfer the caramel-coated cereal into a greased 9×9-inch baking pan.
Press down firmly to create an even, compact layer.
Allow the mixture to cool and slightly set.
Step 5: Melt Chocolate Topping
Use a microwave-safe bowl to melt:Microwave in 30-second intervals, stirring between each session, until the chocolate becomes smooth and glossy.
Step 6: Apply Chocolate Layer
Pour the melted chocolate over the caramel crunch base.
Use a spatula to spread the chocolate evenly, creating a perfect blanket of chocolatey goodness.
Step 7: Chill and Set
Place the pan in the refrigerator for at least 2 hours.
This allows the caramel to firm up and the chocolate to create a delightful, crisp shell.
Step 8: Slice and Serve
Remove from the refrigerator and cut into squares.
Your Caramel Chocolate Crunch Bars are ready to be devoured and enjoyed!
Caramel Crunch Bar Tips That Snap Just Right
Store Caramel Chocolate Crunch Bars
What to Serve with Caramel Chocolate Crunch Bars
Savor Sweet Sips: Chocolate Caramel Pairing Delights
Caramel Crunch Bars With Chocolate Layers
FAQs
Yes, you can substitute crispy rice cereal with corn flakes, rice puffs, or graham cracker crumbs for a similar crunchy texture.
Store the bars in an airtight container in the refrigerator for up to 5 days. Keep them chilled to maintain their crisp texture and prevent melting.
Heavy cream helps create a smooth, rich caramel, but you can substitute with whole milk or half-and-half, though the texture might be slightly less creamy.
Choose a gluten-free crispy rice cereal like Rice Krispies Gluten Free to ensure the entire recipe is safe for those with gluten sensitivities.
Print
Caramel Chocolate Crunch Bars Recipe
- Total Time: 25 minutes
- Yield: 12 1x
Description
Indulgent Caramel Chocolate Crunch Bars blend rich chocolate with buttery caramel and crisp textures. Homemade magic delivers sweet satisfaction that will leave dessert enthusiasts craving more.
Ingredients
Main Ingredients:
- 2 cups crispy rice cereal
- 2 cups semisweet chocolate chips
- 1 cup brown sugar, packed
Dairy and Fats:
- 1/2 cup unsalted butter
- 1/2 cup heavy cream
- 1 tablespoon vegetable oil
Flavor Enhancers:
- 1 teaspoon vanilla extract
- 1/4 teaspoon salt
Instructions
- Prepare a 9×9-inch baking pan by lightly greasing the surface to prevent sticking.
- Transfer crispy rice cereal into a spacious mixing bowl, ensuring it’s ready for the caramel coating.
- Create the caramel sauce by melting butter in a medium saucepan over moderate heat, gradually incorporating brown sugar, heavy cream, vanilla extract, and salt.
- Allow the caramel mixture to simmer gently, stirring periodically to prevent burning and encourage smooth consistency, approximately 3-4 minutes until slightly thickened.
- Carefully pour the warm caramel over the crispy rice cereal, using a gentle folding technique to ensure complete and even coating.
- Transfer the caramel-coated cereal mixture into the prepared pan, pressing firmly and evenly to create a compact base layer.
- Melt chocolate chips with vegetable oil in a microwave-safe bowl, using short 30-second intervals and stirring between each interval to achieve a silky smooth texture.
- Drizzle the melted chocolate uniformly across the caramel cereal layer, using a spatula to spread it edge to edge.
- Place the pan in the refrigerator and allow the bars to chill for a minimum of 2 hours, enabling the caramel to set and chocolate to solidify completely.
- Once thoroughly chilled, slice into neat squares and serve chilled for optimal texture and flavor.
Notes
- Use crisp, fresh cereal to ensure maximum crunchiness and texture in the bars.
- When making caramel, watch the mixture closely to prevent burning and achieve the perfect golden-brown color.
- For a dairy-free version, substitute butter with coconut oil and use dairy-free cream or coconut milk.
- Add a sprinkle of sea salt on top of the chocolate layer for an enhanced flavor contrast and gourmet touch.
- Prep Time: 15 minutes
- Cook Time: 10 minutes
- Category: Snacks, Desserts
- Method: Simmering
- Cuisine: American
Nutrition
- Serving Size: 12
- Calories: 204
- Sugar: 10 g
- Sodium: 90 mg
- Fat: 12 g
- Saturated Fat: 7 g
- Unsaturated Fat: 4 g
- Trans Fat: 0 g
- Carbohydrates: 22 g
- Fiber: 0.5 g
- Protein: 2 g
- Cholesterol: 15 mg
James Walker
Lead Recipe Developer & Culinary Educator
Expertise
Southern Cuisine & Farm-to-Table Cooking, Recipe Development & Testing, Culinary Education & Instruction
Education
School: Auguste Escoffier School of Culinary Arts
Program: Diploma in Culinary Arts and Operations
Focus: Comprehensive training in classical and modern culinary techniques, kitchen operations, and farm-to-table practices.
James didn’t learn cooking from a TV show, he learned it from busy kitchens, family gatherings, and long afternoons spent testing recipes the hard way.
After training at the Auguste Escoffier School of Culinary Arts, he brought his love for real, down-to-earth food to every dish he makes.
At Dining At Home, James loves building recipes that feel familiar but still have something special, like adding a twist to a classic or making a slow Sunday dinner feel brand new.
When he’s not in the kitchen, you’ll probably find him swapping garden tips at the farmers’ market or teaching his daughter how to flip pancakes without a mess (almost).