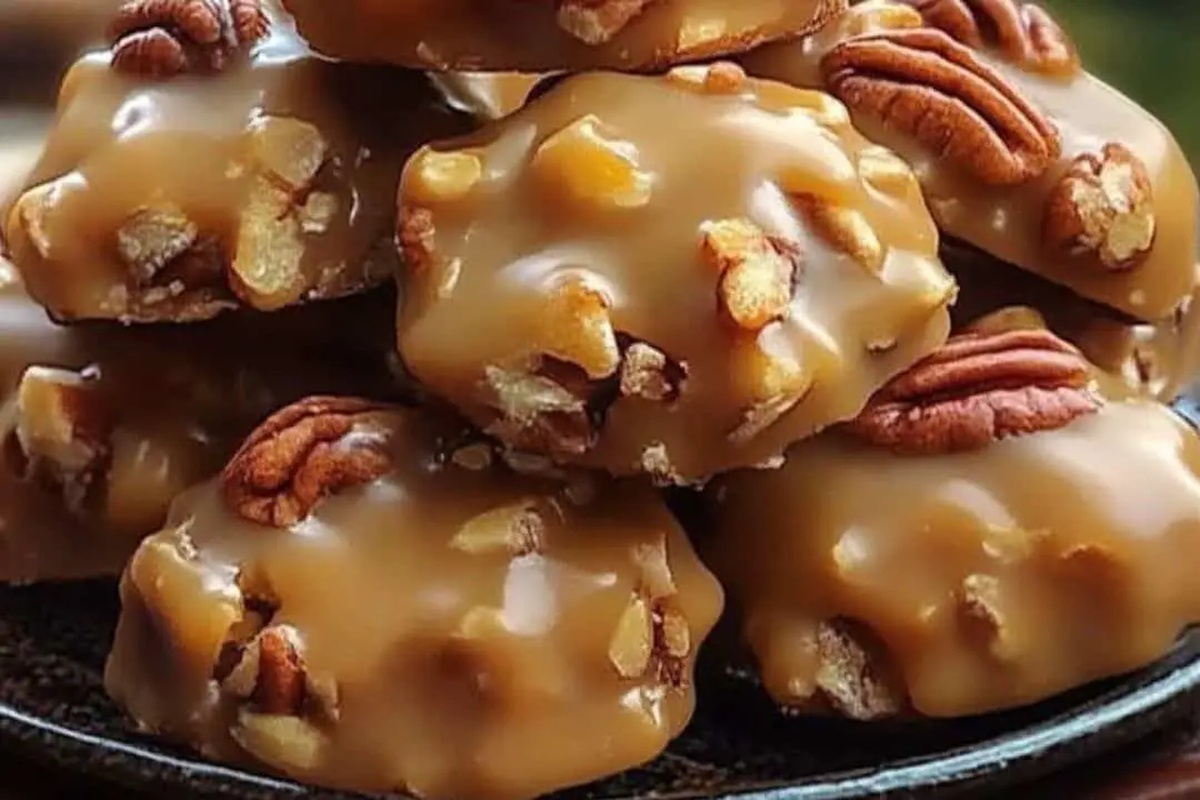
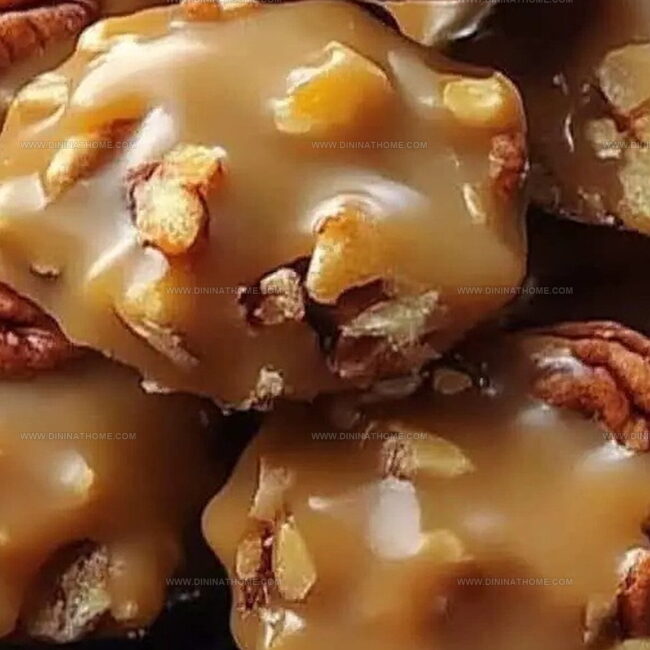
Sweet & Crunchy Buttermilk Pecan Pralines Recipe to Fall For
Sweet southern buttermilk pecan pralines dance between classic candy nostalgia and irresistible homemade indulgence.
Memories of grandmother’s kitchen spark memories of these delectable treats.
Creamy caramel notes blend perfectly with crunchy pecans in this traditional southern confection.
Expect a rich, buttery experience that melts effortlessly on your tongue.
Each praline carries a hint of tangy buttermilk that cuts through intense sweetness.
Simple ingredients combine to create magic in mere minutes.
You can craft these delightful candies and become an instant dessert hero.
Buttermilk Pralines That Melt and Crunch Together
Savor Southern Simplicity: Buttermilk Pecan Pralines
Sweet and Nutty Base for Pecan Pralines
Main Ingredients:Supporting Ingredients:Pecan Pralines Buttermilk Candy Steps

Step 1: Blend Sweet Ingredients
In a sturdy saucepan, mix together:Whisk the ingredients until they’re smoothly combined and create a uniform mixture.
Step 2: Heat and Monitor
Place the saucepan over medium heat and stir constantly.
Watch carefully as the mixture bubbles and transforms.
Use a candy thermometer to track the temperature, aiming for the magical soft-ball stage between 235–240°F.
This process requires patience and attentive stirring.
Step 3: Enhance with Flavor
Remove the pan from the heat source.
Pour in vanilla extract and gently fold in pecan halves.
Stir continuously as the mixture begins to thicken and lose its shiny appearance.
The transformation happens quickly, so stay focused.
Step 4: Shape Sweet Clusters
Grab a spoon and swiftly drop small mounds of the praline mixture onto parchment or wax paper.
Work quickly before the mixture sets completely.
Each dollop should be a rustic, free-form cluster of deliciousness.
Step 5: Cool and Preserve
Allow the pralines to cool completely at room temperature.
They’ll gradually harden into delectable treats.
Once set, transfer to an airtight container.
These Southern delights will stay fresh and delicious for several days.
Candy-Making Tips for Buttermilk Pecan Pralines
Pecan Pralines Storage Guide
Sweet Treat Pairings for Pecan Pralines
Buttermilk Pecan Pralines Sweet Blends
FAQs
Buttermilk adds a tangy flavor and helps create a smoother, creamier texture in pralines. Its acidity also helps break down sugar crystals, resulting in a more consistent candy.
A candy thermometer ensures you reach the exact soft-ball stage (235-240°F) for perfect praline consistency. Without it, you might end up with pralines that are too soft or too hard.
Yes, chopped pecans work perfectly fine. They’ll distribute more evenly throughout the praline and still provide the same delicious nutty flavor and crunch.
Baking soda helps neutralize the buttermilk’s acidity and creates a smoother, more stable candy mixture. It also contributes to the praline’s light, slightly airy texture.
Print
Buttermilk Pecan Pralines Recipe
- Total Time: 30 minutes
- Yield: 12 1x
Description
Southern charm meets sweet indulgence in these buttermilk pecan pralines, a classic New Orleans confection that melts luxuriously on your palate. Rich caramel notes and toasted pecans combine to create a delightful treat you’ll savor with pure Southern comfort.
Ingredients
Main Ingredients:
- 1 1/2 cups pecan halves
- 2 cups granulated sugar
- 1 cup buttermilk
- 1/2 cup unsalted butter
Flavoring Ingredients:
- 1 teaspoon vanilla extract
Binding Ingredients:
- 1/4 teaspoon baking soda
Instructions
- Prepare a heavy-bottomed saucepan and gather all ingredients for crafting Southern-style buttermilk pecan pralines.
- Pour sugar, buttermilk, butter, and baking soda into the saucepan, whisking until ingredients are thoroughly integrated.
- Position the saucepan over medium heat, maintaining constant gentle stirring to prevent ingredient separation.
- Monitor temperature using a candy thermometer, allowing the mixture to gradually transform and reach the precise soft-ball stage between 235–240°F.
- Once temperature is achieved, immediately remove saucepan from heat source to halt cooking process.
- Incorporate vanilla extract and pecan halves, using vigorous stirring techniques to encourage mixture transformation.
- Continue stirring until the praline mixture transitions from glossy to matte, signaling proper crystallization and texture development.
- Working swiftly, use a spoon to deposit small, uniform mounds of praline mixture onto parchment or wax paper.
- Allow pralines to cool completely at room temperature, enabling them to set and develop their signature crisp yet tender texture.
- Once fully cooled, transfer pralines to an airtight storage container, preserving their delicate crunch and rich flavor profile.
Notes
- Ensure your candy thermometer is accurate by testing it in boiling water to confirm precise temperature readings for perfect praline consistency.
- Use a heavy-bottomed pan to prevent scorching and distribute heat evenly during the caramelization process.
- Work quickly when spooning pralines onto paper, as the mixture will start to set rapidly and become less malleable within moments.
- For a gluten-free variation, double-check that all ingredients, especially vanilla extract, are certified gluten-free before preparing the recipe.
- Prep Time: 10 minutes
- Cook Time: 20 minutes
- Category: Desserts, Snacks
- Method: Boiling
- Cuisine: Southern (American)
Nutrition
- Serving Size: 12
- Calories: 210
- Sugar: 18 g
- Sodium: 10 mg
- Fat: 9 g
- Saturated Fat: 5 g
- Unsaturated Fat: 4 g
- Trans Fat: 0 g
- Carbohydrates: 30 g
- Fiber: 1 g
- Protein: 2 g
- Cholesterol: 20 mg
Emily Harper
Nutrition Consultant & Recipe Analyst
Expertise
Healthy Recipe Modification, Nutritional Analysis & Meal Planning, Global Cuisine & Dietary Adaptations
Education
School: French Pastry School, Chicago, IL
Program: L’Art de la Pâtisserie
Focus: Intensive training in traditional French pastry techniques, baking theory, and confectionery arts.
Emily’s journey started in a pastry kitchen but took a detour into the world of health and flavor science.
Graduating from the French Pastry School and studying nutrition opened her eyes to a new mission: making healthy food taste like something you’d actually crave.
At Dining At Home, Emily’s the go-to for smart, feel-good recipes that don’t trade flavor for nutrition.
She’s all about adding a fresh spin on old favorites and finding small ways to make everyday meals a little brighter.
Outside of the kitchen, Emily is most at home walking forest trails, testing plant-based recipes, or sharing a picnic under a wide-open sky.