
Irresistible Buckeye Bars Recipe: Sweet Peanut Butter Magic
Chocolate and peanut butter collide in these irresistible buckeye bars that dance between decadence and comfort.
Sweet memories from ohio kitchens inspired this delightful treat.
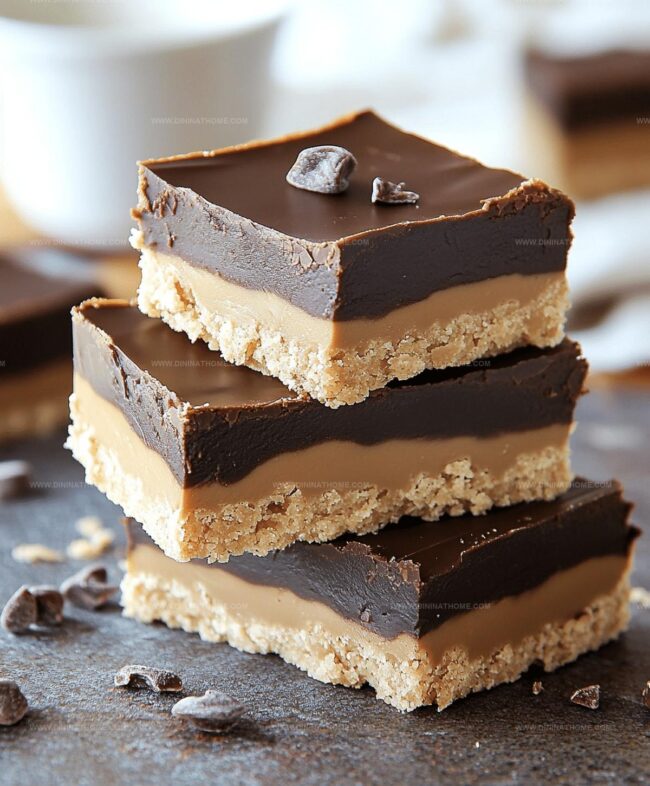
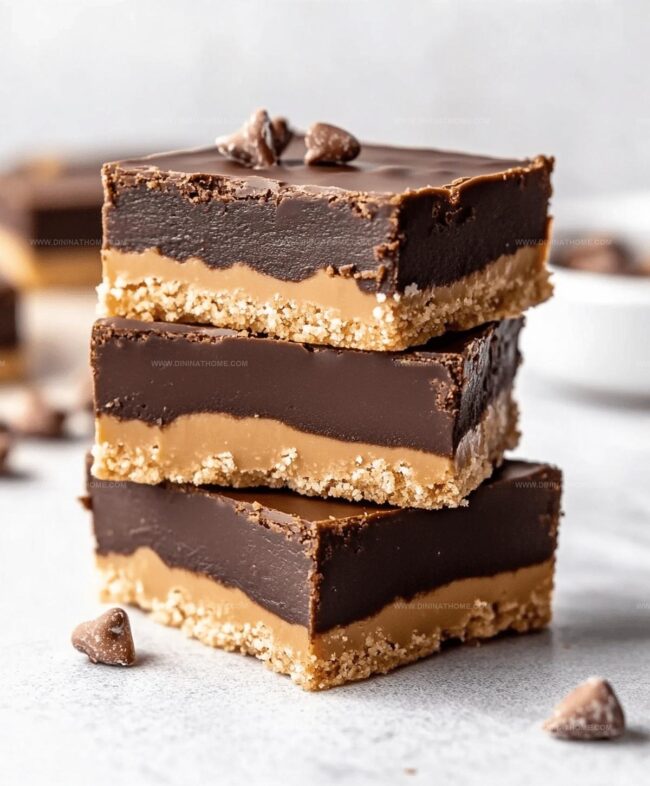
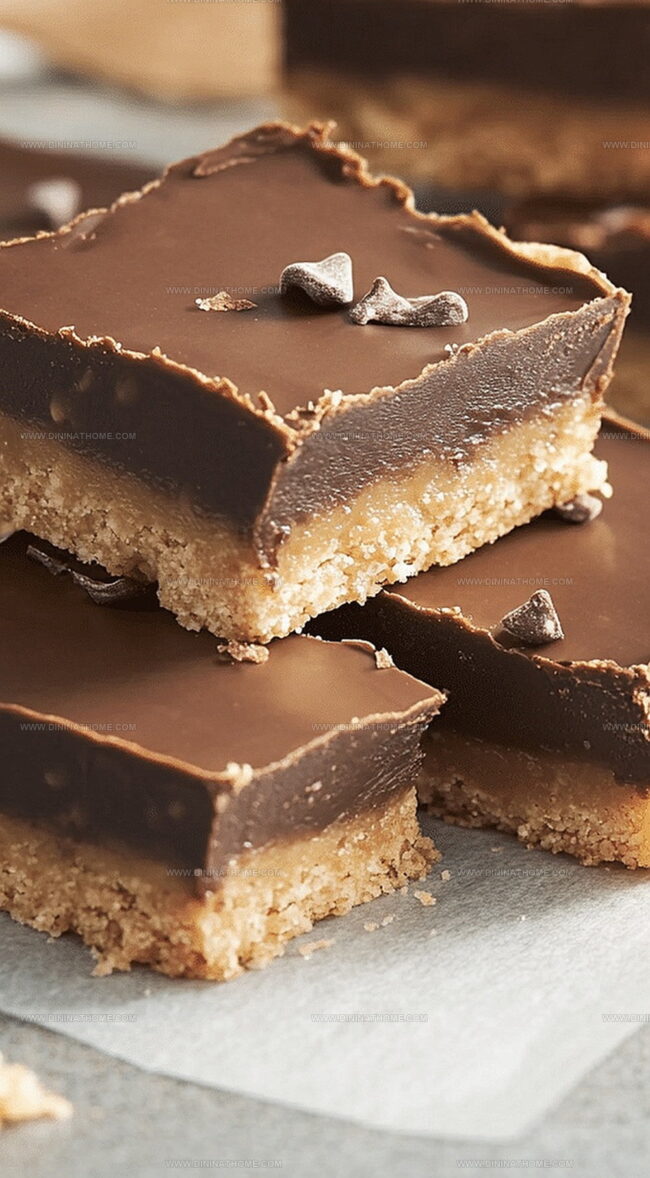
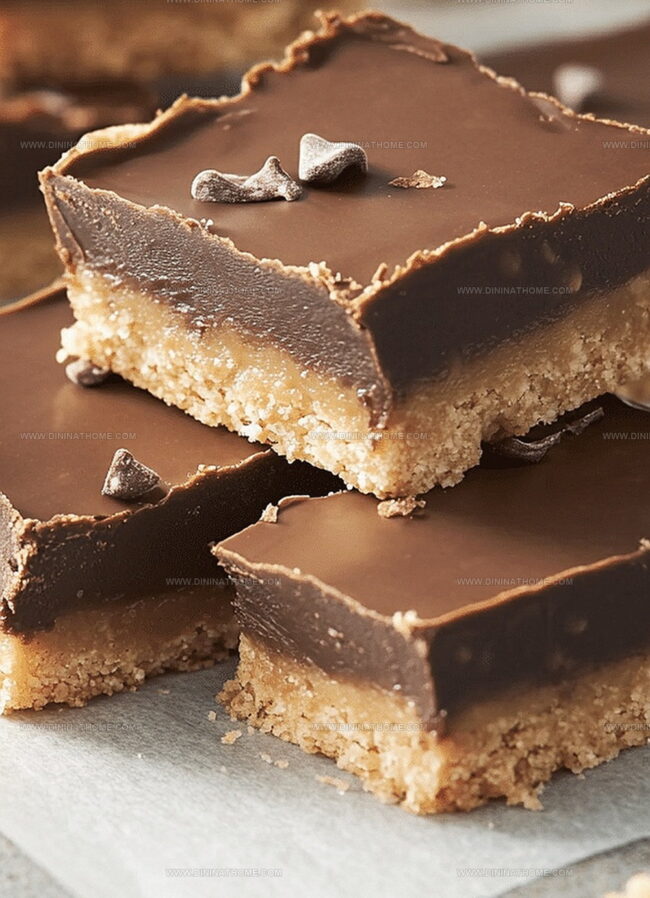
Creamy peanut butter layers nestled beneath rich chocolate create a symphony of flavors.
Nothing compares to the moment you bite into these smooth, luxurious squares.
Generations have cherished this classic midwest dessert for its simplicity and charm.
Each layer tells a story of tradition and indulgence.
You won’t be able to resist making these again and again.
Prepare to fall in love with a dessert that promises pure joy.
Buckeye Bars With The Right Sweet-Salty Mix
Buckeye Bar Mix Setup
Base Layer:Chocolate Coating:Buckeye Bars Quick Baking Steps
Step 1: Create Smooth Peanut Butter Base
Mix peanut butter with softened butter in a large mixing bowl.
Add powdered sugar and vanilla extract.
Blend ingredients until the mixture becomes completely smooth and creamy.
Transfer the mixture into a parchment-lined 8×8-inch baking pan.
Press down firmly and evenly to create a compact layer.
Step 2: Melt Chocolate Topping
Use a microwave-safe bowl to melt chocolate chips.
Heat in short 20-second intervals, stirring between each interval to prevent burning.
Once the chocolate becomes completely smooth and glossy, add a small amount of peanut butter for extra richness and shine.
Step 3: Layer Chocolate Coating
Carefully pour the melted chocolate mixture over the peanut butter base.
Use a spatula to spread the chocolate evenly, ensuring complete coverage of the bottom layer.
Make sure the surface looks smooth and consistent.
Step 4: Chill and Solidify
Place the baking pan in the refrigerator.
Allow the bars to set and firm up for approximately 2 hours.
The bars are ready when the chocolate has hardened completely and the layers are well-defined.
Step 5: Slice and Serve
Remove the pan from the refrigerator.
Lift the bars out using the parchment paper.
Cut into square pieces using a sharp knife.
Serve chilled and enjoy the delicious combination of chocolate and peanut butter.
Buckeye Bars – Chocolate And Peanut Butter Layering Tips
Chill Buckeye Bars For Another Sweet Bite
What Tastes Great With Buckeye Bars
Buckeye Bars with Chocolate and Crunchy Variants
FAQs
Yes, they are a bar version of the classic Buckeye balls, featuring the same delicious combination of peanut butter and chocolate in an easier-to-make format.
Creamy commercial peanut butter works best, as natural peanut butter can separate and make the texture less consistent. Stick to smooth, processed peanut butter for the best results.
When stored in an airtight container in the refrigerator, these bars can last up to 1 week, maintaining their delicious texture and flavor.
No special equipment is required. You’ll just need a mixing bowl, 8×8-inch baking dish, parchment paper, and a microwave for melting chocolate.
Print
Buckeye Bars Recipe
- Total Time: 15 minutes
- Yield: 12 1x
Description
Indulgent buckeye bars blend rich chocolate and creamy peanut butter in a heavenly Ohio-inspired dessert. Sweet layers of smooth peanut butter filling and chocolate ganache create a nostalgic treat you’ll savor with pure delight.
Ingredients
Main Ingredients:
- 1 1/2 cups creamy peanut butter
- 1/2 cup unsalted butter
- 1 1/2 cups semi-sweet chocolate chips
- 2 cups powdered sugar
Secondary Ingredients:
- 1 teaspoon vanilla extract
- 1/4 cup creamy peanut butter
Instructions
- Craft a luscious base by whipping together creamy peanut butter, silky melted butter, powdered sugar, and aromatic vanilla until achieving a velvety, uniform consistency.
- Carefully transfer the mixture into a parchment-lined 8×8-inch baking dish, gently pressing and smoothing the surface to create an even, compact layer.
- Employ a microwave-safe vessel to melt chocolate chips and additional peanut butter, utilizing short 20-second intervals and stirring meticulously to ensure a glossy, seamless chocolate coating.
- Pour the molten chocolate mixture over the prepared peanut butter foundation, using a spatula to distribute the layer evenly and create a harmonious marbled effect.
- Transfer the assembled dessert to the refrigerator, allowing it to rest and solidify for a minimum of two hours, ensuring the bars achieve a firm, slice-able texture.
- Once thoroughly chilled, extract the dessert from the refrigerator and utilize the parchment paper to lift the entire creation from the baking dish.
- With a sharp knife, precisely cut the dessert into uniform squares, revealing the tantalizing layers of rich peanut butter and decadent chocolate.
- Serve immediately or store in an airtight container for future indulgence, enjoying the perfect balance of sweet and nutty flavors.
Notes
- Swap traditional peanut butter for almond or sunflower seed butter to accommodate nut allergies or create a different flavor profile.
- Use dark chocolate chips for a richer, slightly less sweet version that provides antioxidant benefits.
- Line the baking dish carefully with parchment paper, allowing extra overhang for easy removal and clean cutting of bars.
- Ensure ingredients are at room temperature for smoother mixing and more consistent texture, preventing lumpy or separated layers.
- Prep Time: 15 minutes
- Cook Time: 0 minutes
- Category: Desserts, Snacks
- Method: None
- Cuisine: American
Nutrition
- Serving Size: 12
- Calories: 240
- Sugar: 20 g
- Sodium: 100 mg
- Fat: 15 g
- Saturated Fat: 7 g
- Unsaturated Fat: 8 g
- Trans Fat: 0 g
- Carbohydrates: 25 g
- Fiber: 1 g
- Protein: 4 g
- Cholesterol: 10 mg
James Walker
Lead Recipe Developer & Culinary Educator
Expertise
Southern Cuisine & Farm-to-Table Cooking, Recipe Development & Testing, Culinary Education & Instruction
Education
School: Auguste Escoffier School of Culinary Arts
Program: Diploma in Culinary Arts and Operations
Focus: Comprehensive training in classical and modern culinary techniques, kitchen operations, and farm-to-table practices.
James didn’t learn cooking from a TV show, he learned it from busy kitchens, family gatherings, and long afternoons spent testing recipes the hard way.
After training at the Auguste Escoffier School of Culinary Arts, he brought his love for real, down-to-earth food to every dish he makes.
At Dining At Home, James loves building recipes that feel familiar but still have something special, like adding a twist to a classic or making a slow Sunday dinner feel brand new.
When he’s not in the kitchen, you’ll probably find him swapping garden tips at the farmers’ market or teaching his daughter how to flip pancakes without a mess (almost).